Antique Painting

8 Tips and Techniques for Antique Painting Projects

antique painting

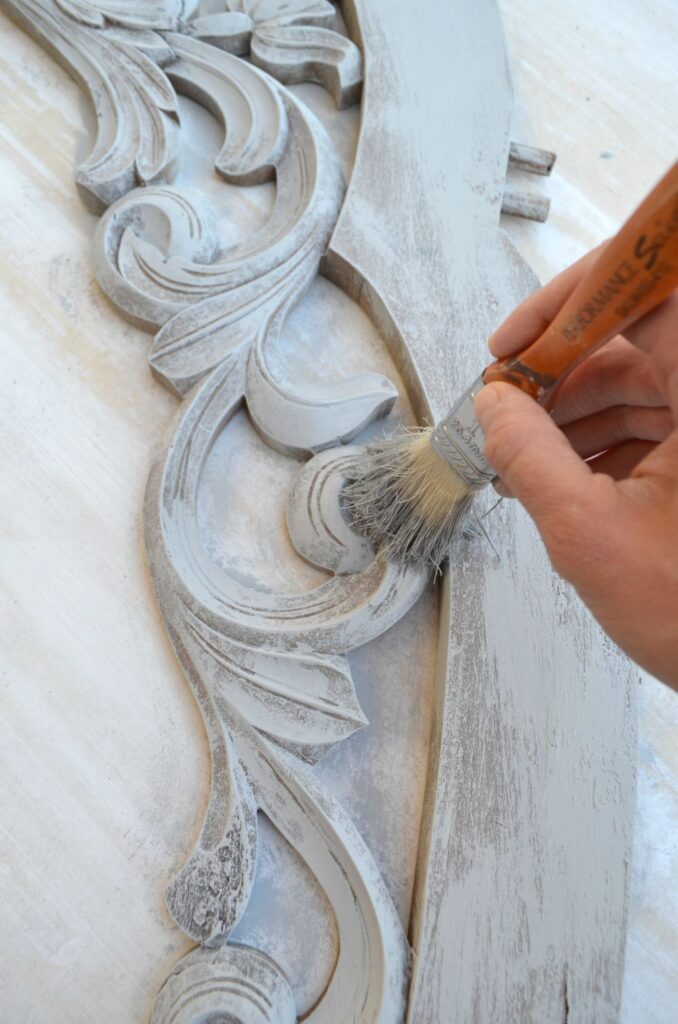
Technique Tip #1: You can perform these techniques on any paintable surface as long as you prepare that surface properly. Practice on a small item before tackling large projects or experiment with different base coats, colors and antique painting techniques on a small unnoticeable section of a larger project before you go forward.

Technique Tip #2: Start by assembling all your tools and materials before you start your antique painting project. You will need a paint tray, latex or alkyd paints depending upon the technique, paintbrushes, a base coat and a sealant, sandpaper, and protective safety gear.

Technique Tip #3: Your costs for the paints, paint brushes, sealants, measuring tools and other items will cost between $50 and $100 depending upon the type of antique painting techniques you employ.

Technique Tip #4: Set aside a weekend to finish your project. This will leave you enough time to prepare everything properly and allow the different layers of paint to dry sufficiently in between each step.

Technique Tip #5: Once you gather all your tools and materials, lay out all the pieces of your project that you will be painting. If you are using antique painting techniques on a piece of furniture, take it apart as much as possible before you begin, especially if there are hard to reach spots or if there are sections that you won’t be antique painting.

Technique Tip #6: If you are antique painting a large area like an armoire or a wall, you can use a power paint sprayer to get even coverage. Don’t forget to wear safety goggles and protective wear!

Technique Tip #7: Before you apply your base coat, make sure to apply a high quality primer to the surface. Latex or alkyd primers may be more appropriate depending upon the surface you are using. Make sure that you allow it to dry completely before moving onto the next antique painting step.

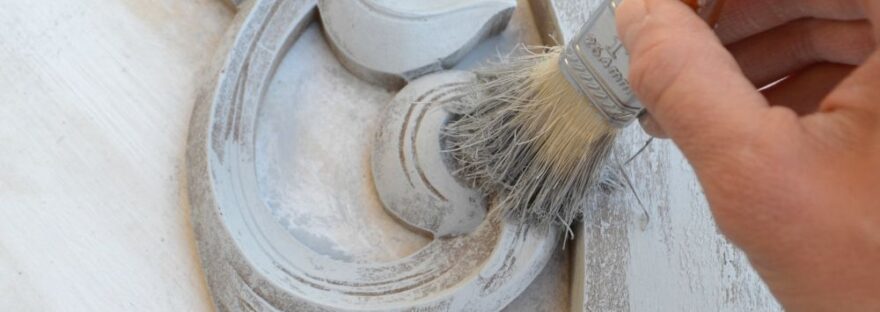
Technique Tip #8: These techniques are not usually about precision. Have fun with it. Allow the paint to be thicker in some places than in others. Use random applications and unique tools to apply the paint layers, like sponges or rags for special effects. Have fun with it and allow your creativity to show through with the colors and the patterns you choose.

Thank you for reading this article! If you have any further questions about this topic please contact us.
Sources

Easy Antiquing Techniques

Faux Finish Painting: Antique Painting Tips

Paint brushes

Everything You Need to Know About Paint Brushes

paint brush

The number and length of the bristles on paint brushes are what primarily determine it’s quality and spreadability. If a brush is dipped 1/3 to 1/4 of it’s length into a can of paint, a good brush will ideally pick up the perfect amount of paint and spread it on a surface in a film that is smooth and uniform and absent of any drips, dips, or brush marks.

Professional painters and contractors are very particular about using a quality brush and therefore look for certain characteristics when selecting one. A good painter will require a brush that has lots of “body” and reasonably long bristles that are capable of picking up a good load of paint and spreading it uniformly across a surface without dripping or running out.

Paint brushes typically come in two forms, synthetic, and natural. Synthetic brushes are usually made from products such as nylon, while natural refers to bristles from an animal source. A good quality brush of either type will exhibit “flagged” ends, or split ends, occurring naturally in animal source bristles, and being created in the artificial ones.

If you are applying a watery, or free flowing product the best brush to use would be one that is softer and has less spring. Brushes in this category are usually trimmed to a wedge shape end known as a chisel edge and can be made from a variety of animal pelts or artificial fibers. The chisel edge allows the applicator the ability to lay a line of paint with precision without pulling a bead of product along. Another feature of the chisel edge is it’s ability to allow the painter to perform one single stroke without the need to brush-out or re- work the paint in a single, one directional brush stroke.

A simple and easy way to determine the quality of paint brushes is by spreading the bristles in a fan like fashion with your fingers and thumbs. This test will determine density and body of the bristles and whether they are inserted in the brush base/block in three or two rows. Once the bristles have been parted they should bounce back into place upon release. The majority of bristles should return to their original place. If the odd strand is loose or astray that is OK. Generally the best quality brushes have three rows of bristles anchored in the body or block of the paint brush.

When you are finished with your paint brush it is very important to clean it immediately and not allow any materials to dry on the bristles as this will spoil the characteristics of the brush. Be sure to clean the correct brush with the correct solvent or cleaner which can be determined at the store that you purchase your paint supplies at.

Some brushes are intended to only be used once and then thrown away, however for the more expensive brush you will want to take some steps to prolong it’s life when it comes time to store it. The first step is to ensure that it has been thoroughly cleaned and even brushed out with a wire brush, then it should be wrapped tightly in glossy newspaper or even a plastic bag in a manner that ensures that all bristles are laying flat and that as much air as possible is removed.

Thank you for reading this article! If you have any further questions about this topic please contact us.


How to Paint: Techniques

how to paint

Welcome to the fifth article in the series “How To Paint,” on techniques of oil painting. The other posts hopefully have laid some groundwork for the actual painting process, and now we finally get to the whole point: painting! You can read the Intro,Materials,Subject and Composition, and Color posts to get an idea of what we’ve gone over so far in order to get ready for putting brush to canvas.

Let me say that while these posts have been pretty long and I go into as much detail without writing a book, the whole painting process itself doesn’t have to take that long. Once you have your materials and supplies ready the next thing to do is just do it. Put on some music and let the painting flow. Some masterpieces took years to paint. Most of my paintings I completed in one sitting (maybe it shows). Of course those sittings can be anywhere from a couple hours to eight, but the point is it doesn’t have to be a big deal.

I explained some of the points on composition and color earlier but I must say you don’t have to follow anyone’s instructions to the t, just do what feels right. Painting can be whatever you want it to be. Perhaps you get out what you put in but it’s all a matter of perspective. You’re only going to learn by doing, but at the same time try to absorb as much information as you can about the subject. So let’s get on with it, shall we?

General Pointers

All this might be very difficult to explain so I’ve included some pictures of the techniques taken from my little camera. Be forewarned that this camera does not have a macro setting, and I never claimed to be a photographer. So take it or leave it!

Let’s re-hash on the materials. You’ve got your

  • Paints- paint tubes of at least the primaries, white, and some browns
  • Canvas- got to paint on something, right?
  • Easel- got to hold that something somehow, right?
  • Brushes- got to- yeah you get the picture
  • Turpentine, or turpentine substitute, a paint thinner with rag
  • Palette- disposable or not
  • Desire- I have to be cliché some time!

So that’s all you really need to get started, and all you’ll ever need really. But you can always get more into and get a “mahl” stick to steady your hand, a “graticola” or other perspective finders, pencils or crayons for the sketching, extra mediums and solvents (though turpentine works fine for a thinner), and maybe a few more things.

I don’t go along with the idea of putting all the paints in a row on your palette before you paint for good reasons. I did this probably the first time I painted and haven’t since. I put my paints on the palette as I need them so I don’t waste any paint. If you put all that paint on your palette, who’s to say your going to use every color? So although you’ll see many artists do this, I don’t do it and don’t recommend it. But I do always put white and raw umber, because there will never be a painting that I don’t use white to mix, or raw umber to darken.

Now let me point out some properties of the paint you’re going to be using. This whole tutorial is centered around oil painting, and I probably should have said this earlier but much of these techniques can be used with acrylics as well. Acrylics are cheaper and possibly easier to use (thin and clean up with water, etc.), but I’ll concentrate on oils specifically.

As I said oil paints are very versatile and a lot can be done with them. You can manipulate in all kinds of ways. Use brush strokes to your advantage. Pile up thick impasto to give texture. Once on the canvas, you can mix it, push it around, scrape it away, wipe it away, whatever you want with it. You definitely want to get full use out of the oils, and apply the correct amount of paint. Spread out too thin and dry and you’re not getting full use of the paint. You want your paint to be the consistency of soft butter, and as you paint you’ll want to load up your brush.Dragging the paint too thin and dry will not produce the desired results.

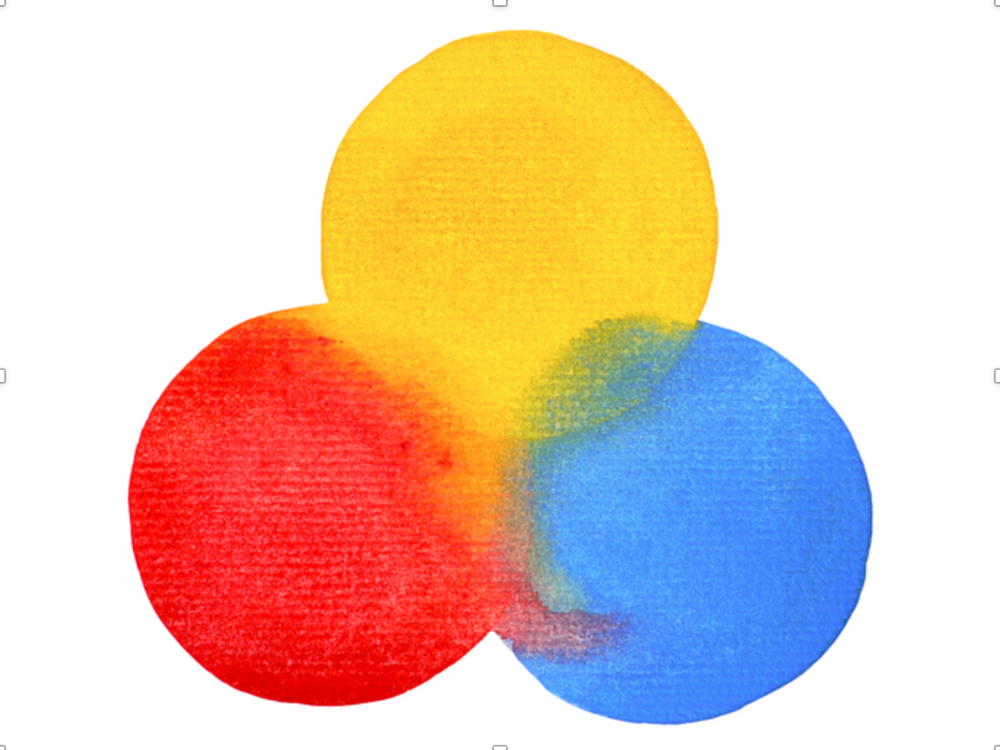
Let’s say I wanted to turn a red spot into orange. I can mix the color right on the canvas by adding a dab of yellow. Normally you should add the darker, dominant color into the lighter color , but by placing the yellow next to the red, I can slowly pull bits of the red into the yellow until I have the color I want.

And once I have these two colors, I can blend them together. I take a dry brush and with small circular motions go from the yellow side to the red side, bit by bit working the two together as I go.

If I decide the orange is way too bright, and I wanted a much duller, grayer color, I add some of orange’s complement blue. With a dab of cerulean blue on a clean brush I work the paint into the orange until I have a much more neutral color than the bright orange we had before. This can be done to any spot of paint already painted with the particular color’s complement, or the grayer color can be mixed on the palette.

And if I wanted to lighten this new color, all I do is is add white straight to it and mix it around a little until I get what I want.

Fat Over Lean

It’s important to remember one simple rule when painting over top other paint. This rule is called “Fat Over Lean” and involves the amount of oil in your paint layers and how they dry. The paint straight from your tube is made up of two things: a.) the pigment, or ground up color, and b.) the vehicle- the oil, usually linseed oil. “Fat Over Lean” states that you should paint the thinner, or leaner layer underneath with paint that doesn’t have as much oil in it, and the thicker or fat paint, with more oil in it last.

This may sound confusing when you’re not used to painting, but when as you go along it makes more sense. When you thin the paint with thinners or turpentine, the paint has less oil than paint straight from the tube. If you tried to paint a very thin paint over thick, it won’t even stick. So when there are several layers, the darker thinner layer is applied first, with the thicker paint coming next, and the very thickest as highlights.

The reason being oil paints dry at different rates. The more oil in the paint, the longer the drying time. If you have thicker paint under thin paint, the top layers dry first and cracks while the underlying thick paint is drying. Fat over lean sees to it that the first layers dry first and the last layers dry last, keeping the paint firm and stable in the long run.

Wet In Wet

Adding wet paint into paint that isn’t dry yet is called “Wet in wet,” or “Wet on Wet” painting. The painter Bob Ross was a proponent of this technique and taught it religiously. You can purchase his videos along with painting kits with everything you need at your art supply store or on the internet. As I’ve said before you can’t get more creative following tutorials such as his where you basically have to copy what he’s doing, but they certainly have value in teaching you techniques. Especially if you’re planning on doing some landscapes, or even if you’re just starting out, his videos will be a great help to you.

Bob Ross’s technique involved wetting the entire canvas with a thin “Liquid White” underpainting, so every bit of paint from your brush mixes right in. This can help psychologically when there is something to paint or add into. A plain dry canvas can be very intimidating.

One of the great things about oil paints as opposed to acrylics is the drying time. It takes days before the paint even begins to dry, so painting wet in wet is very easy to do. Parts of the painting can be constantly changed and added to, or subtracted from. Acrylics, on the hand take minutes before they dry and are hard to alter once you’ve painted.

Ways To Paint

Now you know the basics and how to work the oils around to your advantage. You know to paint thin layers first no matter what the subject, and add paint on top with less turpentine or more oil depending on how you look at it. You can use the Wet in Wet painting technique, using a thin under painting of white, or you can purchase Bob Ross Liquid White or Liquid Clear from your supply store. Here are some specific techniques you can use to achieve your masterpiece:

1. Scumbling- This goes hand in hand with painting fat over lean and basically calls for a very thin and dark first layer, and dragging a brush loaded with thick paint over it, to get a choppy scumbled look.

2. Impasto- Painting with impasto is using very thick gobs of paint being built up. This is good for quick or expressive paintings. The Impressionists generally used impasto.

3. Impressionist- By giving the viewer impressions of the light off of objects, the Impressionists allowed your eyes to blend small patches of color.

4. Pointillism- The Pointillists were Impressionists who believed tiny spots of colors placed side by side can be blended in the viewer’s eye.

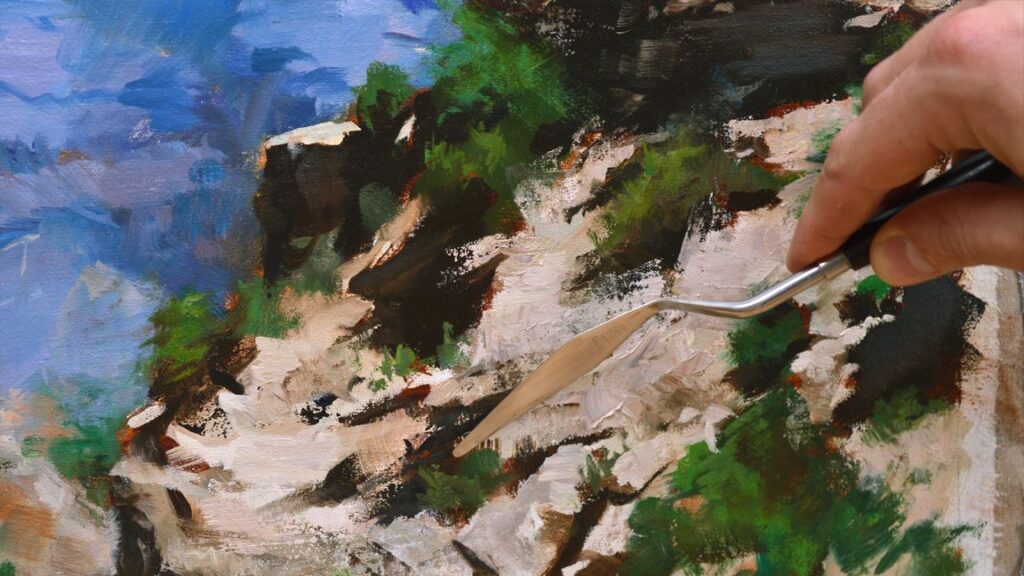
5. Painting with the knife- Painting knives can be sued for more than just mixing paint- you can paint entire paintings with them. Here you apply large patches of color if you don’t want the brush strokes to show.

6. Or use the knife for detailing.

7. Glazing- Glazing is applying layer after layer of thin paint to produce your desired colors. It’s difficult to show here because if requires the layers to dry before adding another layer. But here I show the thin layer of yellow added to the thin red to create the appearance of orange:

Now these are a few of the basics of oil painting, and like I said before you can’t learn by just watching. So try it out for yourself and see what you can come up with. Coming up I will do a step by step presentation of painting. Until then…

Thank you for reading this article! If you have any further questions about this topic please contact us.

Painter William Utermohlen: Artist’s Final Works Chronicled The Effects of Alzheimer’s Disease

William Utermohlen

William Utermohlen was Born in 1933 on the south side of Philadelphia, trained at the Pennsylvania Academy of Fine Arts, graduating in 1957. The GI Bill allowed him to study further in Europe, and throughout his travels to France, Italy and Spain, he was notably influenced by classical painters Giotto and Diego Velazquez.

William Utermohlen then enrolled at London’s Ruskin Academy, and he would ultimately make London his home base following his 1962 marriage to art historian Patricia Utermohlen. His diverse work throughout the next decades would reflect a range of influences such as London street life, Dante Alighieri‘s Inferno, the Vietnam War and a fascinating series of paintings based on the Mummers of Philadelphia. The Mummers are a minstrel-type group dating back centuries. The colorful, carnival-like antics of their Philadelphia chapter’s annual New Year’s Day Broad Street parade are legendary — especially as captured by Utermohlen.

The Alzheimer Portraits

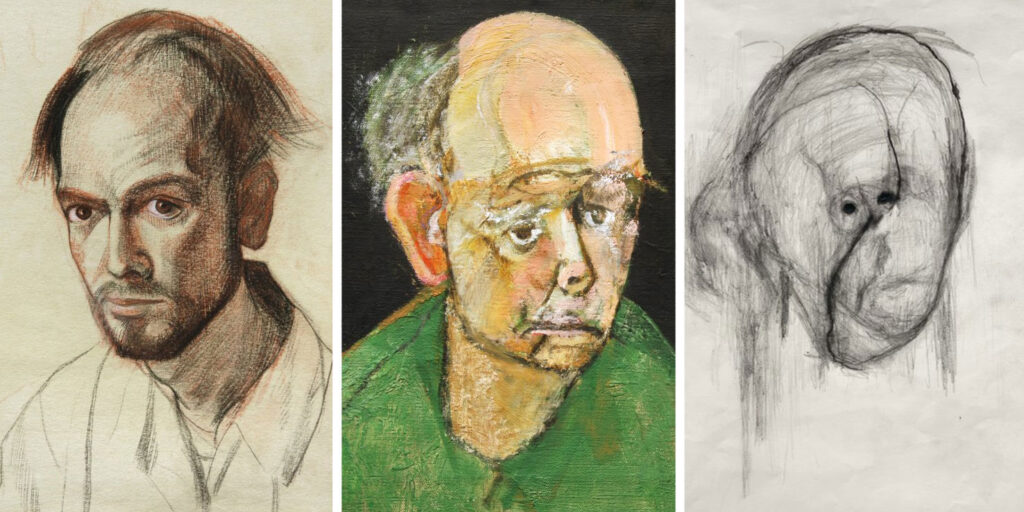
In 1995, Utermohlen learned that he was suffering from Alzheimer’s Disease — a devastating diagnosis for anyone, particularly a visual artist. Utermohlen, however, took it upon himself to keep working and began a series of self-portraits that would reflect the effects of Alzheimer’s on his abilities. Because Alzheimer’s is known for diminishing the power of the brain’s right parietal lobe, an area that controls visualization and perspective, Utermohlen’s art shows a drift from his prior expert use of line and detail. His strong love of color remained, however, and even with the Alzheimer’s — or perhaps because of it — often floated off into the realm of beautiful abstractions. In other works, there was a sense of understandable fear and anger toward his fate.

Utermohlen’s willingness to chronicle the changes Alzheimer’s would have upon his work not only show a sense of great artistic bravery, but are also helping researchers to track the neurological and physical effects of the disease. Throughout the course of creating his Alzheimer portraits, Utermohlen’s wife Patricia reports that her husband was clearly aware of frustrating developments and degenerative changes, but was willing to keep going nonetheless.

Legacy

A traveling exhibit of Utermohlen’s pre and post-Alzheimer-influenced works, Portraits From the Mind: The Works of William Utermohlen – 1955 to 2000, has allowed viewers to connect directly and visually with Alzheimer’s, expanding public awareness of the disease and the search for a cure. The exhibit has brought an ironic fame to a generally overlooked yet talented painter, and Patricia Utermohlen hopes that her the brilliance of her husband’s earlier art will not be completely overshadowed by his later illness.

William Utermohlen died of Alzheimer’s Disease in 2007.

Thank you for reading this article! If you have any further questions about this topic please contact us.
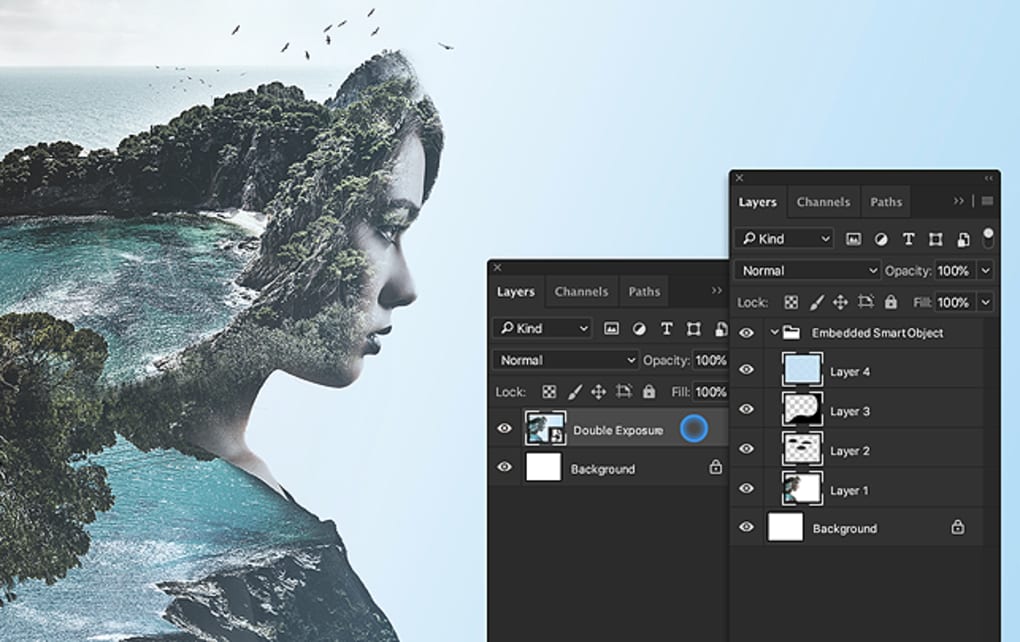
Fine-Tuning Your Digitized Photo Painting in Photoshop

painting in photoshop

The last tutorial showed you how to set up your layers in Photoshop for transforming a photo into a “hand-drawn” style sketch painting. This tutorial will focus on how to take the layers you have and blend them into a cohesive, beautiful picture. In other words help you get better at painting in photoshop.

(Disclaimer: I’ve had people ask me complex questions about getting into the professional photography business. While I have friends in the profession and know that Photoshop is a necessary tool for the modern photographer, I’m not in the business, so I can’t answer related questions; I just have a knack for retouching the photos of friends and family and am familiar with the workings of the program.)

Let’s begin with the layer we labeled “hstroke”. Select it, then click on “Layer Mask” in the palette box. Next, hide every layer other than “hstroke” by clicking on the eye icon. Click on the “hstroke” layer’s mask to activate it.

Begin painting in photoshop by using the Brush Tool, make the foreground black. Black out any areas you want to cover up; conversely, use white to reveal a previously covered up spot. (In general, it’s always a good idea to set the foreground to black and the background to white so you can easily switch back and forth with X key. Whatever is painted with black will be hidden from view because of its low-scale opacity. Because white is its virtual opposite, it has a very high-scale opacity, which is why everything painted with it will be revealed. Using grey will produce half-scale opacity, which will be partially transparent. This is harder to control, so your best bet is to stick with black or white.

Okay, now shift the layer mask to your Layer Set by clicking “Layer Set”, then “Layer Mask”. You’ll be able to use the Layer Set’s mask in the same manner as the regular mask. Click on “Brush Tool” and select a big brush tip. Keeping the layer set’s mask in place, use black paint around the edge of your photo. For closer control you can always press “F” to switch to full screen. When you’re done, go to Filter/Artistic/Palette Knife to adjust the details of your stroke to satisfaction. To smooth it out, use a little Gaussian Blur.

Copy your layer set. In your “new” layer set, go to Layer/Merge Layer Set. Label the layer to “newsketch”. Go to Filter/Sketch/Chalk & Charcoal to adjust the Charcoal and Chalk area; also adjust the Stroke Layer to 2. Set your blending mode to “Multiply” close to 100%. Click on the “newsketch” mask. Call up the “curves” box and switch the black in the mask to grey; doing this will cause the area around the edges to be more visible.

If you’ve done all this and discover that your photo is still too dark, you’ll have to use the adjustment layer; this will adjust the colors you dictate across all layers without flattening them. The adjustment also acts as a fine tuner for the finished product by adjusting the contrast and saturation of your colors, allowing you greater control of the outcome. To use this option, select the top layer and click “Adjustment Layer” towards the bottom of the palette, then click “Curve”

You can change the curve by clicking and dragging the curve line. Your source point (or control point) will pop up when you click the middle of your curve, then just drag your mouse to adjust the curve the way you want it. When you’re done, click OK.

The adjustment layer also lets you modify your changes whenever you’d like by clicking it twice. To make it “hide” (disappear temporarily), click on the Eye icon; to get rid of it forever, drag it over to the “Trash” icon. If saturation is an issue, use the hue/saturation adjustment layer to fix any unwanted color problems. Just click “Create Adjustment Layer” , then “Hue/Saturation”. Moving the slidebar to the left will lessen the saturation effect, while sliding it to the right will have the opposite effect. If you only want to fix a certain color, click the Edit button and pick the color you want to concentrate on.

Now you’ve created all the layers necessary to make a perfect drawing/painting rendition of your photo. All that’s left is to create a final layer mask to blend everything together, and you should be all set. Enjoy your new digitized “painting”.

Thank you for reading this article! If you have any further questions about this topic please contact us.
8 Tips to Apply a Faux Leather Painting Technique

faux leather painting

The faux leather painting technique is an extremely popular faux finish, especially on walls. A common use of the technique occurs when one utilizes the faux leather painting on the lower half of a wall in a darker color, contrasting it with a lighter color on the top half of the wall. It also works well on coffee table tops, desk drawers, and other accents on furniture pieces and decorative accents like frames.

Technique Tip #1: Gather all of your supplies together before you begin your faux leather painting technique. You will need a primer, a base coat, a matching glaze, a flat paint brush and a stippling paint brush as well as a Fitch edge paint brush, painter’s tape and paper towels. If you would like to wear latex gloves or any other protective gear, then do that first.

Technique Tip #2: Before you begin your faux leather painting, tape off the edges of your project. Measure carefully and make sure your lines are straight if you’re doing a half wall or stripes.

Technique Tip #3: Start by priming the wall or the object you are decorating with a faux leather painting technique. Allow it to dry completely.

Technique Tip #4: Next, apply the base coat to the wall when your primer is completely dry. This is applied using a flat brush. Allow it to dry normally and completely before moving onto the next step.

Technique Tip #5: When the base coat is completely dry, it is time to apply the glaze. This is the most important part of the faux leather painting technique. If you are using this technique on a large area, consider doing this part in sections to make sure that it doesn’t dry before you have time to use the brushes to create the faux leather effect.

Technique Tip #6: After you apply the glaze, use the stipple brush randomly to soften the brush marks left by the flat blush during application.

Technique Tip #7: Use the Fitch edge brush along the edges and corners to blend the brush marks again and finish off the faux leather look.

Technique Tip #8: Allow the glaze to dry completely. If you would like, apply a clear and thin sealant on top to protect your work.

Sources

Tips for Faux Leather Painting

Paint Technique: Faux Leather Instructions

Thank you for reading this article! If you have any further questions about this topic please contact us.
Art Book Review: Drawing and Painting Buildings by Richard Taylor

drawing and painting

Drawing and painting can be very difficult, especially for beginners. There are many different art books to help people who are trying to improve their artistic talent, or just give people ideas when they don’t know what to draw. Drawing and Painting Buildings by Richard Taylor is a great book for architectural type drawings. This book is great for beginners, and for those who are a little more experienced as well. This art how-to book can help anyone become a better artist. Here is a review and more information about the art book, Drawing and Painting Buildings by Richard Taylor.

Review of Drawing and Painting Buildings- art materials
Drawing and Painting Buildings starts off with information about the different kinds of materials you can use to create your artwork. It covers all the most common supplies used to draw and paint buildings such as pencil, pen, watercolor, and more. Rather than listing the materials that can be used for your buildings, this art book has information about how to use each of the materials and different effects that can be achieved with them. If you are unsure about how to use a certain material or have been wanting to try one but don’t know what to do, Drawing and Painting Buildings by Richard Taylor will surely help you.

Review of Drawing and Painting Buildings- perspective
Perspective is one of the most important parts of drawing or painting buildings, this is what makes them look realistic and three-dimensional. It’s not a very hard thing to learn and master, but if it hasn’t been taught to you, there’s a good chance you could be struggling with it. Drawing and Painting Buildings by Richard Taylor goes over all the different perspective and explains them so that they are easy to understand and draw or paint.

Review of Drawing and Painting Buildings- building textures
There are so many different types of building and houses and that can be hard to recreate on paper. This art how-to book is great when it comes to teaching you how to do things such as brick, wood, stone, tiles, and even more. There are instructions and examples drawn out to help you make your building look realistic.

Review of Drawing and Painting Buildings- building types
Skyscrapers, cottages, town homes, Victorian houses, and other types of buildings are all discussed in the art book, Drawing and Painting Building by Richard Taylor. There are many examples provided, so you can practice by copying them or create your own using the same technique. There is also a written description that will help you better understand these techniques, so you can either go straight to the drawing or read the paragraph to get a better idea of what you’re doing, or both.

How to draw building books can be hard to find at the typical arts and crafts stores, and for this reason (among others), Drawing and Building Buildings by Richard Taylor is one of the best how to draw building books. It is very detailed, without being complicated, and there are lots of examples provided if you are a visual person. Another great thing about this art book is that there are so many examples, so if you’re out of ideas for what to draw or paint, this can be your inspiration.

Thank you for reading this article! If you have any further questions about this topic please contact us.
Nail Painting: Perfectly Painted Nails

nail painting

To start nail painting, invest in a good nail polish, such as Revlon Colorstay (it runs between $3.00-4.00 a set) and a multi-step nail buffer, such as the 4-step one sold by Sephora (it runs about $5.00)

Start by cleaning any old nail polish off your nails with some nail polish remover and a cotton ball.

Next, trim your nails to the length you desire (shorter nails work because they can accommodate even some of the wildest colors with out looking gaudy or tacky)

Use the filing side on you buffer to smooth out any rough edges on your nails, then find the side that smoothes out your nail bed and rub it across the top of your nail until it is smooth to the touch. (This gives the nail polish an even surface to adhere too)

Now, gently shake your polish a few times to make sure the color is even mixed. Open the bottle and wipe off any excess from your brush on the side of the bottle.

Starting from your cuticle, use long, even strokes to reach the end of your nail. Apply more color to the brush as needed. (Remember it’s easier to add more polish to your nail than to take away. Keep this in mind to prevent getting polish all over your finger. If you do get some on your finger, dip the end of a Q-tip in some nail polish remover and gently rub off the smudge)

Once you have finished applying your color, let it air dry for approximately 5-10 minutes. (I know it’s tempting, but do not blow on your nails to dry them. This actually prolongs the drying time because the water vapor in your breath transfers to the polish, keeping it wet. If you are in a hurry, set your hair dryer on the lowest setting and gently sweep it back and forth over your nails. Be careful not to burn yourself, your hair dryer can get hot on your hands)

Repeat the previous few steps until you have the desired depth and intensity of the color.

Once your nails have dried, apply a top coat and let it set.

There you go! All finished. Your nails should look like you just stepped out of the salon (For a fraction of the price of course….but no one needs to know that. It’s our little secret!)

All of the products I mentioned can be found at most local stores or on amazon.com

Thank you for reading this article about nail painting! If you have any further questions about this topic please contact us.


How to Choose the Right Brush for Your Painting

types of paint brushes

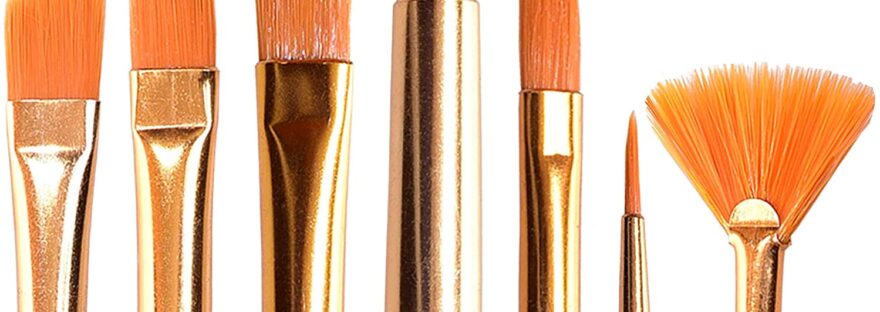
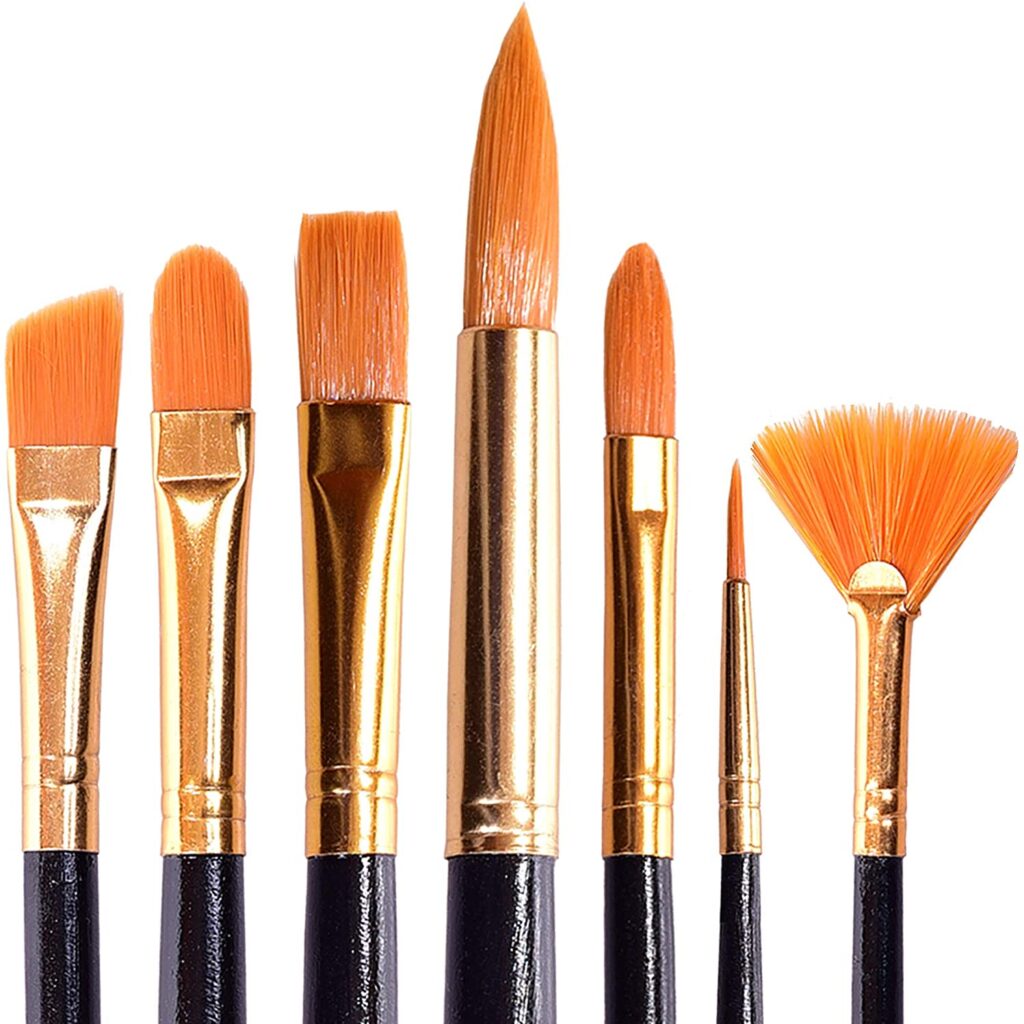
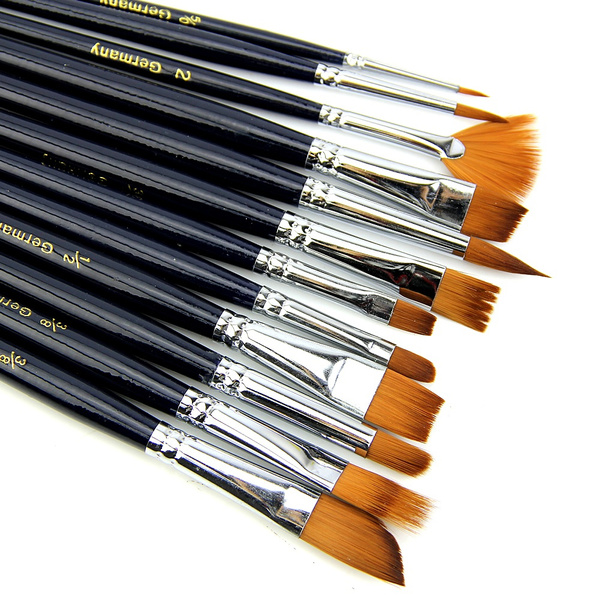
Different Types of Paint Brushes

So you’re feeling inspired and gathered your paints and painting surfaces together. Maybe you have a competition you’re entering or are just making a gift for a friend. Knowing what the right kind of brush is to use can make all the difference in your final product. This article will help you get to know different types of paint brushes so you know which to choose in future for different kinds of projects.

Different brushes work best with different kinds of paints and its critical to chose the right one. As an artist, teacher and former art store manager, I have a lot of knowledge on brush types. Follow this easy guide to determine what type of brush is right for your project.

Natural Bristle

Natural bristle brushes are brushes made from animal hair such as horse, ox or squirrel hair. They vary in price from the quality and rarity of the brush hair. Most inexpensive natural bristle brushes are made from ox hair. There are varying textures in natural bristle brushes from soft to coarse. Natural bristle brushes show brush marks as you paint, and are suited well for oils or acrylic paints. They soak up some of the paint as you work and can help you layer paint thickly.

A disadvantage to animal hair is that it is not animal friendly, so that may discourage you from using natural bristle brushes. I prefer to not use natural bristle brushes whenever possible, but do use them for some projects. They can tend to be a bit pricier if you want a higher quality brush as compared to higher quality synthetics.

Synthetic

Synthetic brushes are made from nylon made into fibers. They are suitable for all types of paint and watercolors do especially well with synthetic brushes. Synthetic brushes are usually soft and typically inexpensive. They work great for moving fluid paint along your surface and mixing colors easily. They do not tend to show brush strokes and can be easier to clean. Synthetics also tend to be relatively inexpensive, even for high quality brushes.

However, synthetic brushes are not the best for layering paints thickly and sometimes have a lot of splitting of the fibers. I avoid using synthetics when I need to build those layers or am trying to achieve texture. They are good, however for when using mixing mediums in acrylic paint, because they do not tend to hold onto tiny particles that add texture.

With any brush, keeping it clean is the best way to improve longevity. Use a brush soap to clean your brushes and if using oils, an appropriate paint thinner to remove excess paint. Always dry brushes with the bristles facing upward to keep them from getting smashed and bent. I always recommend to my students to have a selection of both synthetics and natural bristle brushes so that no matter the project they are always prepared for their best work. The right brush can take your project from boring to truly breathtaking. And as always, make sure you practice and have fun as you create art.

Thank you for reading this article! If you have any further questions about this topic please contact us.

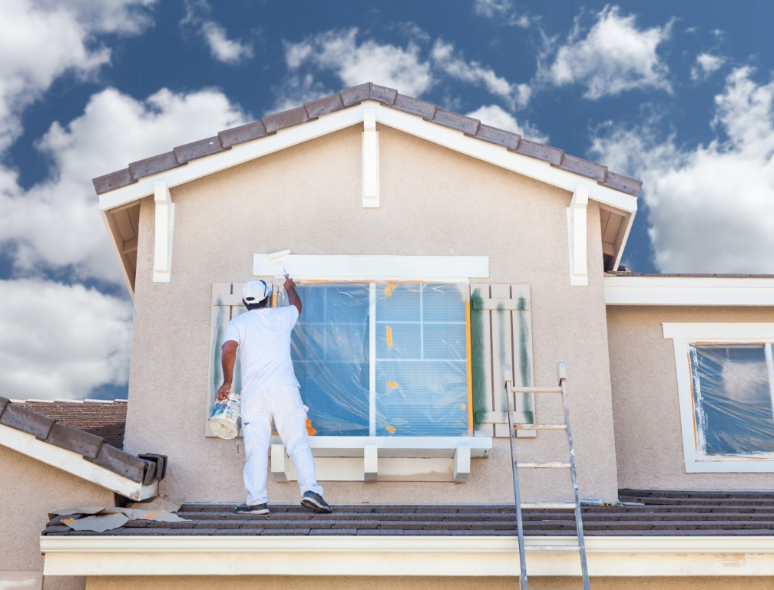
The 5 Most Common Exterior Painting Mistakes

exterior painting mistakes

Exterior Painting Mistakes #1: Using the wrong paint

Making exterior painting mistakes can hugely affect the look of your property or personal outdoor items. A bad exterior paint job is easy to spot. You can see the paint peeling off the walls or blistering up in certain areas. Sometimes the color is not uniform or appears to have run. The first step is always to choose the right paint. The Home Depot website guides you in purchasing the right kind of paint. Use a water-based paint to paint the exterior of a mason home or a home with siding. Use an oil-based paint on wooden or metal exteriors. And, of course, don’t forget to always apply a primer first.

Mistake #2: Using the wrong painting tools

Ever notice a stained wooden door covered in white paint along the edges or a different color paint along the roof line of a home? Getting the job done as quickly as possible is just as important as getting it done right. You can find all the right tools at your nearest Home Depot. Painter’s tape and plastic sheeting are a must in order to cover areas that are not to be painted. Be sure to have a roller tray, roller frame, high density roller brush cover, a brush set of various widths and styles, and plenty of shop towels.

Mistake #3: Painting under inappropriate weather conditions

Watch the weather before painting the exterior of your home. Painting in direct sunlight or with strong wind will cause your paint to dry too quickly. Cold weather will not allow your paint to dry properly, and humid or wet conditions will also delay your paint from drying and may cause it to streak or run.

Mistake #4: Not preparing the surface to be painted

Be sure that the surface that you are going to paint is not peeling or blistering. If this is the case, be sure to scrape these areas. If the house has more than four coats of paint, you may want to consider sandblasting it before reapplying any additional paint. Sherwin Williams has some excellent tips on preparing exterior surfaces for painting.

Mistake #5: Overworking your paint

Finally, when painting with a roller, apply your strokes evenly and in the same direction. When reloading your roller, be sure to continue painting in the adjacent area while working your way back to the painted area. This prevents extra paint from building up and causing streaks. These tips should help you resolve many exterior painting mistakes before you make them!

Thank you for reading this article! If you have any further questions about this topic please contact us.