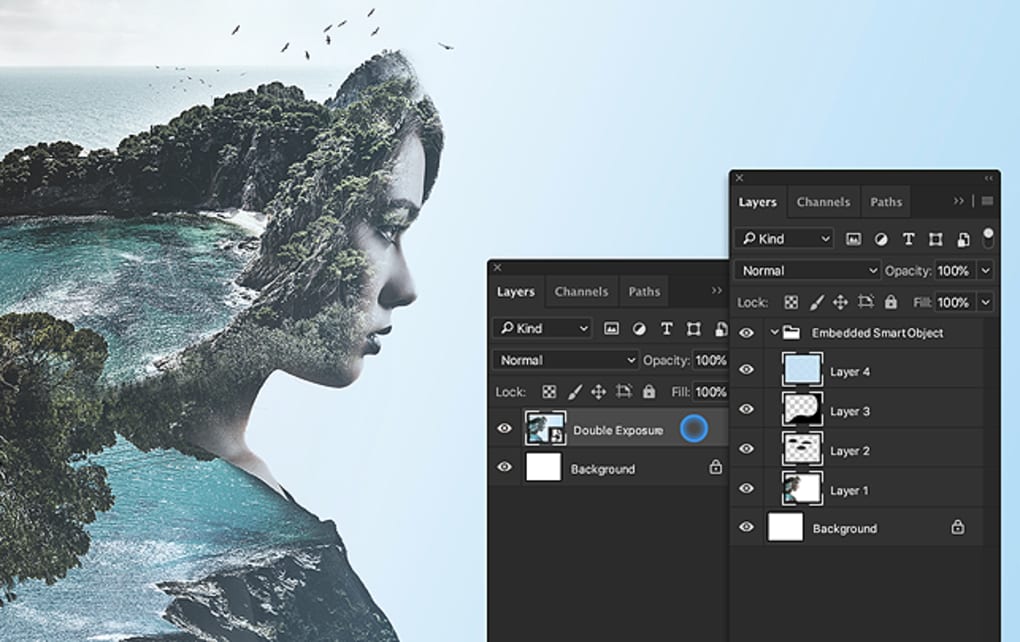
The last tutorial showed you how to set up your layers in Photoshop for transforming a photo into a “hand-drawn” style sketch painting. This tutorial will focus on how to take the layers you have and blend them into a cohesive, beautiful picture. In other words help you get better at painting in photoshop.
(Disclaimer: I’ve had people ask me complex questions about getting into the professional photography business. While I have friends in the profession and know that Photoshop is a necessary tool for the modern photographer, I’m not in the business, so I can’t answer related questions; I just have a knack for retouching the photos of friends and family and am familiar with the workings of the program.)
Let’s begin with the layer we labeled “hstroke”. Select it, then click on “Layer Mask” in the palette box. Next, hide every layer other than “hstroke” by clicking on the eye icon. Click on the “hstroke” layer’s mask to activate it.
Begin painting in photoshop by using the Brush Tool, make the foreground black. Black out any areas you want to cover up; conversely, use white to reveal a previously covered up spot. (In general, it’s always a good idea to set the foreground to black and the background to white so you can easily switch back and forth with X key. Whatever is painted with black will be hidden from view because of its low-scale opacity. Because white is its virtual opposite, it has a very high-scale opacity, which is why everything painted with it will be revealed. Using grey will produce half-scale opacity, which will be partially transparent. This is harder to control, so your best bet is to stick with black or white.
Okay, now shift the layer mask to your Layer Set by clicking “Layer Set”, then “Layer Mask”. You’ll be able to use the Layer Set’s mask in the same manner as the regular mask. Click on “Brush Tool” and select a big brush tip. Keeping the layer set’s mask in place, use black paint around the edge of your photo. For closer control you can always press “F” to switch to full screen. When you’re done, go to Filter/Artistic/Palette Knife to adjust the details of your stroke to satisfaction. To smooth it out, use a little Gaussian Blur.
Copy your layer set. In your “new” layer set, go to Layer/Merge Layer Set. Label the layer to “newsketch”. Go to Filter/Sketch/Chalk & Charcoal to adjust the Charcoal and Chalk area; also adjust the Stroke Layer to 2. Set your blending mode to “Multiply” close to 100%. Click on the “newsketch” mask. Call up the “curves” box and switch the black in the mask to grey; doing this will cause the area around the edges to be more visible.
If you’ve done all this and discover that your photo is still too dark, you’ll have to use the adjustment layer; this will adjust the colors you dictate across all layers without flattening them. The adjustment also acts as a fine tuner for the finished product by adjusting the contrast and saturation of your colors, allowing you greater control of the outcome. To use this option, select the top layer and click “Adjustment Layer” towards the bottom of the palette, then click “Curve”
You can change the curve by clicking and dragging the curve line. Your source point (or control point) will pop up when you click the middle of your curve, then just drag your mouse to adjust the curve the way you want it. When you’re done, click OK.
The adjustment layer also lets you modify your changes whenever you’d like by clicking it twice. To make it “hide” (disappear temporarily), click on the Eye icon; to get rid of it forever, drag it over to the “Trash” icon. If saturation is an issue, use the hue/saturation adjustment layer to fix any unwanted color problems. Just click “Create Adjustment Layer” , then “Hue/Saturation”. Moving the slidebar to the left will lessen the saturation effect, while sliding it to the right will have the opposite effect. If you only want to fix a certain color, click the Edit button and pick the color you want to concentrate on.
Now you’ve created all the layers necessary to make a perfect drawing/painting rendition of your photo. All that’s left is to create a final layer mask to blend everything together, and you should be all set. Enjoy your new digitized “painting”.
Thank you for reading this article! If you have any further questions about this topic please contact us.
