Preschool Painting: Ideas for Parents and Educators

preschool painting ideas

Art is play for young children. Providing art experiences to children allows them not only express themselves but to develop fine and gross motor skills as well. These preschool painting ideas can help you give them fantastic learning and fun experiences!

Paper

Offering a wide variety of preschool painting ideas for your kids will help them be super happy little beings! Paper is the first thing you will need in big supply as it is important for experimentation. Posterboard, tracing paper, butcher paper and cardboard are all nice to have on hand. Try cutting the paper into a variety of shapes, circles and long triangles often produces interesting results. Children may enjoy kneeling over a piece of paper on the floor, standing up at an easel or sitting at a desk, or if you are brave, tape a large piece of paper along a wall or fence.

Color

To allow for success, offer colors that mix well together. Primary colors (red, yellow and blue) all mixed together create shades of brown. Try offering just two colors at a time and encourage conversation about what happens when the colors are mixed. Paper plates make great pallets. Washable tempera paint is versatile and readily available at discount stores.

Brushes

One way to encourage children to create art is to offer ways for children to get paint to paper that allows freedom from depicting images from life and concentrates more on play and experimentation. Some of these creative brushes include: feather dusters, tooth brushes and Qtips. Dipping toy cars in paint and allowing them to drive along a long paper is great fun. Play some music and have children drum onto paper with paint covered hands. Mix paint with a small amount of water in a spray bottle, hang a piece of paper along a wall and let children spray the paper.

Hang art work in a prominent spot to bolster a child’s self confidence. Most of all, approach art making with a sense of wonder and fun.

Thank you for reading this article! If you have any further questions about this topic please contact us.
Home Improvement: Painting the Hearth

painting the hearth

Painting the hearth is a great way to change the look of the fireplace and fireplace hearth.There are many reasons people decide to paint their fireplace hearth, including wear or unavailable replacements for brick or stone.

Preparation is tedious, but important. Measure the area you will be painting. The hardware store will be able to recommend how many gallons of paint are needed for your project when you tell them the area to be covered. The hearth needs cleaned, which means the entire fireplace should be scoured clean. Make any repairs to brick, stone, or mortar after the initial cleaning, being certain to clean up any accidental spills or cement. Based on past experience, I recommend a full twenty-four hour period of drying time. That minimizes paint bubbles and peeling.

Cleaning the Hearth

Spread several drop clothes around the hearth, to keep the flooring or carpet clean. Brush or vacuum the area to be painted. TSP (trisodium phosphate) is a great cleaner and degreaser. It also works wonders with smoke stains and soot. Use a nylon scrubber and scrub brush. Because TSP can sometimes irritate or burn hands, wear rubber gloves. You can get the scrubber, scrub brush, and gloves at your local Dollar Store. TSP can generally be found at your local hardware store. If you are young, ask Grandma or Grandpa. TSP was a household cleaning name way back when. It was the perfect cleaner for asphalt tile.

Painting the Hearth

Leave the drop cloths to protect the flooring and items that can’t be moved. Use masking tape as an edging around the hearth and fireplace (do not get any paint on the inside of the fireplace). I use ¾” tape to be on the safe side. Meticulous people can get by with ½” tape. This is often available at the Dollar Store, and always at the local hardware store.

If you have a flat or slightly-textured surface, you can use a regular paint roller. If it is more textured, as in bricks or stones with strips of mortar in-between, get a roller with more nap. If you are painting the entire fireplace, get an extension pole for the paint roller, as well. You should also have available a durable stepladder. Purchase them at the hardware store.

If you are painting brick that has not been painted before, use primer first, letting it dry overnight. If the hearth gets a lot of use, apply two coats of paint. When repainting, a semi- gloss with primer added will do. I encourage the use of semi- gloss because high gloss paint really brings out imperfections. If you intend to keep the same color for the rest of time, buy enamel paint. If you are like me and think you will change your mind in the next few years, buy acrylic. It is easier to paint over or remove. Also, water easily washes acrylic paint off the rollers.

The Home Depot, True Value, and Lowes are excellent hardware stores for supplies. They usually have guidelines or a class scheduled for do-it-yourself projects. Many WalMart stores also carry home improvement supplies.

Thank you for reading this article! If you have any further questions about this topic please contact us.
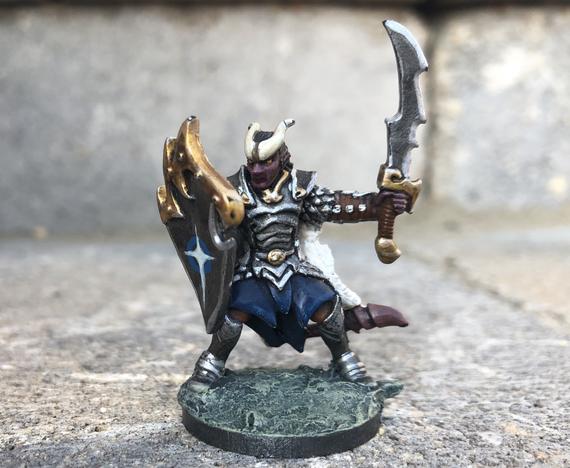
How To Finish RPG Miniatures: Tutorial: Final Touches to Enhance Figures For Role Playing

RPG Miniature

Once an RPG miniature figure is painted and detailed, it is ready to be displayed. However, much as the drybrushing technique can be applied to improve a figure from decent to special, there are three final details that can take a special figure to the level of professionally finished.

It All Comes Out In The Wash

Washing an RPG miniature figure isn’t a way to clean it, but to dirty it. By applying a final coat of diluted pigment the folds and creases of a figure are deepened and enhanced and by contrast, the raised areas are highlighted.

There are two methods of washing miniatures:

  1. Ink washes employ a diluted (usually a 1:1 or even more diluted) solution of ink to the figure. Each section should be washed separately and the artist needs to take gravity into account since the dilute solution will tend to wind up most intense at the lowest point. For example, when washing a cape, lay the figure face down and wash the entire cape so that the wash pools in the depths of the various folds of the cape. Use an ink colour that is slightly darker than the the colour being washed. If done correctly, the ink will slide off the high points and adhere in the shadowed low areas.
  2. Paint washes are applied in the same way. Darken the main colour that was used on a feature with a dab of black paint and water the paint down to a consistency just a little thicker than water. The application process is identical to the process used for inks.

Washing takes a great deal of practice and not all painters use the technique. It can produce amazing results if done correctly. It should be noted that the paint wash is basically a reverse version of the three step drybrushing process detailed in Part 4 of this series. Beginners might be more comfortable using the simpler, less messy drybrush technique.

Covering All The Bases

The base of an RPG miniature figure is often left out of consideration. It should not be treated as an afterthought.

Incorporating the base in the early planning stages of painting the figure will save time puzzling out what to do with it once the figure is done. There are two basic ways to approach finishing the base.

  1. Painting the base is the simplest way to finish it. In the early days of figure casting, all figures had metal bases that could easily be painted, just like the rest of the figure. If the figure in question has a metal base, or better still a metal base that has some detail to enhance the figure, a simple paint approach can give the figure a perfect finish.
  2. Flocking is the technique that railway modelers use to create the grass, sand and gravel effects that surround railroad dioramas. Flocking is available in bags at most hobby stores. Simply pick a colour of flock, paint some glue (two part, five minute epoxy works well for this) on the base, taking care not to get any glue on any part of the figure that is attached or close to the base. Cover the wet glue in flock and let dry. Sand can be used in place of flock. It helps the finish to paint the base a similar colour to the chosen flocking colour first. The flocking technique works best with the modern “slot base” figures, but it works fine on metal bases too.

Seal the Deal

Finally, a sealant should be sprayed on the entire RPG miniature figure to finish it. A good sealant will help protect it from fading, chipping and repel dirt and oil from hands. Any art supply or hobby shop should carry several different matt finish sealants that will do the job.

Metal miniatures may be small, but with patience, practice and perseverance, painting and displaying them can a hobby worth the time.

Thank you for reading this article! If you have any further questions about this topic please contact us.


Phlebotomy Blood Drawing Techniques for Female Muslim Patients

phlebotomy

The primary task of phlebotomy is to ensure the health, safety and welfare of the individual from which he or she is to collect a specimen. An essential part of this process is to be aware of and sensitive to the concept that, although it is vital to collect a valid specimen, cultural differences need to be respected and accommodated. A phlebotomist’s review of the cultural norms of Muslim women is well worth the effort in order to ensure proper specimen collection.

A Growing Population of Muslims in America

Any phlebotomist working to implement a larger practice of Phlebotomy in a wide metropolitan area will most likely be repeatedly presented with patients who are of a culture different from their own. For example, in 1988 according to the book entitled Culture Care Diversity and Universality (Leininger, M.M. & McFarland,M.R., 2006), Arabs were the fastest growing minority population in Michigan and the third largest minority group overall in the U.S. Ninety-two percent of Arabs in the world consider themselves Muslim and as of 1999, it was estimated that the Arab population in the metropolitan Detroit area alone was over 250,000. With minority populations such as these, providers of healthcare need to train their employees in cultural diversity and have proper procedures in place to provide quality patient care to all.

Potential Barriers to using Phlebotomy and Achieve Successful Blood Draw

There are several areas where it is possible to see differences between Muslim culture and the general culture that is found in the U.S. Perhaps the most obvious difference is the possibility of a language barrier between Muslim patients and healthcare providers. Female Muslims in particular prefer to have same-sex interpreters. These same-sex interpreters should also be sworn to confidentiality with regard to any communication between the patient and healthcare provider that they may help to assist. Whether or not a translator is necessary, Phlebotomy practitioners should be encouraged to inquire of the patient culturally focused questions to determine how best to maintain their religious and/or cultural practices in order to avoid refusal of treatment (Leininger & McFarland, 2006).

There can be challenges in even attempting to initiate conversations between the Muslim patient and phlebotomist. An article entitled, Muslim Women and the Veil on the Islam Watch website (Asghar, M., 2008, para. 2), notes that Muslim women are to keep their gaze lowered in order to “guard their modesty.” Once again, healthcare providers need to be properly trained and follow effective procedures in order to facilitate the best possible communication between patient and provider which is so vital in a healthcare setting. In this type of situation, understanding that eye contact with Muslim women should be avoided will go a long way to avoid the possibility of offending a female patient, and perhaps offending her husband as well.

Healthcare providers who are sensitive to the needs of a Muslim woman may make the difference between her receiving the medical care she requires or having her refuse medical treatment which may be vital to her health. In order to accomplish this, all healthcare providers, phlebotomists included, need to be aware that modesty is of the utmost importance to Muslim females. Muslim women, along with their husbands, prefer that Muslim females are treated by members of their own sex and may refuse treatment if the only option if to receive any type of treatment from a male employee. The author of “American Health Care Professionals Should Respect the Traditions of Other Cultures” in Western Journal of Medicine (Galanti, 2000) recounts a story where prior to a surgery, a Muslim man refused to allow laboratory technicians to draw blood from his wife’s arm. The husband only allowed the procedure to be performed after he completely covered his wife’s body, with only an area of her arm exposed to allow for the collection of her blood.

Across cultures, there are nonverbal cues that should be respected by healthcare providers as well. In Muslim cultures, non-Muslims are to avoid shaking hands with a Muslim of the opposite sex. A handshake should only occur if first initiated by the Muslim. In order to avoid an occurrence of improper handshaking, a Muslim may either put both their hands behind their back or put their right hand over their heart in order to avoid skin contact. In addition, healthcare providers should take precautions to ensure they announce themselves before entering the room of a female Muslim in order for her to properly cover herself (Leininger & McFarland, 2006).

Achieving the Goal of Quality Patient Care

The duty of phlebotomists and all other healthcare workers is to provide the utmost in care in order for their patients to be safe and well. Those in the medical field need to understand that in order to assist in the effective treatment of human beings there are requirements beyond simply focusing on the functions of the body they are seeking to treat.

When healthcare workers possess attributes such as kindness, compassion and a willingness to embrace the differences of other cultures, they can have a tremendous impact upon whether a person recovers and becomes well again or continues to struggle with illness or disease. It should be the primary mission of every phlebotomist to do whatever is necessary to assist in the recovery and wellness of their patients

Thank you for reading this article about phlebotomy. If you have any further questions please contact us.


How to Paint Figures in Landscapes

paint figures in landscapes

Deciding to Paint Figures in Landscapes

Whenever you paint cityscapes you will encounter a lot of people, some purposefully stroll past, others relax peacefully reading or sunbathing; however while they will be abundant in dense urban areas their presence will be extremely sparse in rural areas. Ultimately, the decision to paint figures in the remote countryside is at the discretion of the artist.

Watercolor sketches of figures are generally more effective when they strive to capture the essence of a particular moment; an impression of spontaneity and originality. Such sketches are useful in various ways; improving your fundamental life drawing skills; discovering which postures and compositional placement are aesthetically pleasant and learning how to render them so they appear natural.

The first step in learning how to paint figures in landscapes is to learn how to properly observe. Life drawing provides you with the opportunity to learn how to observe and comprehend human postures. Inevitably, this is a challenging task as your “models” will usually be mobile. If you find this difficult it is crucial that you focus on improving this skill through practicing quick, gestural outdoor sketching more often. Generally you have to learn to forget about detail and preconceived ideas and instead interpret the model using broad, sweeping strokes and adding only a few touches. If you focus on accuracy you risk overworking the piece and achieving a detailed yet static and artificial image.

Using a No.2 pencil, quickly draw the outline of a group of figures in a public place. Strive to capture their postures and interactions while omitting most of the trivial details such as clothing designs and facial features. Then, paint the neutral colors, focusing on both high contrasting colors in the group of figures and accurately depicting the shadow using the glazing technique. This creates compositional interest while ensuring proper tonal balance, an integral part of a harmonious successful watercolor painting. Moreover, the shadows can later be as reference when rendering details affected by the direction of lighting and reflective lighting cast on the figures. You can also make quick color notes using your own numerical system.

Thank you for reading this article! If you have any further questions about this topic please contact us.

Islamic Art in Afghanistan: Afghani Culture Revives

Islamic

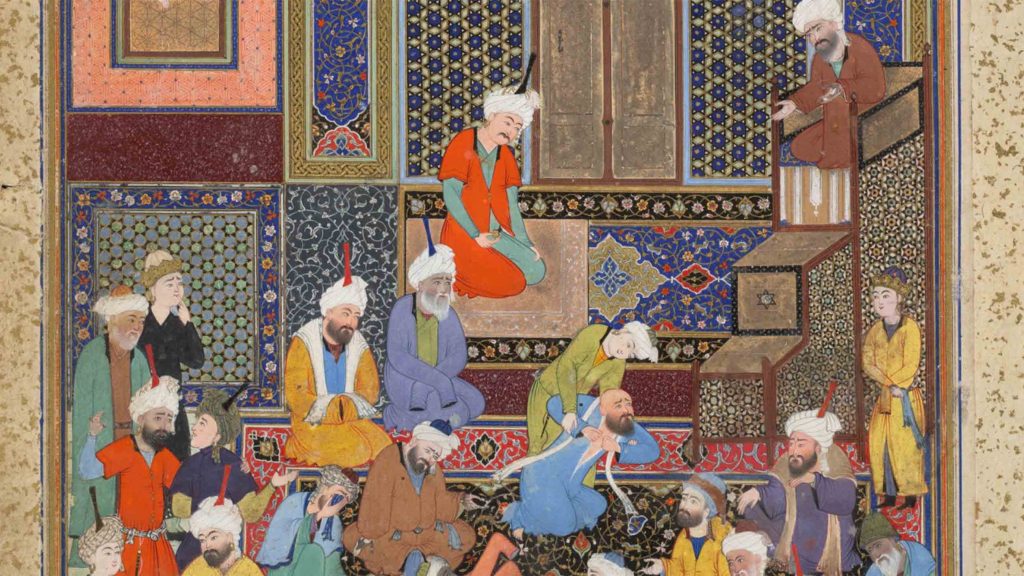
Little is written about modern Islamic art. It is clear that today’s artists are still inspired by cultural traditions and imagery from earlier Islamic periods. However, Afghan art of today is more clearly a means of personal expression, freed from traditional cultural rules in the post-Taliban era. Many of the Afghan master artists painting today do paint in more freedom, but have yet to be able to receive international recognition for their fine art paintings.

There are several styles of art which appear to be more popular for the Afghan master artists. Modern art paintings, colorful abstract art, and impressionism art are the most frequently found styles in the numerous art galleries popping up around Kabul.

Modern Art Paintings

There are at least four master artists painting in this style in Kabul today: Niazi, Faryad, Hamdard, and Ismael. Each of these brings his own interpretation to modern art. Some are clearly drawing from their own experience. Many artists fled during Afghan civil war of the ’90’s (the Mujahadeen war) and lived in refugee camps in Iran or Pakistan when the Taliban were in power.

Impressionist Art

Two of the most prolific impressionist artists are Hamdard and Shukoor. They have an amazing talent of highlighting the beauty of Afghan culture. If impressionism is defined as “seeing a scene at-a-glance,” it exactly describes how they describe their inspirations. They elaborated they never can stop to paint in the middle of the bazaar or crowd, because the people would crowd around them too much. They have to see a scene as they are strolling, and then go to their studio to paint.

Colorful Abstract Art

Abstract art is a newer art style less frequently seen in Kabul than paintings in Impressionism. The artists seem to be more influenced by Picasso. Cubism, geometric Abstract art, and partial abstraction would be more characteristic of the Master Afghan artists.

Classical Islamic Calligraphy

Calligraphy has been a consistent art form in Islamic history since it’s beginning dated to the 7th Century A.D. It typically is considered the highest form of Islamic art, based on the glorification of letters, words, or passages of Islam’s holy book, the Qur’an.

Thank you for reading our article about Afghan Art. Should you have any further inquiries please contact us.

Professional Home Painting Tool Selction Made Easy

home painting tools

Professional Home Painting Tools Selection Made Easy. This article is going to cover the basics of selecting home painting tools including brush and roller types used in professional painting. To start with lets cover the equipment, a professional specializing in home painting really needs several brushes and one roller with several roller covers to produce high quality work. While there are several quality brands of paint brushes available for your use, the most commonly used by professionals for its long durability is “Purdy” brand. You will need one brush for latex paints, and one for oil based paints. I do not recommend that an amateur use oil based paints until they are able to do a good clean job with latex, as latex is easier to clean up after.

The brushes should be angle cut in order to make drawing a line with them easier. They will be labeled as to the type of hairs they have and what type of paint that is good for. Once purchased I recommend marking them with a permanent marker on the tip end of their handle as to what type of paint you use them in and then store them in their covers to protect the hairs from getting bent out of place.

A good brush will probably cost you $20.00 USD and should be 2-1/2 to 3 inches wide depending on personal preference. A smaller brush is easier to get into tight spaces with, while a wider one needs to be reloaded with paint less often. You may also need a small 1/2 inch or maybe even an artist brush for some of those small spaces or if you want any type of graphics on your walls.

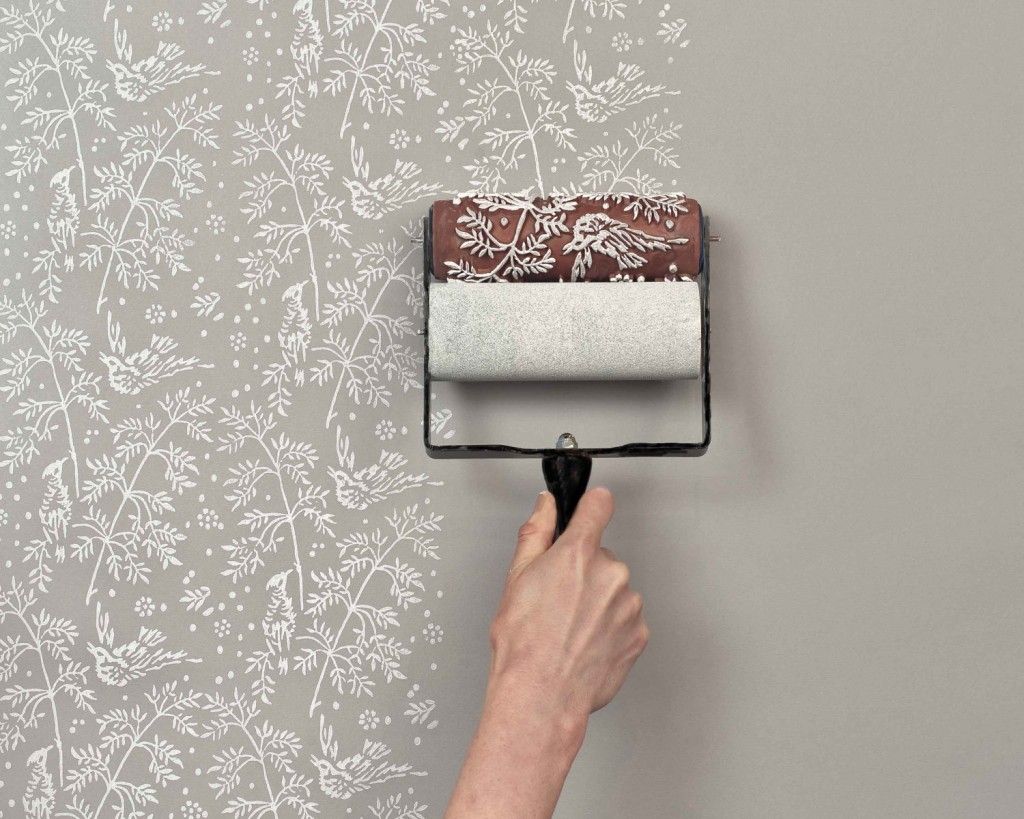
The standard roller is 9 inches wide and is used in wide open spaces. The type of roller cover you use will depend on the texture of the wall your using it on. A fine 1/8 inch or less nap cover is used on smooth walls while a 1/4 inch works good for knockdown texture and you may need a 1/2 or 3/4 inch nap for really rough surfaces. For oil painting I recommend a cheap cardboard core to the roller cover as you will want to throw it away on a daily basis. For latex painting I would look for a plastic core as it will wash out without falling apart and thus should last several weeks or even a month before you have to throw it away. Smaller 3 inch wide rollers are commonly used for painting some trim and large signs they are not recommended for cutting lines like in corners or against roofing or on signs, this is what a brush is for. Although on a rare occasion under right circumstances a professional can draw a fine line with a roller it is very tricky and not recommended for the amateur. There are special rollers made with an edge guard just for drawing lines that makes it easier for the amateur to do it. That guard requires more frequent cleaning to keep it working good, and once you get used to a brush for lining it will be the easiest way to do it unless you only have a little to do then the extra clean up of an extra piece of equipment might be more hassle than it is worth. Sprayers are only good for fences and large walls with little or no brick and very few windows, as everything around where you are spraying needs to be masked off and covered up and the extra masking and covering is often more work than if you just took the extra time to brush and roll it and with spraying you still have to brush your lines in. While sprayers have come down in price dramatically in the last twenty years they still cost enough that it is not worth while for the home owner who if he does the job right is only going to be painting once every twenty to thirty years. I personally have exterior and interior paint jobs that are twenty years old and with the advancements that have been made in the last twenty years it wouldn’t surprise me if ones I am doing today would last thirty years. The key to getting long durability out of a paint job, is to seal it up tight and do a good job of troubleshooting problems that may cause water to get behind the paint or be held on the paint. Examples of problems would be, plants that are planted too close to a house will touch and hold rain water against the paint for extended periods of time while leaky gutters or roofs allow water behind the paint, any of these will cause the paint to peal. If you have pealing paint you know you have another problem as paint won’t peal otherwise, it would just fade away.

Thank you for reading this article! If you have any further questions regarding home painting tools or anything else about this topic please contact us.
Chinese Antique Paintings

Chinese Antique Paintings

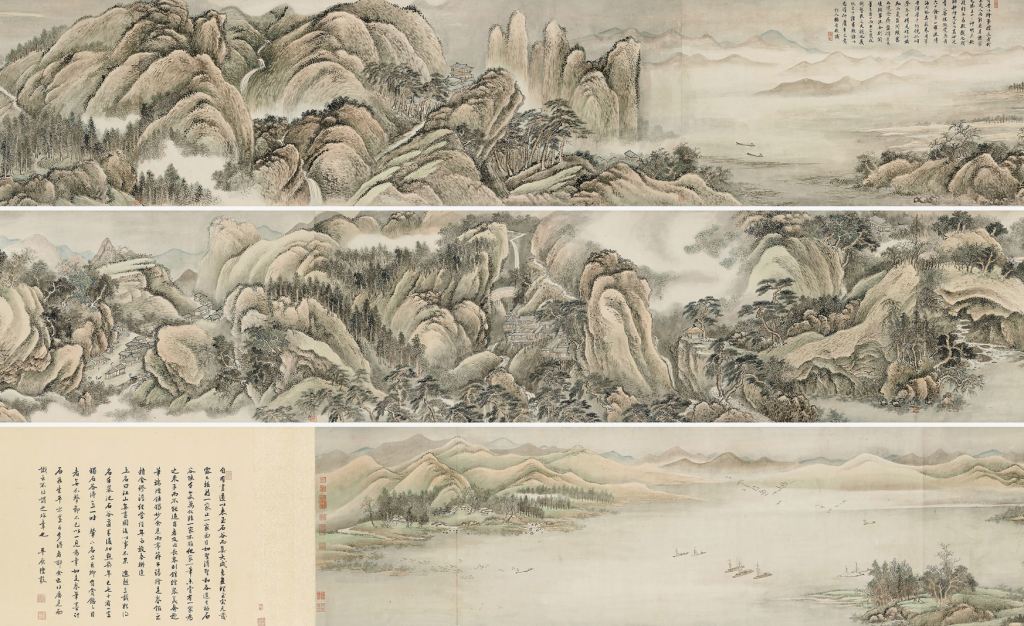
Decorating for your home. The images in Chinese antique paintings are traditionally both delicate, and bold. The landscapes are often quite hypnotic. These pieces can be a wonderful addition to a home, or a room in a home, that needs a harmonizing, peaceful element to bring it into balance.

Harmonizing with Chinese Antique Paintings

For instance, if your dining room is fairly formal, with heavy wooden furniture and heavy drapery, the lightness and delicacy of Chinese antique paintings can breathe new life into an otherwise stuffy environment. In contrast, if your daughter’s room is a modern mess, with laundry on the floor and celebrity posters covering the walls, something like a Chinese nature painting can add a touch of much-needed elegance. Your daughter will love it for its beauty and “grown up” appeal.

Chinese paintings also make wonderful gifts, because they appeal to most people, yet are totally unexpected. Most people really like Chinese paintings, but few people have them. A painting of lotus flowers on silk would be a splendid gift for your mother or grandmother. A painting of a prowling tiger on rice paper makes a fantastic gift for a boy’s birthday.

The best place to get these paintings, as well as angel art and golf art, is online. When you search for pictures online, you literally have thousands upon thousands of paintings at your disposal. When you shop in a traditional store, you’re lucky to find even 100 prints.

Thank you for reading this article! If you have any further questions about this topic please contact us.


How to Paint a Portrait

paint a portrait

You can paint a portrait. It is quite simple. You do not need any special skills. Although it would be easiest to paint with at least one hand, it is not necessary. There are painters who use a foot or a mouth. What you will need is desire and inspiration. The rest is a three-step process, so let’s get started!

1) Select your medium

As with any type of painting, you will need paint. There are many types of paint to choose from: oil. Acrylic, watercolor, tempera, aerosol spray, and finger are some examples. If you have no paint, that is okay. Colored liquids in various viscosities can be found all over your home or office: toothpaste, transmission fluid, pudding, gravy, fingernail polish. Be creative! You can combine ingredients to get the colors you want.

After you’ve acquired your paint, now you need something to paint on. Canvas is great, but it is rather expensive. Poster board, slate shingles, and plaster board are all very good to paint on. If you are painting wit toothpaste, you might as well paint right on the bathroom mirror. Just remember one thing: if you are going to paint on community property, ask permission.

2) Select your tools

There are many types of brushes available to artists: filberts, fans, rounds, flats. They come in many shapes and sizes. The bristles are either made of synthetic materials or animal hair. Some animals that have generously donated their precious hair to the noble cause of art include mink, camel, horse, and badger. Some artists in Java use the hair of the nearly-extinct wooly rhinoceros for brushes. These artists greatly cherish these exotic brushes and protect them ferociously. You should love your brushes, too. Take care of them and keep them clean. Animal hair brushes are expensive. You may want to try to make your own. If you have a dog, cat, or pet ferret, you can make very good brushes. Just snip one to three inches of fur, glue it to any old stick, and use a cut-up pot pie tin for a ferrule. It is that simple!

You don’t need brushes to paint. You can use rollers, feathers, turkey basters, and most power or hand tools from the garage. You can use your fingers. Some artists paint by poking their fingertips with a lance and paint with their own blood. This is not suggested, because your palette would be extremely limited.

3) Choose your subject

Sometimes the hardest thing for an artist is not how to paint, but what to paint. You should paint someone you like. It can be a friend, relative, or acquaintance. You can have your subject pose in person, or you can paint from a photograph. Maybe you could paint the portrait of a famous person: rock star, actress, athlete, war hero, living or dead, man or woman. It is up to you, so choose wisely.

You can paint your subjects realistically or abstractly. You can flatter them with portraits or you can dignify them. If your subject is posing in person, allow time for breaks.

Now that you know how to paint a portrait, go get started. It’s fun, easy, and relaxing. Painting portraits is good art. All you need is Inspiration!

Thank you for reading this article! If you have any further questions about this topic please contact us.


How to Paint a Doll’s Face: Faceup Tips for Pullip, Blythe, and Super Dollfie

Doll Painting

For doll enthusiasts, whether their obsession is a Pullip, a Blythe, or a Dollfie, there is no greater joy than customizing their doll. There’s also no greater pain than ruining a beautiful doll with stains or chemicals after the wrong care. For all that can go wrong with a faceup, however, so much can go right. Here are some tips for painting a beautiful customized doll.

Know The Medium

Each type of doll will require different care. The main types of doll that can be painted and customized are plastic dolls similar to Blythe and Pullip, vinyl dolls like Tyler Wentworth and Barbie, and resin dolls like the Volks Super Dollfie. Of all of these, Resin is the easiest to change, and vinyl is the easiest to paint, but stains easily. Aspiring doll faceup artists may want to practice on a few cheap ceramic dolls before tackling Tonner fashion dolls, or resin ball jointed dolls (BJDs).

The first step in painting a doll face is to remove the old face paint. In nearly any medium, this can be done with three items: an abrasive sponge, some acetone (resin only!), or some rubbing alcohol. When using any caustic material such as acetone, it may be a good idea to dilute it with water to avoid damaging the doll’s face. Dip a sponge into the alcohol or acetone and water solution, and use it to gently wipe away any current paint. Clean the doll head thoroughly after removing paint, as leaving chemicals on any material might damage it.

Painting the Doll

The next step in painting a doll is to seal the doll’s face. There are many substances to do this. Among doll hobbyists, Testor’s Dull Cote and the Japanese import Mister Super Clear are the most popular. These sealants not only protect the original material, but provide a texture that will hold paints and powders. Testor’s may not be suitable for Blythe or Pullip dolls, so always test a spare head first. Always seal a doll outdoors, in a well ventilated area. Hold the can at least a few feet away from the doll head, and lightly mist the head a few times until the area is coated with a transparent layer of sealant.

Many doll faceup artists begin with blushing. Blushing a doll adds a lifelike quality. There are several suitable methods of blushing. For those talented with an airbrush, airbrushed blushing is very natural in appearance. For beginners, however, chalk pastels, or oil free makeup will work. Makeup brushes, or natural fiber art brushes are best for blushing. Create the desired color by applying the brush to the chalk, or by shaving the pastels and mixing colors. Lightly dust the powder on the doll’s cheeks and nose.

Painting Doll Eyes and Lips

After the doll is blushed, another layer of sealant will protect the work so far. Generally, any mistakes with the paint can be removed with alcohol if applied quickly enough. The eyes and the lips are the next step. The level of detail here will depend on the artist’s personal preferences.

To paint a doll’s lips, first mix the preferred color of paint using acrylic paints. For a glossy look, mix paint with a thinner for some transparency. For a matte color, apply paint directly to the lips. Painting the eyes is done in the same way. First, apply a dark liner, and then allow it to dry. Eyeshadow can be done in either chalks or paints.

Eyelashes and eyebrows are often the hardest part of a doll’s face to paint. It’s always a good idea to have a piece of glass or plastic to practice the stroke and consistency of the paint before applying it to a doll. A liner brush with a long, fine tip is often the best tool for painting doll lashes and eyebrows. Paint the lower lashes first, with light strokes that taper at the ends.

The eyebrows can be difficult, partly because they should be symmetrical. This can be accomplished easily by designing the shape of one brow, and then using a stencil to paint it. Detail can be added as desired.

At this point, seal the doll’s face again with the sealant, and allow it to dry fully. Some artists use a clear acrylic gloss to add some sheen to the lips or eyelids. Do not seal after using a gloss, as this will dull the shine.

Thank you for reading this article! If you have any further questions about this topic please contact us.