Famous Paintings

famous paintings

Well-Known Paintings

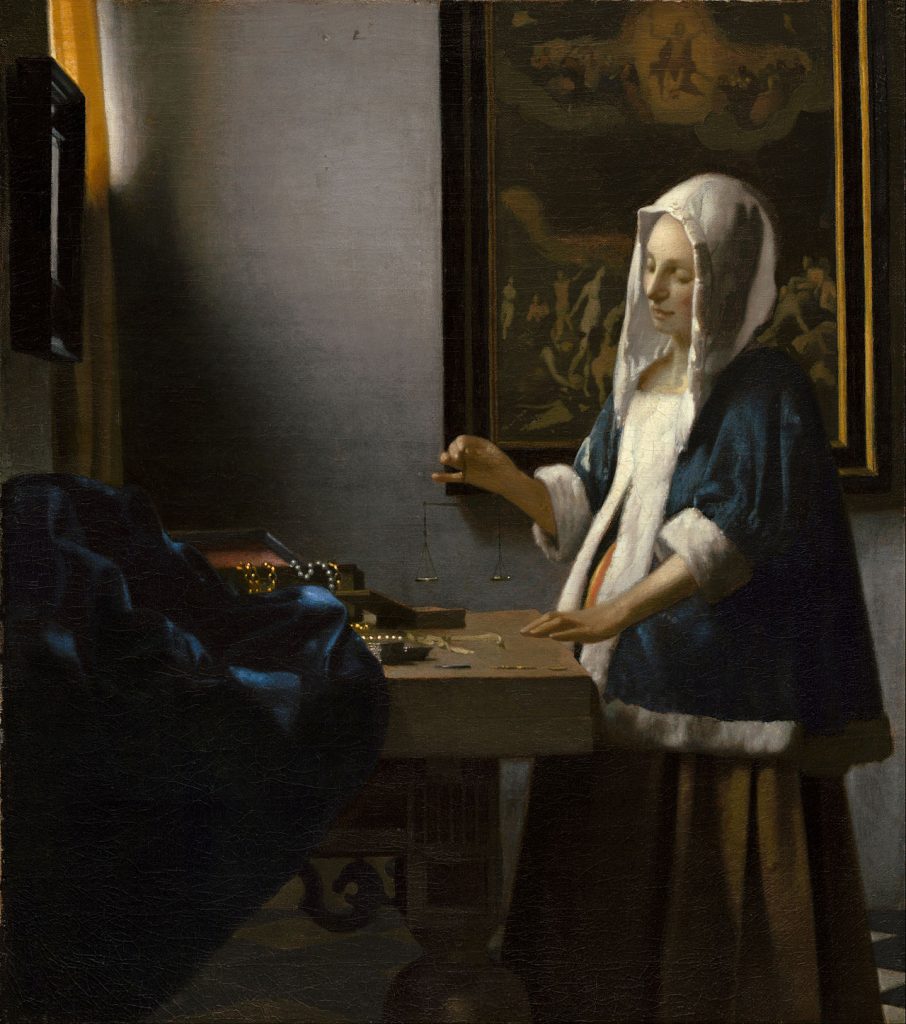
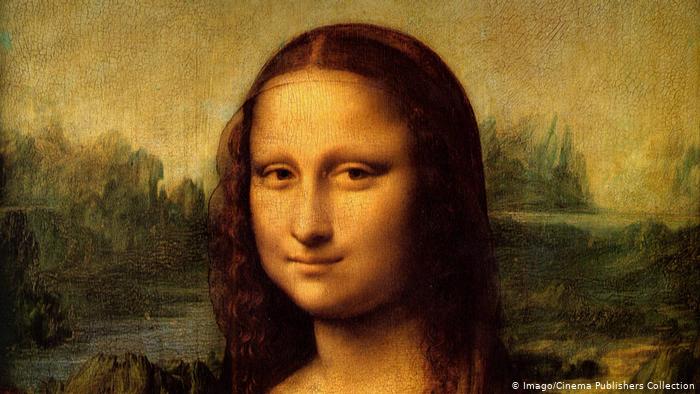
A certain number of famous paintings are recognized by almost everyone, even people who have had no formal exposure to art. Think of the Mona Lisa, for example. That face with the mysterious smile appears on coffee mugs, t-shirts and cocktail napkins. Nat King Cole sang of her, and New Yorker cartoonists riff on her. This portrait, and other famous paintings such as Van Gogh’s Starry Night or Monet’s Waterlilies, are universally known and loved.

That may not make them the best choice when you’re purchasing artwork for yourself. Before you decide on a piece of art that you’ve seen enough to feel familiar and comfortable with, browse through the online galleries to look at less well known works. You might even find an original painting that speaks to you, and which you won’t see everywhere you go.

Look Beyond Famous Paintings

When people buy artwork for their homes and offices, they tend to choose from the same handful of paintings all the time. One reason for this is that these famous paintings are always available, and it takes little effort to find them. Another may be that the buyer is insecure about his or her taste. Everyone knows that Waterlilies is a great painting, so it’s a safer choice than the one you may like better but which is unknown.

Buy What You Love

It’s my belief that you should buy what you love. You live with it, you look at it every day, and it should please you every time you see it. The problem, of course, is that when you fall in love with an obscure painting, it may be hard to find a reproduction. Fortunately, internet shopping makes it much more likely that you’ll be able to find exactly what you want.

Thank you for reading this article! If you have any further questions about this topic please contact us.


SketchUp Makes 3D Drawing and Modelling Easy For Beginners

SketchUp

Google Sketch-Up is a free 3D drawing program for creating polygon models quickly and easily. While lacking the sophisticated toolset and advanced features of the 3D software used by professional modelers and animators in both the gaming and film industries, such as those found in Autodesk Maya or Cinema 4D, SketchUp has a comparatively simple learning curve.

Google are masters of interface design, and Sketchup benefits from its uncluttered, easy to navigate layout. Unlike more complex 3D software, the Sketchup interface makes all of the programs intuitive modeling tools instantly accessible. Sketchup is comprehensively documented, and is further supported by an active and enthusiastic community and a variety of Google Sketch-Up tutorial videos.

Download Google Sketchup Free or Buy Sketchup Pro

Available for both the Mac and Windows, Google Sketch-Up comes in 2 editions. Sketchup itself is free, and can be downloaded from the Google Sketch-Up website. The free version of the software has certain limitations that are unlocked in the professional version of the program, Sketchup Pro, which retails for $495. The Pro version includes the following features not available in the free version of Google Sketch-Up:

  • Extended export capabilities, including saving out to the OBJ, FBX, 3DS and XSI formats.
  • Inclusion of LayOut, the 2D documentation design tool.
  • The ability to add attribute data to 3D models using Dynamic Components.
  • Use Solid Tools for additive and subtractive modeling.
  • Create 2D drawings and sketches from 3D geometry using Style Builder.

However, the 3D modeler using the personal edition of Sketchup for free can still make 3D models, export them to 3D formats such as KMZ and DAE and create limited scene-based animations. Free users can also upload their creations to the Google 3D warehouse to share with other Sketchup users, and make 3D buildings to upload to Google Earth.

Easy 3D Modeling in Free Sketchup Software

Making 3D models in Sketchup is a quick, intuitive process, that can be thought of as 3D drawing. Geometry in Sketchup is sketched out in 2D by drawing straight lines that, when linked together, form flat planes, such as triangles, squares and rectangles.

These 2D planes are then extruded into 3D using the Sketchup Push/Pull tool. This tool adds the third dimension to the sketch, creating 3D depth. This tool can also be used to cut holes through existing geometry. More complex extrusions can be achieved using the Follow-Me tool, which creates sweeps and lathes from 2D faces along a predetermined path sketched out by the 3D modeler.

The Paint Bucket tool, common to most 2D drawing applications, is used in Sketchup to add color to the flat faces of 3D models, or to add imported materials and textures to geometry. Textured 3D models can also benefit from the extra realism provided by the softwares Shadows Engine, which provides realistic real-time shadow effects to objects created in Sketchup.

Google Sketch-Up is Superior 3D Drawing Software

While the free version of Google Sketch-Up would be considered feature-light by most professional 3D digital artists, its simplicity is its strength. Learning all of the capabilities of market-leading 3D software creation tools such as Autodesk Maya, or the more advanced free 3D programs such as Blender or 3D DAZ Studio, can take weeks, months, or even years. In contrast, Sketchup enables a newcomer to 3D to be modeling effectively within minutes of downloading and installing the program.

The ease of use of the Sketchup modeling toolset can even be useful to the more experienced 3D artist, as rapid prototyping in this program is remarkably quick, with 3D geometry extruded from 2D sketches all but jumping off the screen. With the additional functionality offered by Google Sketch-Up Pro, it is little wonder that both the free and commercial versions of this superior 3D drawing software are so vastly popular, with millions of users worldwide.

We hope this article was inspiring for you! Please contact us if you have any further questions.

Teaching Young Children How to Paint

pallete of watercolors

With so many types of paint available, it may seem overwhelming when choosing what to buy for children. A boxed palette of watercolors can teach a child about mixing colors as well as how to take care of their arts and crafts supplies. Tempera paints offer more intense colors that work on paper as well as other surfaces

Materials for Young Painters Ages 2 to 12

Even a toddler can use a palette of watercolors. A palette of eight-to-ten colors is actually better for children than a palette twice that size because then the child has to mix colors to get lighter and darker colors than the kit offers. Children ages nine or ten and up might want to try using tube watercolors that require they squeeze a small amount of paint onto a plate or palette. Kids can try a variety of techniques with watercolors.

Tube paints are easier to mix and are good for children who like mixing colors and creating seventeen shades of green. Children eight and up may also enjoy exploring watercolor pencils since they can create a precision drawing with a pencil but soften the look with a brush and water.

Tempera paints are used directly as opposed to being mixed with water. Washable tempera paints are okay for painting on paper but if used on other surfaces and they get wet then the project is ruined. Use acrylics with children who possess the dexterity to manipulate a paintbrush and keep a neat work area.

Paintbrushes for Artwork

Purchase some inexpensive paintbrushes that are a better quality than the short, stiff-bristle brushes that come with watercolor palettes. Soft-bristled brushes require more control but they cover a surface (whether paper or wood) more smoothly.

Look for flat-edged brushes, pointed brushes, angled tip brushes, and even fan brushes. Quite often, sets of five brushes with different tips are sold in inexpensive sets. These brushes give more flexibility in creating different results and should be purchased for kids ages seven and up.

How to Use a Paintbrush with Watercolors

Dip the tip of the brush in the water and then in the paint. Rinse the brush thoroughly when switching colors. Change the rinse water frequently (which isn’t the same thing as providing a larger container of water). Have a rag or a stack of paper towels nearby to dab excess water off the brush. If using the same color, it isn’t necessary to dip the brush in the water between strokes.

At the end of a project, dip a clean paper towel over each cake of paint to absorb the excess water and mop up any dirty water. This way the paints will be clean for their next use. Show children how to clean up their paints at the end of a project. By age seven or eight, most children should be able to connect the act of cleaning up to the benefits of finding their supplies in the condition they wish to use them.

Thank you for reading this article! If you have any further questions about this topic please contact us.

Mona Lisa as Leonardo Painted Her: New Louvre-approved Images of Painting in CA Exhibition: An Overview

Mona Lisa

Mona Lisa by Italian High Renaissance master Leonardo da Vinci (1452-1519) is arguably the most recognizable image in the history of Western art. But did you know that the portrait originally had eyebrows? Mona Lisa Secrets Revealed (October 17-December 31, 2007), a new component of Da Vinci: An Exhibition of Genius (August 4-December 31, 2007) at San Francisco, California’s Metreon, reveals facts about the artist’s mysterious masterpiece heretofore unknown. Recent scientific studies sanctioned by France’s National Laboratory and Paris’ Musée du Louvre, the painting’s keeper, irrefutably confirm 25 discoveries about the composition’s original appearance.

Da Vinci: An Exhibition of Genius

This breathtaking interactive presentation, a decade in the making, surveys the wondrous accomplishments of painter, draftsman, sculptor, architect, engineer, scientist, anatomist and inventor Leonardo da Vinci. The intellectual interests of this quintessential polymath included: fauna and flora; mathematics and geometry; physics and mechanics; civil, military and hydraulic machinery; flight; musical instruments; and philosophy. Taken from designs in some 6000 intact pages from his personal codices (notebooks), 65 of 120 full-scale modern recreations of Leonardo’s inventions are on display, many fabricated by Rome’s Anthropos Association using 15th-century Italian techniques and materials. Among those on view are da Vinci’s glider, parachute, ball bearing and gear systems, early helicopter and military tank, bicycle, automobile and submarine.

Also exhibited are remarkable color reproductions of many of Leonardo’s famous works of art: the Litta Madonna (ca. 1481-97); anatomical drawings; and preparatory sketches for the Battle of Anghiari (ca. 1503). They’re joined by interactive presentations on the Last Supper (ca. 1492/94-98), Vitruvian Man (ca. 1490) and Equestrian Monument to Francesco Sforza (1493), explaining the artist’s experiments and achievements in painting, drawing and sculpture.

Mona Lisa Secrets Revealed

This recent installation illustrates the work of Pascal Cotte for the first time in the United States. The passionate French engineer invented the 240-megapixel Multi-spectral Imaging Camera to take multiple photographs of Mona Lisa using patented infrared technology and intense illumination. Over an almost three-hour period, Cotte photographed the portrait, his session resulting in 13 original images. Two years of technical analysis allowed Cotte to document precisely what pigments Leonardo actually used, where the artist made changes to his composition and where restoration efforts have occurred. This innovative kind of photography permits the viewer to see Mona Lisa as it originally appeared. The show features a high-definition color recreation of Cotte’s work alongside an accurate replica of how the painting appears today. Oversized copies of the portrait and its various sections, enabling one to examine the painting better, are also on display. Its original blue sky, vibrant mountains, green trees and Mona Lisa’s pinkish face are now visible to the human eye.

Some of the verifiable revelations about the painting’s composition are startling.

  • The painting was never cut to be framed.
  • The top of the sky, sitter’s eyes and lips were restored.
  • Mona Lisa had eyebrows.
  • Glazes or glacis (semi-transparent layers of paint) in Mona Lisa’s veil reveal the order in which Leonardo painted the portrait.
  • The artist changed the position of the left hand’s index and middle fingers.
  • Her dress had lace that has vanished over time.
  • A blanket, rising above the wrist of Mona Lisa’s left hand that holds it, covers both her knees and stomach.

Thank you for reading this article! If you have any further questions about this topic please contact us.

The psy-link between painting and photography

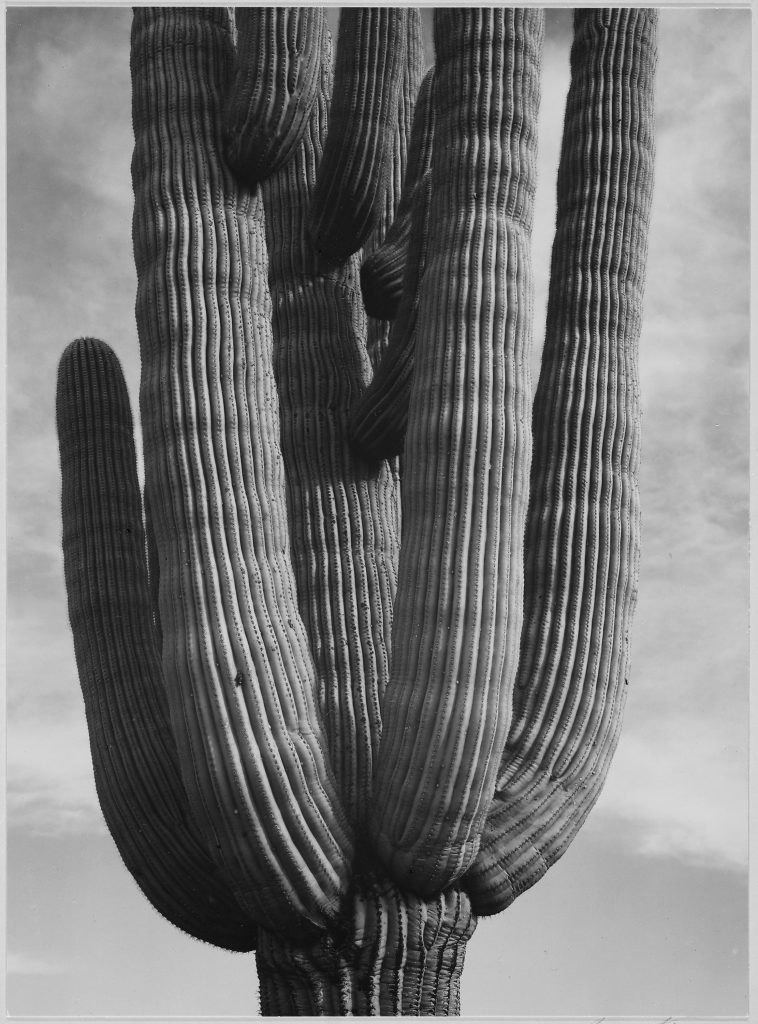
Today we are going to learn about The psy-link between painting and photography. When you think of American photographers who have made a difference, the names of Ansel
Adams
or Robert Mapplethorpe may come to mind. But the first American to spur change by
tripping a shutter was Alfred Stieglitz, who also ran a painting gallery. He was the first to define
photography as a fine art. Stieglitz mentored Adams. He gave him the idea of making photography
the “equivalent” of painting. And Robert Mapplethorpe, whose lens art is celebrated for its poetry,
began his career as a student of painting.

The psy-link between painting and photography
“Projeto mural” – photograph by Ansel Adams

And just as photography learned its art lessons from painting, the reverse ultimately took place with
the advent of photo-real painting, also known as super-realism. The photo-realist movement in
painting also showed up in sculpture and Tampa Museum offers examples from the Martin Z.
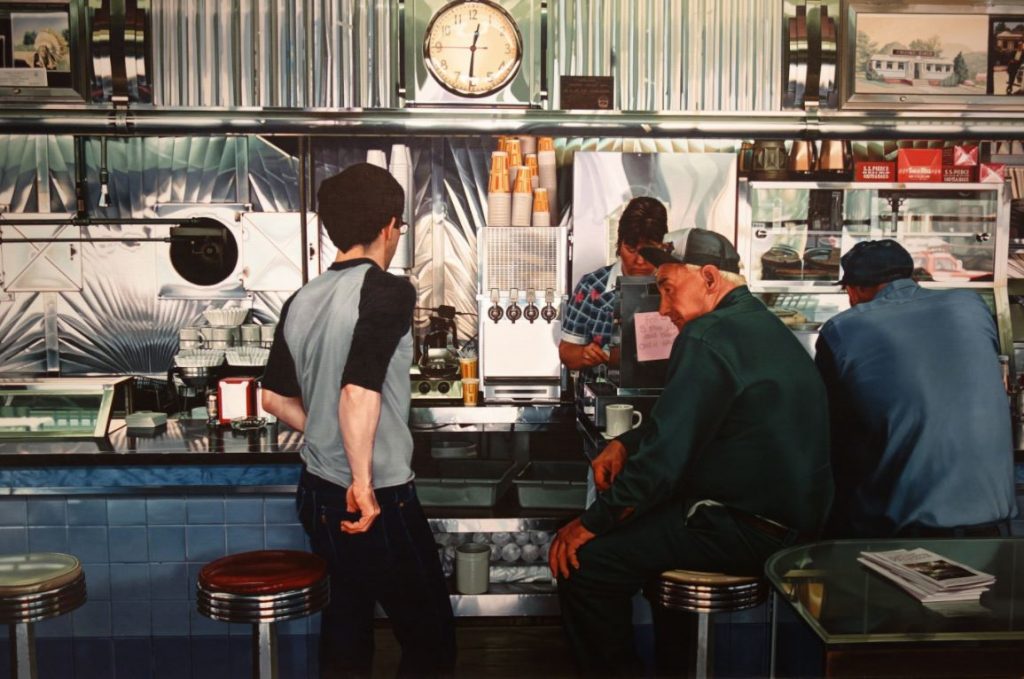
Margulies Collection, as well as its own example in paint: Ralph Goings’ “Collin’s Diner.”

Collin’s Diner outside view

If you think super-realist painting is just naturalism in cinematic Technicolor, you should see
“Collins Diner.” His is not the stuff of representational imagery. It’s about what a camera sees.
Paintings in this case take on the look of good quality color slides, often made section by section
and sometimes upside down, the aim being the look of reproductions, not interpretation.

Ralph Goings - inside Collin's Diner
Ralph Goings – inside Collin’s Diner

In Goings’ 48-by-68-inch oil painting, there’s more to the eatery than meets the eye. Even with
20/20 acuity, human sight isn’t designed to record the amount of detail that Goings records.

So you’re looking at something beyond realism. Intensity, in the glare of polished diner chrome, is
everywhere: from the precise, razor edge of the tapering second hand on the concave crystal casing
of the diner wall clock to the discernible thickness of a diner patron’s eyeglasses.

With these details, the painting seems to reflect urban life in its seemingly endless facets of
scrubbed metal and glass – monuments to industrial hygiene and sterility. Like a still life, “Collins
Diner” also enumerates the furnishings of our time: paper cups, fast food, swivel stools and the
inevitable clock by which we live.

Signs of the human condition are no match for the overriding crispness of high gloss. A snapshot of
newlyweds on a shelf cannot minimize the bland, neutral anonymity of the whitewashed,
untouched-by-human-hands environment. Man looks like an intruder in his own man-made space. It
is as if in exchange for a high-tech world, he traded off his leading role for a bit part.

Out of this painter’s extraordinary exactness, then, comes social commentary, not only reporting.
Just as omission is a form of editorializing, an opinion also is expressed when nothing is ignored
and everything is emphasized.

And therein lays both Goings’ appeal and his significance. If focus is so sharply defined that
everything in sight looks magnified and underlined as if in red, what you have is a kind of
expressionism – not realism. When Goings flawlessly projects what a camera faultlessly sees, rather
than what the human eye perceives – peripheral blur and all; when art looks like a high-quality color
slide rather than pigments brushed on by hand, he only reiterates the message: Next to precision and
spic-and-span shiny smoothness, people look grimy and beat.

We at Paintings Studio hope you enjoyed reading the article about the psy-link between painting and photography. Feel free to contact us if you have any further questions.
Water Dreaming (Lungkata Tjungurrayi)

We at Paintings Studio today are pleased to present to you information about Lungkata Tjungurrayi, or in its full name “Shorty Lungkata Tjungurrayi”. is a Pintupi man born at Walukuritji (c. 1920 – 1987) south of Lake Macdonald, and is best known as an artist, and important member with Papunya Tula Artists.

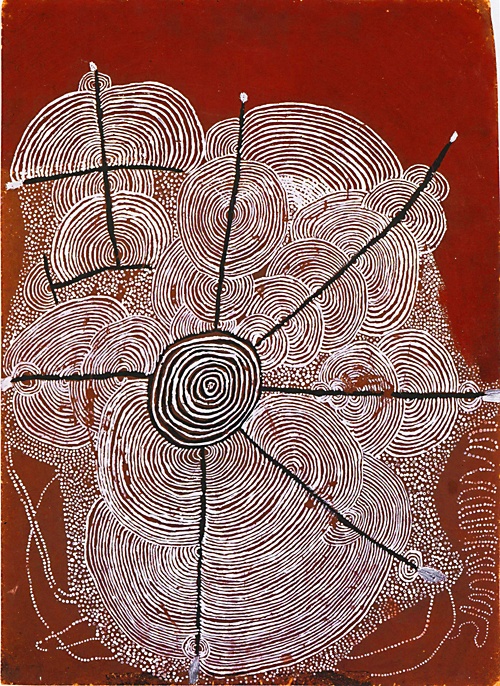
Children’s Water Dreaming 1972, 62 x 44 cm, Shorty Lungkarta Tjungurrayi

Aborigines used Australia’s wealth in ochre colors (iron oxides) to paint their mythologies on sand, cut bark of stringybark tree and their bodies. In 1972, acrylic paints and masonite boards were made available to a few Aboriginal men congregating in a ‘painting club’. While the usage of contemporary materials served to adulterate, it also helped to popularize Australian Aboriginal art.

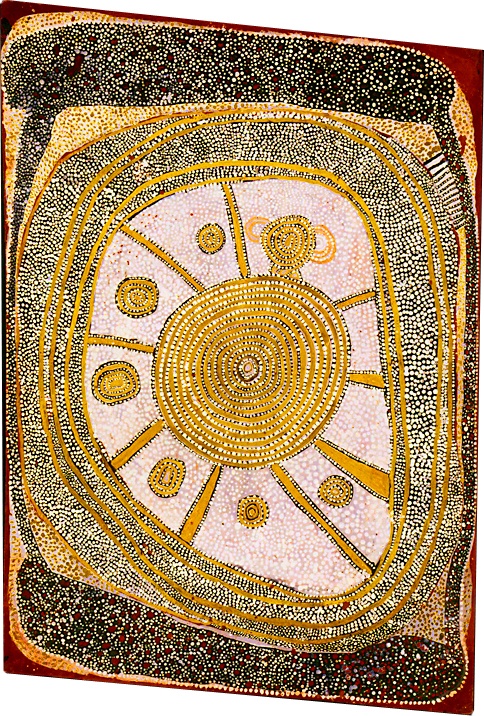
Classic Pintupi Water Dreaming 1972, 62 x 42 cm, Shorty Lungkarta Tjungurrayi

Last year, early ‘Papunya’ boards were shown at the Grey Art Gallery, NYU. Paintings from the exhibition are reproduced in a book icons of the desert that also provides anthropological information on Aboriginal art and artists.

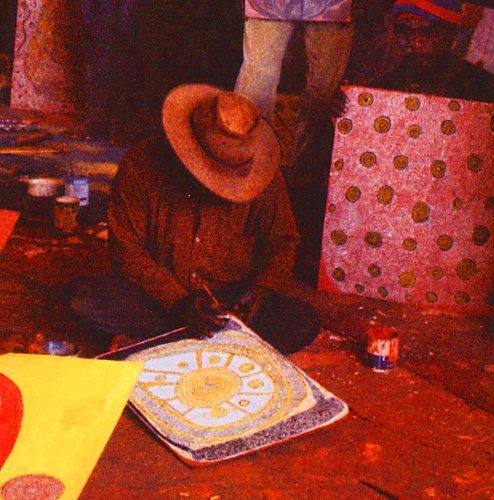
Shorty Lungkarta Tjungurrayi, detail of a group portrait, Men’s painting room, Papunya, 1972

Shorty Lungkarta Tjungurrayi, then 52 yr old, was a member of the 1972 painting club. In his ‘Water Dreamings’, he painted the distant region of his youth. Water Dreamings can be openly shown unlike secret men mythologies that were displayed during the NYC exhibition in a separate room. At the entrance, a message warned Aboriginal women not to enter there. These secret boards are reproduced in a separate, removable folder within icons of the desert. (Women, too, possess secret mythologies).

Researching classical pigments, a British journalist visited Australia on her quest for ochre. In her book COLOR, a Natural History of the Palette she writes about contemporary Australian Aboriginal painters, many of whom are women. She also visited the schoolteacher who created the 1972 painting club and thereby provided the impetus for popularizing Australian Aboriginal art.

An explanation of Dreaming is given in COLOR, a Natural History of the Palette:

Traditional Aboriginal life only makes sense in the context of the time when Ancestors first arose out of the original mud or sea or sky and brought the first sunrise with them. In English it is articulated as the “Dreaming” or “Dreamtime” – a dream in the sense that it is not set in the past, but a kind of parallel present universe, rather like the one that we operate in while we are asleep. In Aboriginal lore, the Dreaming is the reason for everything that has ever existed and ever will exist. And its stories are told in layers, depending on how ready, or authorized, the listener is to understand them. It is said that your personal Dreaming depends on where your mother was when she first felt you in the womb. The Ancestors who live in that place have given you “anima” – they have animated you – and when you grow up their stories and songs will be in your trust, and you in theirs.

Religious Oil paintings

religious oil paintings

Religious oil paintings bring your home to life! If you have lived in your home for many years, chances are you might be a little bored with your surroundings. Before repainting or recarpeting, consider purchasing new religious oil paintings. Christian paintings can dramatically change the look and feel of any room.

For instance, you might want to hang a large, historical piece by Arnold Friberg in a formal dining room. This will lend an air of dignity and grace to the room. Works by Larry Dyke can quickly become the centerpiece of any office. Your children’s bedrooms will benefit from the cheerful, touching beauty of religious oil paintings of angels and cherubs.

Religious Oil Paintings Online

The best place to find religious oil paintings and other Christian artworks is online. The Internet is a great source of religious art, with amazing variety. You can easily find signed and numbered prints by all of today’s top artists. You can even commission an artist to make a portrait of your family!

Signed and numbered prints are excellent investments. The more famous the artist, and the smaller the printing, the better your odds of having the painting appreciate in value. This is why signed and numbered prints are ideal baptism gifts. Their value increases over time.

Thank you for reading this article! If you have any further questions about this topic please contact us.

Still Life: The Basics of Drawing a Pencil Still Life for beginners

still life

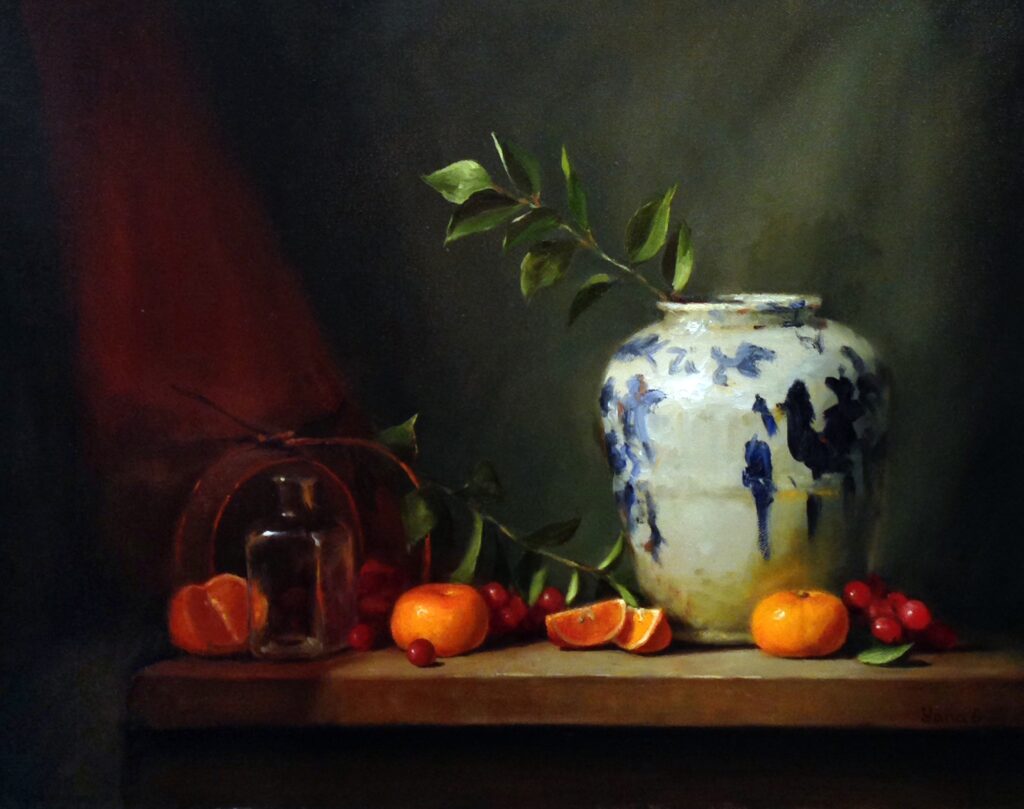
Drawing is an artistic skill that can be improved by combining natural talent with diligent practice. A simple still life is a good place to start in learning to create attractive pencil drawings. Beginner artists may consider these tips for drawing a still life.

Still Life Drawing Supplies

Begin with the necessities for drawing. You will need a sketching paper or a sketchpad, pencils, an eraser, a pencil sharpener and perhaps a blending tool. A blending tool is a pencil-shaped device made of paper, either end of which can be used to blend pencil or pencil crayons. Once used, the ends can be sanded to remove excess pencil lead. You may appreciate the look of charcoal or conté, but it is often easier to learn with a pencil.

Consider sketching pencils. An “HB” pencil is a regular pencil – students will use in it school for math class. A number alongside “H” on a pencil indicates the hardness of the lead. The higher the number, the lighter the pencil marks will be. A number alongside “B” on a pencil indicates the softness of the lead, and how dark the pencil marks would be. The higher the number, the darker the pencil marks. Therefore “HB” is in the middle of the spectrum. These different pencils help with shading in sophisticated pencil drawings.

A beginner artist can learn well with a simple HB pencil. However, while practising, you may wish to experiment with different sketching pencils as well.

Drawings Shapes and Shading in Pencil Sketches

Drawing is a skill that takes some practice to do well. For learning, begin with something simple, like an apple. Look at the apple before you; noticed its curves. Apples are not perfectly round, as much as some look like they are. The apple may have a round middle, but inevitably dips in on the top, where the stem is. Taking note of this shape, begin drawing with the outline. Drawing a still life is translating to the page what you see. To best form the outline, be sure to observe the apple often, comparing it to the drawing. Draw the outline with a light hand, as it will be easier to erase mistakes.

Pencil sketching looks at shapes, shadows and colour contrasts rather than colours and shades. Consider the shadows as well as differences in shades of colour on the apple. For example, a mostly red apple may have a spot of yellow on it as well. As a lighter colour, it requires lighter shading.

When shading, start with the outline and work your way inward. When using a simple HB pencil, shade lightly and go over the same area until the shadows are as dark as desired. This keeps mistakes easy to erase if need be. If you do not have a blending tool, shading can be smoothed lightly with a fingertip. As with the outline, compare the drawing to the apple. Does the shading gradually become lighter or darker, as it does on the apple? Have you left a spot of white where a light may be reflecting off the apple?

A good trick for creating such a spot of light is to shade the area lightly and erase it in whatever shape the light is in. In the case of the apple, it would likely be an upside-down tear drop shape that curves slightly. Moreover, rubbing the shading lightly with a blending tool helps to better even out the pencil lines and keeps fingers clean.

Beginner artists may try these tips for pencil sketching a still life. Remember that drawing is a skill that can be learned with an artistic eye and plenty of practice. If the first still life drawing is unsatisfactory, simply try again.

Thank you for reading this article! If you have any further questions aout this topic please contact us.

A Guide to Acrylic Paint Brushes

paint brush

A Guide to the Acrylic Paint Brush

While painting with acrylic, there are many different brushes that can give you your desired effect. Many beginner artists wonder what each paint brush does and what they are used for. This article will explain some of the key brushes when painting with acrylic.

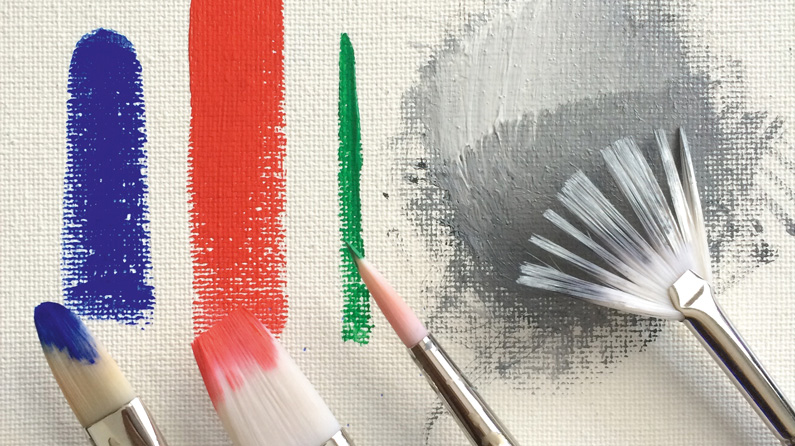
Filbert – This paint brush has a flat profile with a point that is slightly rounded. When using it on its side, it will give a thin line. When used flat, the filbert gives a broad brush stroke. It is used for softening edges and giving a variety of strokes.

Fan Brush – The fan brush has a flat profile and spreads out like a fan. It is used for blending from color to color. Also, I like to use it for creating fur on animals. I dip the tip of my brush into my paint and very lightly and smoothly make a stroke. There are different sizes depending on what you are trying to create.

Round – The more you press down the wider this brush becomes. It is thin at the top coming to a point. It can create a variety of thin and thick lines depending on the pressure applied to the brush. It is easier to use with thinned paint.

Pointed Round – This brush is thinner than the round paint brush. It too has a pointed tip. It is best used for small detailed areas.

Detail Round – The detail round has shorter hairs than the round and pointed round. It is very small and is best used for areas that have a lot of detail. I use this brush a lot if I am painting words, eyelashes, cracks, and a lot of other objects.

Bright – The bright paint brush has a flat profile with short hairs. The hairs curve inwards as you get closer to the tip of the brush. It is good when painting with thick, heavy paint.

Flat – Of course, this brush has a flat profile. The tip is very squarish and has medium sized hairs. I use this brush a lot for fine lines, and edges. The square tip makes it easy to use when trying to get straight lines.

Angular – The angular paint brush also has a flat profile with long hairs starting at one side and getting shorter at the other side. The hairs end at an angle. This brush is great when try to fill in corners because of its angle. It can be used when trying to get into small areas.

The more you experiment with these brushes, the better you will become at using them. My advice is to get a piece of paper and try all the different techniques with each brush. Learning the techniques will help you in painting a finished piece.


Thank you for reading this article! If you have any further questions about this topic please contact us.


How to Paint a Mural for Your Child’s Bedroom

child's bedroom mural

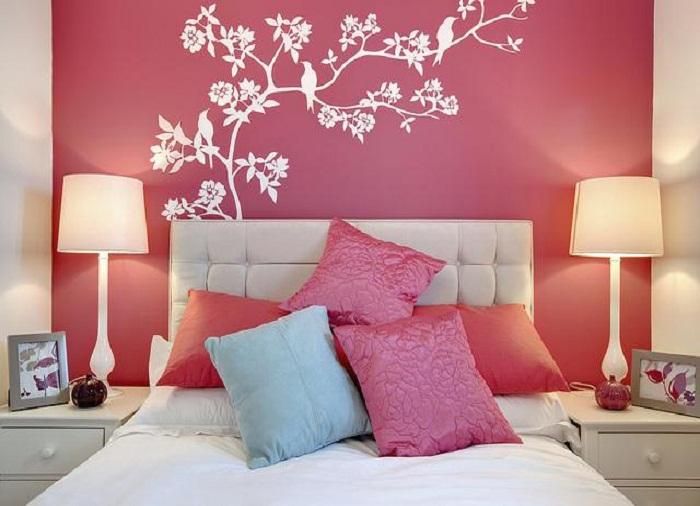
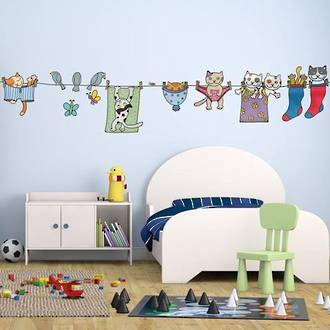
Painting a mural for your child’s bedroom can create a unique environment for your son or daughter. The choices for mural topics are endless. My wife and I have painted murals in two bedrooms in our house. If you would like to do the same, please consider the following tips based on our experience.

Tip1: Choose a Theme for the Mural

Themes can range from bumblebees to trains to Disney Princesses. The sky is the limit! However, when painting a mural for your child’s bedroom, consider how long the child will enjoy the theme. Your five-year-old daughter may love Little Einsteins now, but will she two years from now?

When our daughter was born, we painted a jungle theme for her bedroom, complete with a pink elephant and a yellow giraffe on the walls. Our daughter is almost four and still loves her bedroom. We just finished another mural of Mulan in the spare bedroom because we are expecting another daughter in three months.

Tip 2: Get your Equipment

Painting a mural for your child’s bedroom is so much easier when you have access to an overhead projector. Using an overhead projector allows you to draw your mural on a smaller scale, like 8 ½ inches by 11 inches, which is much easier than drawing on a wall free hand. Also, using an overhead projector allows you to just print a template off the internet, if you find something you like.

I am a fairly artistic individual, but when painting a mural in my daughter’s bedroom, it still would have been difficult for me to get the proportions correct when drawing large figures on the walls. Using an overheard projector allows you to get these proportions correct and also allows you to appropriately space out figures, trees, and other objects on the walls.

Tip 3: Trace in Pencil

Yes, it is quicker to just start painting, but my tip is to trace in pencil first. This is time consuming, but so is painting a mural for your child’s bedroom in the first place. If you wanted to save time, you would have just bought some border and some large wall clings and called it a day instead of spending hours working on a mural.

Tip 4: Pick your Paint

Many different paints can work when painting a mural for your child’s bedroom. Much of the decision boils down to personal preference. We have used both Dutch Boy Dirt Fighter acrylic latex paint and Apple Barrel acrylic paint. Both paints applied well, but they required two coats, as expected. We used a variety of brushes, including traditional brushes, rollers and sponge brushes. My tip is to buy a variety pack, especially if your mural includes very intricate details.

Tip 5: Outline Correctly

Unless you are going for a bold, comic-book type mural (think Superman bashing through a wall), do not outline the characters and details in black. The outlines will be too harsh. For a softer, more organic feel, mix the color with a little bit of black.

In our daughter’s bedroom, the pink elephant is outlined in a darker shade of pink. The yellow and orange giraffe is outlined in a dark orange. This technique works with all but the darkest colors. With very dark greens, browns and blues, you may need to use black to outline the details.

I hope you consider these tips when painting a mural for your child’s bedroom. Your child will appreciate a special bedroom of her very own!

Thank you for reading this article! If you have any further questions about this topic please contact us.