Quick and Easy Crafts: Painting a Rainy Day T-Shirt

quick and easy crafts

Quick and easy crafts for rainy days that are a great time to do crafts with the kids. When my son was just about 6 years old, he was extra bored one day, and I just happened to be extra tired. He really wanted something to do, but I really wanted to something quick and easy and to keep him busy. His little face really wanted something interesting to do, and I wanted to make him happy. We decided on designing him a new shirt, one that he would paint himself.

This shirt was going to be his masterpiece. He planned it and was very excited to begin. Here are the supplies we used:

1 white t-shirt
Acrylic paints, assorted colors
Fabric medium
Stiff paintbrushes
Cardboard
Paper towels
Water cup
Paper plate
Newspapers

This is a super easy craft for any experience level and age, as long as properly supervised.

Since it was raining outside, and my kitchen table was already full of quick and easy crafts, we decided on using my newly mopped kitchen floor. My young son was ecstatic that he got to paint my kitchen floor! I reminded him to keep the paint on the shirt not my floor.

To prepare, he spread two layers of newspapers on the floor. While he did that, I placed a large piece of cardboard inside his white shirt. The shirt needed to be stretched, but not overly stretched to cause the cardboard to bend.

After that, I took out my vast collection of acrylic paints and let him pick five colors. He was very happy and picked some metallic colors and even a bright pumpkin orange. I taught him how to gently squirt the paint onto the paper plate and made sure he had the basics of dab-dab-dab after he rinsed his brush in the water cup. I followed the directions on the fabric medium and properly mixed it with each color on the paper plate. After putting on his painting smock, he was ready to paint.

I walked a safe distance away and let him plan his own design. It was fun to watch. He designed a very nice train and insisted that certain areas be the metallic colors. He used the gold paint to make the smoke/steam coming out of the stack. He wrote “ENGINE” below his masterpiece so everyone would know what it was. He was very proud.

I still have this shirt, even though he outgrew it years ago. At the time, he slept in his homemade shirt and proudly showed it off to everyone he could. This was a great way to introduce simple crafting to my young son and, to this day, he asks me if he can make another one. He is nine, almost ten, and now wants to teach his little sister how to make her own shirt.

Thank you for reading this article! If you have any further questions about this topic please contact us.

Paintbrushes, Rollers, or Painting Pads?

paintbrushes, rollers and painting pads

The 411 on Paintbrushes Rollers and Painting Pads

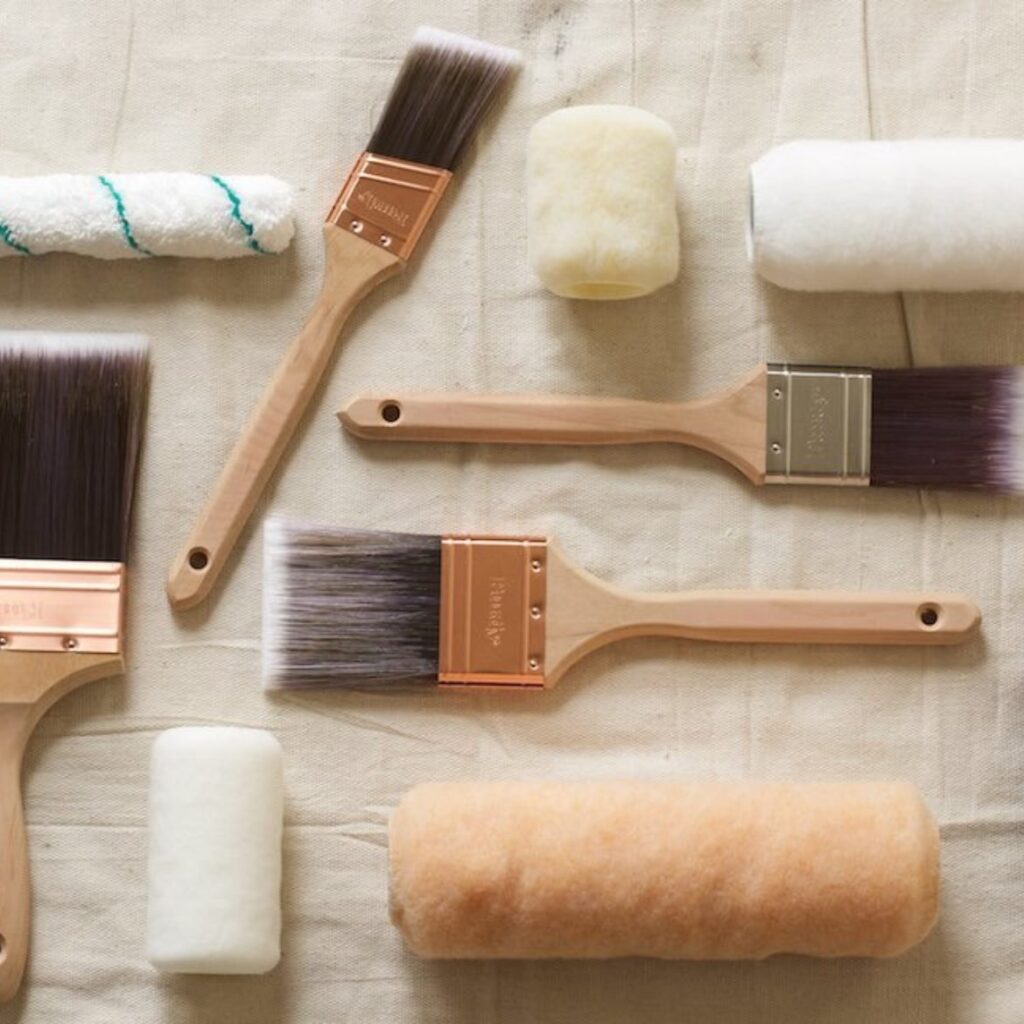
When that decorating bug bites and you decide to start with a fresh coat of paint, the painting tools you choose can make a big difference in the outcome of your work. This definitely includes with paintbrushes rollers and painting pads you choose. Buy the best quality painting tools you can afford. Those cheap brushes will leave streaks and loose bristles all over your painted surface!

Old-fashioned natural bristle paint brushes are perfect for oil-based paints. Natural bristles do not work well in water-based or latex paints. Natural bristles absorb water from the paint and become limp; in oil-based paint they retain the firmness necessary for the paint to flow correctly from the tips of the bristles.

Synthetic bristles are tapered and individually split on the painting ends so they can hold more paint and spread it smoothly. Hold a cheap synthetic paintbrush next to an expensive one, and the difference will be astounding. The expensive brush will have softer bristles, and more of them, tightly packed into the ferrule. The ferrule itself will probably be more tightly crimped. The bristle tips of an expensive brush will feel soft and hair-like; they will be split and feathered to provide more paint-capturing ability and smoother delivery of the paint onto the surface. You can use synthetic bristle paint brushes with any type of paint, so buying a few good brushes and taking care of them is a wise investment. Note: Keep brushes you use for oil-based and water-based paints separate. Residues from oil-based paint or cleaning solvents do not mix with water-based paint.

Painting pads are another choice. Pads are thin synthetic foam with short, hair-like bristles to spread paint evenly over flat surfaces. The pad fits onto a metal or plastic frame with a handle, so you can buy one handle assembly and replace pads as often as you need to. The pads are washable, but after several hours of use you will probably want to opt for a new one. Painting pads give a very smooth finish. Some pads have small “wheels” along the edge that act as guides along woodwork or at the ceiling/wall joint, and there are even pads in an “L” shape made specifically for painting inside corners.

Today’s paint rollers are wonderfully superior to the cardboard-core rollers of years ago. The newer plastic core rollers hold the nap firmly, and they give a sturdy rolling surface that doesn’t become limp. Plastic core rollers are washable and reusable, too. Water-based paints can be cleaned out of the nap with a little warm water and dishwashing liquid. Select the nap of your roller according to the desired finish on your wall. Short, smooth nap gives you smooth, even paint application. Thick nap was designed to cover textured walls/ceilings.

If you need to take a break from painting for a couple of days, place any of these tools in a plastic bag without cleaning off the paint, seal the bag, and put it in the freezer. You can store the brushes or tools in the freezer for a week or two. Simply thaw the brush (still in the sealed bag) at room temperature for at least an hour when you are ready to paint again. You’ll know when your brush or tool is ready to use when it becomes soft and flexible again. If you see frosty moisture crystals inside the bag, it may indicate an air leak, so check the condition of the painting tool before using it. If any of the paint dried while the tool was in freezer storage, you’ll want to clean or replace the tool.

Sources:
Personal experience finding and trying my own paint brushes rollers and painting pads
Home Depot paint department

Thank you for reading this article! If you have any further questions about this topic please contact us.

How to Encourage Reluctant Art Students to Paint: Helping Learners Find Confidence and Self Expression With Painting

painting

Painting with Confidence

The initial assessment does not always pick up on every learner’s needs until the practical exercises ensue. As is the case with painting, the teacher might find herself concerned over a student who freezes at the thought of depositing paint to paper. When this happens, identifying the cause will help find a solution.

Overcome the Fear of Painting

There are many causes of reluctance to painting. These might be:

  • Beginner’s nerves, if this if the first time
  • Fear of making mistakes
  • Inability to tap into the inner child that enjoys exploration
  • Low self-esteem

How to Encourage the Inner Artist

Sensitivity must be applied. In certain situations, the student might be willing to discuss the issues that might be causing this mental block. An overbearing inner critic or anxiety over domestic or financial issues might be hampering freedom of expression. Singling out the student in any way must be avoided. However, assuring the student that this affliction is common might put him at ease. In order to develop as a visual artist, the student must be encouraged to apply lenience whilst exploring an unfamiliar medium such as oils or acrylics. Happy accidents are part of learning and is the only way to move forward.

Completing a Painting in Lesson

The following teaching strategies might be applied when encouraging a reluctant art student to complete a painting.

  • Agree on an individual learning plan with the learner that sets out clear and precise goals
  • Ensure the goals are small and manageable
  • Ensure the goals provide opportunities for the learner to experience success
  • Use cheap materials during the experimentation

Art Resources for the Special Needs Learner

  • Set of acrylic paints
  • Bristle brushes
  • Sponges and rags
  • Thick paper
  • A china plate for a palette
  • Stencils of simple shapes such as circles and stars

Examples of small goals might be:

  1. To paint exploratory marks over the page via different types of brushes and implements
  2. To draw around the stencils at random places on the painting surface and then to fill in the stencil shape with a solid colour
  3. To apply a contrasting solid colour into a neighbouring stencil shape

Further goals might be:

  1. To lighten a colour by adding small increments of white
  2. To darken a colour by adding small increments of a complimentary colour
  3. Mixing colour combinations to see how they behave

Opportunities for praise and achievement are essential for learning according to G. Gibbs in Learning by Doing [FEU, 1988]. The application of paint onto the painting surface is what defines art and is a great first step for the bashful student. The next step might be to emulate the great Expressionists or Abstract artists, such as Picasso, Miro or Klee in order to further explore paint.

Encouraging the Hesitant Art Student

Completing a painting can be a daunting prospect for some learners. The teacher must treat this problem sensitively. Appropriate use of encouragement and praise will help overcome this mental block, but agreeing an individual learning plan that sets out specific, achievable and clear goals is likely to encourage the student to take their first steps into exploring paint. Ensuring that learners experience success is likely to build their confidence in the future.

Thank you for reading this article! If you have any further questions about this topic please contact us.

Five Safety Tips for Using Paint Thinner

paint safety tips

It’s important to use safety tips when using paint thinner. As the do it yourself season is always ongoing there are many people who will be touching up their homes; both inside and out. of particular interest over the summer months is getting that big paint job done. Maybe you’re hoping to sell your home in the fall and you want to put a new coat of paint on your exterior; maybe your family’s expecting and you want to touch up the baby’s room in shades of blue or pink. Even if it’s none of those if you’re using paint, chances are you’re using paint thinner. Consider these five simple safety tips put together with assistance from doityourself.com when delving into paint thinner.

Safety Tips: Ventilation: Perhaps one of the most important things for paint thinner users to remember is to keep the space you’re using paints and thinners in well ventilated. That is more than just blowing cold air in via air conditioning; you need to have windows and doors open and it would help to have an industrial sized fan blowing out a window or door to keep the fresh air in and the stale air out.

Safety Tips: Protective Gear: Make sure you’re wearing the right type of protective gear for paint thinner use. That is, goggles to cover your eyes, a mask to cover your face, and don’t wear your party dress in to paint; make sure the clothes you’re wearing is expendable.

Safety Tips: Acidic Combustion: It is possible for paint thinner to react with acids or acidic materials in a very hazardous way. For that reason it’s important to keep acids and thinner away from each other at all times.

Safety Tips: Safety First: When you’re not using your paint thinner, make sure to keep all lids tightly closed. It is a noxious chemical and should also never be inhaled or ingested so also wash your hands when you’ve been using paint thinner and never eat while using paint thinner. Thinner also ‘hangs out’ so don’t use paint thinner as a substitute cleaner to clean floors or tables; that’s a big no-no. Lastly, don’t smoke around paint thinner.

Safety Tips: First Aid: Make sure that if you do ingest or become otherwise ill from paint thinner, that you don’t delay in getting assistance. You’d hate to be light headed one minute and pass out the next.

Do it yourself projects are some one of the most rewarding experiences. However working with paints and paint thinners is no laughing matter. Follow these simple steps and you’ll be safe and productive in your uses of paints and paint thinner.

Thank you for reading this article! If you have any further questions about this topic please contact us.

How to Paint on Feathers

Feather Painting

My feather-collecting daughter was enchanted when we discovered the beautiful painted feathers by Northwest wildlife artist Julie Thompson. Since then, I’ve kept my eye out for feather painting tips and tutorials. Here’s what I have found.

What You’ll Need

  1. Feathers (thick and wide)
  2. Fixative spray (to hold feather together)
  3. Waxy paint marker (for outlining)
  4. Blue painter’s tape or artist tape (to hold the feather down)
  5. Acrylic paint (and water to dilute if necessary)
  6. Paintbrushes
  7. Spray-on gloss (for finishing and preserving the painting)

Recommended feathers: Turkey, peacock, pheasant, and quail. All are thick and wide.

A little inspiration: On Julie Thompson’s Featherlady Studio website, you can watch a slideshow of her famous painted feathers.

A History

Vanya the Faerie Lady of Sacred Earth Sacred Art presents “Arteplumaria” – Feather Painting Through the Ages,” an article about the art and practice of feather embellishment around the world.

Tutorials and Resources

  • Novawuff’s Tutorial on Deviant Art is a little rough-around-the-edges, but it gives some helpful tips such as prepping the feathers with fixative spray, painting with water-diluted acrylic paint, and finishing with a spray-on gloss.
  • Caroline Travisano created a series of eHow video tutorials beginning with Choosing Feathers for Acrylic Painting. Further videos demonstrate laying out the painting, choosing brushes, and finishing the painted feather. View the whole series: How to Paint Feathers with Acrylics.
  • In her How to Paint Feathers tutorial, eHow author Michelle Bell says feather painting is not as complex as it looks. She breaks the process down into seven simple steps.
  • Folk artist Kelley Patterson describes her feather painting process using Gesso, a paint binder with chalk, as an undercoat and oil paints on feathers.
  • Instructables.com author poofrabbit is planning to create an Instructable: Feather Painting as a project to share with children. The author answers questions about the project on this page.
  • Wildlife artist and feather painter, B. Curtiss, sells a downloadable ebook Painted Feathers, divulging the secrets of feather painting from start to finish.

Thank you for reading this article! If you have any further questions about this topic please contact us.
Hand Painted Wall Murals

hand-painted

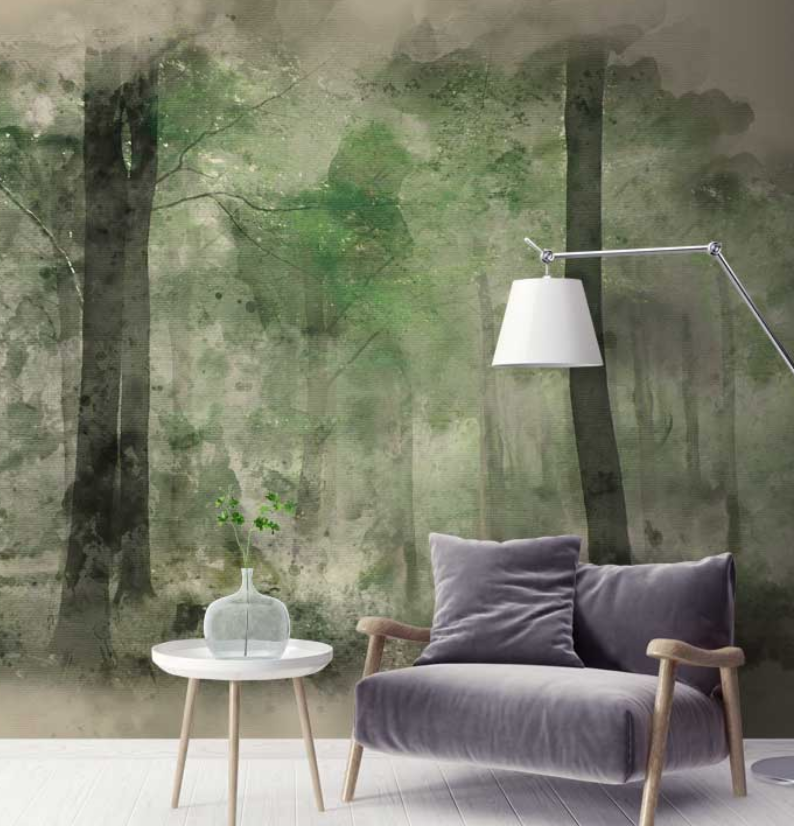
A hand-painted wall mural inside a personal residence, are very creative, personal, and fun methods to liven up any room! You can make the mural painting a fun family project, or even hire a professional muralist to help conceptualize your ideas and put them down in paint. Finding a talented mural artist opens up endless possibilities to paint any scene that your imagination can come up with onto the walls or ceiling.

Children’s rooms make great candidates for a hand painted wall murals, especially for vivid and colorful imagery. Parents often have decorative wall murals painted on the walls and ceilings in a nursery or children’s room, creating a stimulating environment for the kids. Think about how educational and entertaining zoo animals, underwater creatures, or the planets can be for kids as they play in that space!

Hand painted wall murals are also beautiful alternatives when choosing decorative art for any room in the house. A professional muralist can help you interpret ideas and set a mood or atmosphere. Hand-painted murals can be painted in many styles, such as an authentic Renaissance feel, which can accompany your furniture and other decor nicely. Hand painted wall murals also create the illusion of larger space.

Commercial Hand Painted Wall Murals

Businesses often find mural art as a way to enhance a commercial space’s appearance, making the space appear larger and more attractive. With planning and conceptualization, decorative wall art creates a distinct theme throughout a store, restaurant, or salon, making the space memorable to customers and creates repeat clients. This is a great way to stand out amongst your competitors and establish a unique image for your business!

Thank you for reading this article! If you have any further questions about this topic please contact us.

Simple Paint Thinner Safety Tips

paint thinner safety

Paint thinner is an oil-based paint and is often used to clean paint from tools and surfaces but it is a toxic chemical. Toxic chemicals like paint thinner are harmful to animals and people and serious medical illness can set in if you inhale or ingest it. A lot of people use paint thinner to clean off their hand or leg if paint gets on it and do not think of the safety concerns this poses. Paint thinners need to be used in a proper manner and also need to be disposed of properly to ensure your safety as well as the safety of other people. If you are going to be using paint thinner then you might want to follow some easy tips to keep you safe while using this toxic chemical.

The first thing you want to do if you are using paint thinner is to wear safety equipment while handling this product. Safety glasses and solvent-resistant gloves and shoes need to be put on before you open the container of paint thinner. You want to make sure your eyes are protects as well as your skin from the possible splashes of paint thinner. You should also be wearing long-sleeved shirts and pants while working with paint thinner to protect your skin from the paint thinner if it splashes on you while you are working with it. The safety glasses will help with unintended splashes that might occur and will also protect your eyes from the fumes of the paint thinner.

Working in good ventilated areas is something else you need to do if you are using paint thinner. Since paint thinner gives off fumes the best thing you can do is prevent those fumes from making you sick by using them in well ventilated areas. The paint thinner can make you feel nauseous as well as dizzy and can give you a headache or respiratory problems. Windows and doors should be open and you should also use fans to circulate the air during the time you are using the paint thinner. If it is at all possible, only use paint thinner outdoors so that you do not have to open windows and doors in your house for circulation.

You should also keep paint thinner away from acidic materials because it can cause a huge chemical reaction. Never mix the paint thinner with anything other than paint because explosive reactions can occur. Paint thinner is designed to be used only with paint and if you are using other chemicals with paint thinner then you are putting yourself and everyone around you in danger.

Paint thinner is also combustible so it should not be anywhere near explosive or other combustible materials. Liquids and heaters could spark a deadly chemical explosion if it comes into contact with paint thinner so make sure you place the paint thinner in a separate area. Smoking should also be avoided while you are using paint thinner due to the possibility of an explosion which could kill you. If the end of your cigarette falls off near the paint thinner then this could cause a serious deadly reaction and it would start a fire with flames that you could not control.

It goes without saying but you should also never eat near the area where paint thinner is located and never eat while you are using the paint thinner. Paint thinner could be splashed onto your food items without you knowing it and just a little bit in your food could make you really sick. Ingesting paint thinner is a very bad idea and if you do not know you ingested it then it could cause serious internal problems.

Since paint thinner is a hazardous chemical, you should always dispose of this chemical in a safe manner. There are rules in regulations in place that say you should not dispose of paint thinner down a drain or in the trash can because of the hazard it causes. Paint thinner needs to be disposed of properly and you can find that information on the side of the paint thinner.

When you are using paint thinner you should also keep the container closed tightly and stored in a proper location. If you do not put the lid on the paint thinner properly, then you could be potentially leaking fluids and this could cause a safety hazard. Store the paint thinner up high on a shelf where children and small pets can not get to it.

Thank you for reading this article! If you have any further questions about this topic please contact us.

Painting Reproduction

reproductions

Breughel’s Hunters in the Snow isn’t for sale; neither is Turner’s Approach to Venice. And while some Picassos and Hockneys might be on the market, few of us can afford them. Painting reproductions, therefore, is the only way for the vast majority of us to own and display great art.

Of course, painting reproductions, even the best of them, are only substitutes for the original, and don’t express the genius of the artist completely. But a fine reproduction is a work of art in itself. Prints and lithographs fit into limited budgets, but hand-painted reproductions are an excellent investment and will transmit more of the original painting than a flat print.

Painting Reproductions Vary Widely in Quality

Of course you can’t expect a print to catch the textured brushstrokes of a Van Gogh. And even hand-painted reproductions may be “off” in color or form. Shopping for painting reproductions on the Internet offers you a great selection and unsurpassable convenience, but you are limited to looking at a reproduction on your screen of a reproduction on canvas. Therefore, be sure that the gallery you buy from has a reputable return policy, in case the art that arrives isn’t quite as you expected.

That said, online shopping for art is really the best way to find something unique, something that speaks to you personally in a way that Van Gogh’s Irises or Monet’s Waterlily Pond may not. Online, you can shop the galleries of the world, find artists you’ve never heard of and paintings by famous artists that you’ve never seen. And with high quality reproductions, you can have them in your own home or office.

Thank you for reading this article! We hope you enjoyed reading the article Painting Reproduction and learned new things. If you have any further questions about this topic please contact us.

Painting an Accent Wall: Falling Leaf Scene

painting an accent wall

Painting an accent wall in your home can make a wonderful impact in any room. Whether the accent wall consists of a punch of color, or a mural – here are some tips that can help you to create a classic scene in a room in your home by painting an accent wall of falling leaves. The supplies that you will need to create this accent wall are latex paint to create the backdrop color for the wall, oil paints of varying fall and leaf colors, a paint roller brush, intricate paint brushes or leaf stencils and a drop cloth to protect the floor and furniture within the room from paint spatters.

The first step to painting an accent wall of falling leaves is to paint the background color. After the background color has been applied, and you have decided that the mural would be painted on, consider testing on pieces of art paper the leaves that are going to be painted. It can be helpful to purchase stencils from the local art store of leaves, in many shapes and sizes which can be customized with colors and brushes to adhere to the wall. ‘

Traditional leave colors vary from golden to orange to green with hues of purples and red. For this reason, leaves can be customized to many colors to match many different rooms. When purchasing the paint, consider oil to give the leaves a lifelike look. It is important to take the theme and color of the room into account when planning a falling leave motif on the wall.

As an alternative to painting the falling leave accent wall, there are many paper murals that can be adhered to the walls. Many of these murals come to be installed in one piece so that there are no visible seams and can be custom created, and printed to the exact size of the wall in which it is going to be adhered to. These are available to order on the internet, or at the local mural and home store. The online store www.murals4everyone.com offers many choices of falling leave murals, in their selection.

These murals are applied easily with a peel and stick application, and many are accompanied with a brush that can ensure that the murals are put on to stick, and stay. This brush ensures that no air bubbles are present behind the murals, and that the mural is going to be flush with the wall.

Another option to create falling leave murals are to consider peel and stick leaves. These decals offer the most lifelike look, with leaves looking as if they have fallen directly from a tree. Quality peel and stick decals are available at such websites as www.creativewallcovering.com and can be adhered to a clean wall that has been painted, and is ready to become the focal point of the room. These decals can be used with paint to create a mural with many different textures. Alternatively, you could create a mural of a tree with paint and use these decals as different texture, and technique within the mural.

Thank you for reading this article! If you have any further questions about this topic please contact us.

Floral Art

floral art

If you think the genre of floral art is limited to stodgy Victorian paintings of roses, think again. There is a certain charm to Victorian roses, and I have such a painting in my bedroom, but flower art ranges far and wide, from Picasso’s bouquet to Georgia O’Keefe’s calla lily or medieval mille-fleurs.

My life has been divided between Southern California and New England, and every time I move, I take my art with me. One of my favorites is a large, contemporary, very bright watercolor of jonquils and hyacinths by Tom Noble. This is the very antithesis of my Victorian roses, but it serves a different purpose. In my bedroom, I want things serene. The watercolor hangs in my office, and when I’m in SoCal, it echoes the sunny atmosphere and brings the outdoors in. When I’m in New England in February, it brightens everything and keeps the hope of flowers alive. And in both locations, it energizes me.

Floral Art to Suit Every Taste

This art can make any kind of statement you want. It can be rich and romantic, such as Fantin-Latour’s Flowers and Fruit. It can be starkly dramatic, as is any of Georgia O’Keefe’s work. It can be lush and shimmering, if done by Renoir or Monet. Whatever atmosphere you wish to create can be supported by floral art.

Some men feel that floral art is “too feminine” for their tastes. I would ask them to look at Joan Mitchell’s nearly abstract 1991 work Sunflowers or one of the many starkly beautiful paintings of plum trees by Yoshida Toshi. Floral art can make as bold a statement as any other genre.

Thank you for reading this article! If you have any further questions about this topic please contact us.