Painting a room can be easy, fun, and rewarding – as long as you have everything you need and know how to use it. Be sure to read through this article fully before starting. First, here is a checklist for what to buy at the hardware store:
1 – Paint (obviously). About 1 gallon per coat for 4 walls of a room that measures 12 feet by 12 feet.
2 – Stir Sticks. These are usually free with the paint.
3 – Drop Cloths. Cheap plastic works well enough to cover furniture.
4 – Masking Tape. Low-Tack can be left on longer and leaves less sticky residue.
5 – Rollers. One cheap, disposable roller with a 3/8 inch nap for each coat.
6 – Roller pan. Get a quality pan and use disposable pan liners for multiple coats or rooms.
7 – Step Stool or Short Ladder. I prefer to get up close instead of using a pole on the roller, except for ceilings.
8 – Brush. Use a quality brush for corners and trim or you’ll find bristles coming off in the paint.
9 – Small Roller. This is optional, but can come in handy and minimize brush strokes in tight places.
10 – Extension pole for roller. A cheap wooden one works, but I only use that for ceilings.
11 – Spackle. Inspect your walls to see if and how much you might need.
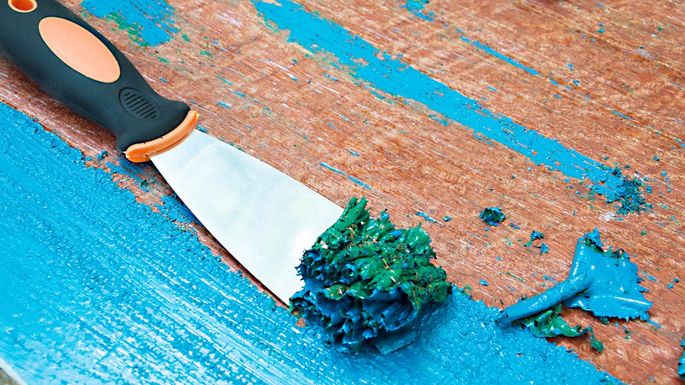
12 – Putty knife. Once again, a small one is fine for nail holes, but a big one is needed for major damage.
13 – Paper towels. Rags work, too. Keep your work area clean and neat or you’ll find paint in bad places.
14 – Tiny finishing brush. Totally optional and probably only found at a hobby shop.
Now, how to go about painting a room:
1 – Choose your color. This is the hardest part for many people when they come to painting a room. Some stores, like Lowe’s, sell small sample cans of each color. With one of those, you can paint a small piece of poster board and tape it to the wall that you plan to paint. This allows you to see what the color is really going to look like in the actual light of the room. Remember that daylight is blue and artificial lamp-light is more orange, so the color will look different depending on which light source is dominating. You can now buy light bulbs with different color temperatures, also, so it is possible to tweak the look by changing bulbs.
2 – Buy the paint. Get more than you’ll need because if you run out, then you’ll have to go back to the store and get a new can, which might be mixed slightly differently and be a different color. Stores try to avoid that by using computer-controlled mixers, and they are usually pretty good, but you never know. Plus, it’s always good to have some paint leftover to use as a touchup in case you miss a spot or a wall gets damaged at some point in the future. Use latex for interiors because it cleans up with water and is less toxic, and choose an eggshell or another non-glossy finish for interior walls of regular rooms because you don’t want to be surrounded by reflective, glossy walls everywhere (trust me). However, in kitchens, bathrooms, workshops, or mudrooms, use semi-gloss because it’s more durable and easier to wash due to its higher resistance to water and steam. Use semi-gloss for the trim as well because it tends to get scuffed by shoes and needs cleaning more often.
3 – Prepare the room. Move furniture away from the walls and cover it with plastic. Cover the floors also and tape where the wall meets the floor. I prefer to paint the walls first because you’re using a higher volume of paint and that means it’s messier. Then, if the trim is going to be a different color, I’ll tape the wall off (the floor is already taped) and do the trim next. If you’re good, slow and careful, you won’t even need to tape. Take off all of the outlet and switch covers. Look at the walls for any nail holes or other imperfections that might need to be spackled. If so, use the putty knife to put a small amount at a time on the spot. It’s important to let the spackle dry COMPLETELY before putting any more on. Sand between coats of spackle and then sand when finished. Spackling could take days, depending on the shape of your walls.
4 – Prepare yourself. No matter how careful you think you are, you will get paint on your clothes and shoes. So be sure to wear old, crappy clothes or coveralls. A white, disposable Tyvek suit costs under $10, and is well worth it.
5 – Open the paint. If you have two or more gallons, open two of them up and thoroughly stir both cans. Then, mix equal amounts of each can in the roller pan – this eliminates the problem of two slightly different colors. As you deplete the cans, pour one into the other and stir again. At that point, if you have a third can, open it up and mix as you did before. Most people don’t do this, and you can probably get away without doing it, but someday, somewhere you’re going to get two cans that are different – and then you’ll be sorry!
6 – If you are painting the ceiling, do it either first or last. If you do it first, then you should use the brush to get the corners where the wall meets the ceiling and you won’t have to tape because you’re going to be painting the walls anyway. Then, use the roller with the extension pole. Get as high as you can with the stool or the ladder, and go slow and easy. You don’t have to worry about splatter on the walls but you don’t want to overload the roller or else you’ll get ugly drips. And wear a hat, because you will get paint in your hair.
7 – Do the brush-work on the walls next. If you’ve painted the ceiling first, then wait for that to dry (several hours or overnight) and then tape off the ceiling by the walls. Use the brush to paint the corners, where the wall meets the ceiling, around windows, and where the wall meets the trim. Or, if the trim is going to be the same color, then just paint the trim also. Use the lid of a can of spray-paint or a small cup full of paint so you can dip and paint without running back to the roller pan every five seconds. When you finish, clean the brush thoroughly and immediately and it will be ready for the trim later.
8 – Move on to the roller. At first, the roller itself will absorb a lot of paint, but don’t try to go too fast. Don’t load the roller up with too much paint or you’ll get drips. Be patient, use a “W” shaped painting motion and don’t move the roller too fast or you’ll get splatter. Make sure that you overlap every square inch a few times. When you finish, if you don’t plan on putting another coat on, then go back to where you first started (where the paint will be driest) and look very closely for places where the old color isn’t completely covered. Hit those places with the roller again, and go over the entire room very slowly. Then, repeat the process until you’re certain. If you’re confident you’ve perfected painting a room, throw the roller away.
9 – Do the trim. Dry that brush as best as you can with some paper towels. If you don’t trust yourself and feel that you need to tape, then wait for the walls to dry completely (overnight), then tape the wall just above the trim and around the windows and doors. If you’re painting the trim white over a darker color, you’ll probably need two coats. Try to get both coats on right after each other so you can pull the masking tape off while the trim paint is still wet. If you let it dry, you’ll need to run a razor blade along the trim to get the tape off without pulling some of the paint off with it. Once again, clean the brush completely immediately after you’re done.
10 – If you’re doing the ceiling last, same as before: if you don’t trust yourself then tape the wall just below the ceiling, and then use the brush to paint where the ceiling meets the wall. Use a fresh roller with the extension pole for the rest. Use the ladder or stool to get as high as you can. The blood will run out of your arms even with the pole, so go slow and be patient. Be very careful to avoid splatter when close to the walls. Some people like to paint the ceiling first, but I find that if I’m careful I never get any paint on the walls and it’s easier to tape the wall than it is to tape upside down on the ceiling. Either way, doing the ceiling is annoying, but usually pretty quick because there are no windows, doors, outlets, or light switches to paint around.
11 – An optional step, for real perfectionists in painting a room, is to use a tiny brush from a hobby shop to smooth out any uneven lines or eliminate any little spots where one color bled under the tape. The line where the ceiling meets the wall is particularly tough because it’s not hidden by furniture and in plain sight all the time. Even a little mistake up there can drive you crazy.
12 – After completing painting a room you will of course need to clean up thoroughly. Watch out for wet drips of paint that you might step on, because you’ll track it all over the house and ruin carpet. It’s best to take your shoes off and put them on a piece of newspaper or plastic. Throw everything out, except a little paint for touchups, the brush, the roller pan (if you used liners), the roller handle (which probably needs to be cleaned), the extension pole, and of course the ladder. If you have a large amount of paint left, check to see if your county has a specific place for disposing it.
13 – Put the room back together. Put the outlet covers, switch plates, drapes, and furniture back, and get ready for the next room!
Thank you for reading this article about painting a room! If you have any further questions about this topic please contact us.
