Comprehensive Checklist for Painting a Room

painting a room

Painting a room can be easy, fun, and rewarding – as long as you have everything you need and know how to use it. Be sure to read through this article fully before starting. First, here is a checklist for what to buy at the hardware store:

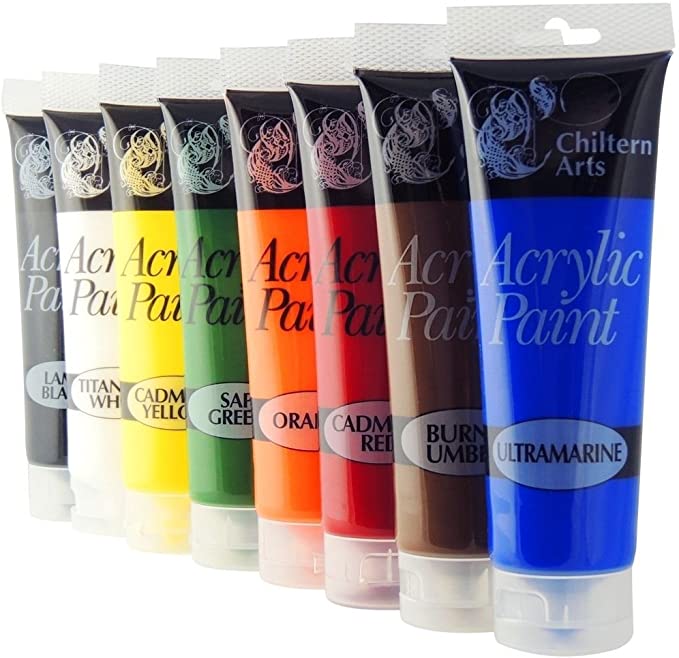
1 – Paint (obviously). About 1 gallon per coat for 4 walls of a room that measures 12 feet by 12 feet.
2 – Stir Sticks. These are usually free with the paint.
3 – Drop Cloths. Cheap plastic works well enough to cover furniture.
4 – Masking Tape. Low-Tack can be left on longer and leaves less sticky residue.
5 – Rollers. One cheap, disposable roller with a 3/8 inch nap for each coat.
6 – Roller pan. Get a quality pan and use disposable pan liners for multiple coats or rooms.
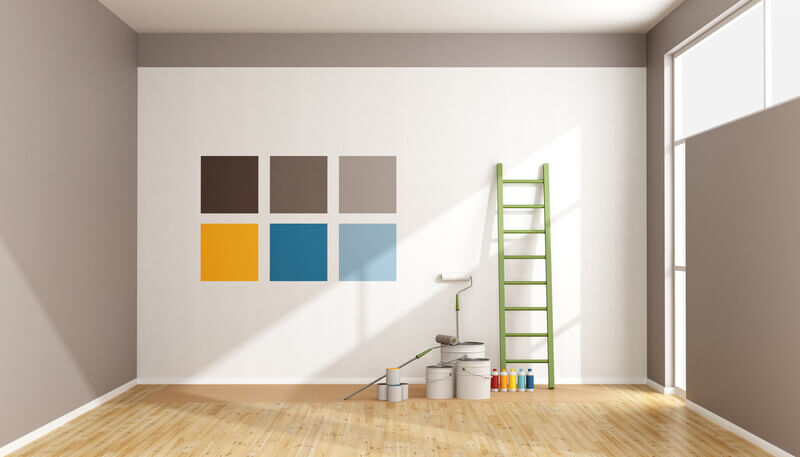
7 – Step Stool or Short Ladder. I prefer to get up close instead of using a pole on the roller, except for ceilings.
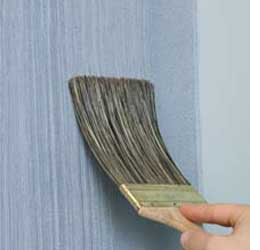
8 – Brush. Use a quality brush for corners and trim or you’ll find bristles coming off in the paint.
9 – Small Roller. This is optional, but can come in handy and minimize brush strokes in tight places.
10 – Extension pole for roller. A cheap wooden one works, but I only use that for ceilings.
11 – Spackle. Inspect your walls to see if and how much you might need.
12 – Putty knife. Once again, a small one is fine for nail holes, but a big one is needed for major damage.
13 – Paper towels. Rags work, too. Keep your work area clean and neat or you’ll find paint in bad places.
14 – Tiny finishing brush. Totally optional and probably only found at a hobby shop.

Now, how to go about painting a room:

1 – Choose your color. This is the hardest part for many people when they come to painting a room. Some stores, like Lowe’s, sell small sample cans of each color. With one of those, you can paint a small piece of poster board and tape it to the wall that you plan to paint. This allows you to see what the color is really going to look like in the actual light of the room. Remember that daylight is blue and artificial lamp-light is more orange, so the color will look different depending on which light source is dominating. You can now buy light bulbs with different color temperatures, also, so it is possible to tweak the look by changing bulbs.

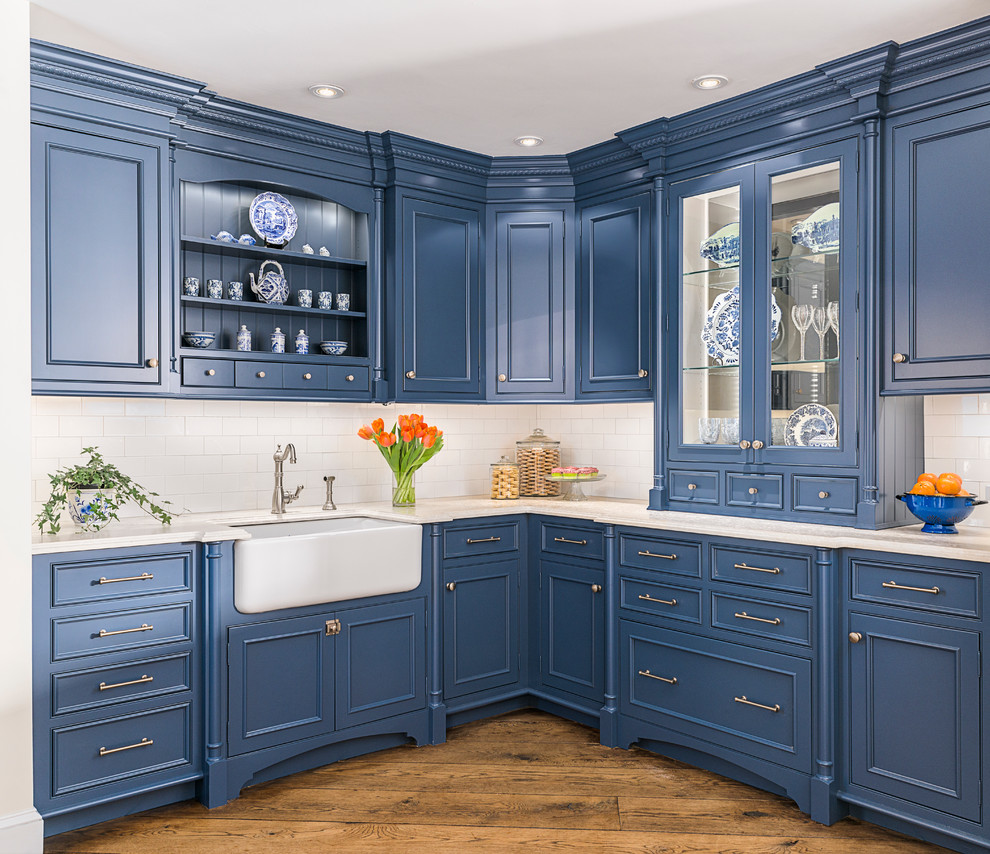
2 – Buy the paint. Get more than you’ll need because if you run out, then you’ll have to go back to the store and get a new can, which might be mixed slightly differently and be a different color. Stores try to avoid that by using computer-controlled mixers, and they are usually pretty good, but you never know. Plus, it’s always good to have some paint leftover to use as a touchup in case you miss a spot or a wall gets damaged at some point in the future. Use latex for interiors because it cleans up with water and is less toxic, and choose an eggshell or another non-glossy finish for interior walls of regular rooms because you don’t want to be surrounded by reflective, glossy walls everywhere (trust me). However, in kitchens, bathrooms, workshops, or mudrooms, use semi-gloss because it’s more durable and easier to wash due to its higher resistance to water and steam. Use semi-gloss for the trim as well because it tends to get scuffed by shoes and needs cleaning more often.

3 – Prepare the room. Move furniture away from the walls and cover it with plastic. Cover the floors also and tape where the wall meets the floor. I prefer to paint the walls first because you’re using a higher volume of paint and that means it’s messier. Then, if the trim is going to be a different color, I’ll tape the wall off (the floor is already taped) and do the trim next. If you’re good, slow and careful, you won’t even need to tape. Take off all of the outlet and switch covers. Look at the walls for any nail holes or other imperfections that might need to be spackled. If so, use the putty knife to put a small amount at a time on the spot. It’s important to let the spackle dry COMPLETELY before putting any more on. Sand between coats of spackle and then sand when finished. Spackling could take days, depending on the shape of your walls.

4 – Prepare yourself. No matter how careful you think you are, you will get paint on your clothes and shoes. So be sure to wear old, crappy clothes or coveralls. A white, disposable Tyvek suit costs under $10, and is well worth it.

5 – Open the paint. If you have two or more gallons, open two of them up and thoroughly stir both cans. Then, mix equal amounts of each can in the roller pan – this eliminates the problem of two slightly different colors. As you deplete the cans, pour one into the other and stir again. At that point, if you have a third can, open it up and mix as you did before. Most people don’t do this, and you can probably get away without doing it, but someday, somewhere you’re going to get two cans that are different – and then you’ll be sorry!

6 – If you are painting the ceiling, do it either first or last. If you do it first, then you should use the brush to get the corners where the wall meets the ceiling and you won’t have to tape because you’re going to be painting the walls anyway. Then, use the roller with the extension pole. Get as high as you can with the stool or the ladder, and go slow and easy. You don’t have to worry about splatter on the walls but you don’t want to overload the roller or else you’ll get ugly drips. And wear a hat, because you will get paint in your hair.

7 – Do the brush-work on the walls next. If you’ve painted the ceiling first, then wait for that to dry (several hours or overnight) and then tape off the ceiling by the walls. Use the brush to paint the corners, where the wall meets the ceiling, around windows, and where the wall meets the trim. Or, if the trim is going to be the same color, then just paint the trim also. Use the lid of a can of spray-paint or a small cup full of paint so you can dip and paint without running back to the roller pan every five seconds. When you finish, clean the brush thoroughly and immediately and it will be ready for the trim later.

8 – Move on to the roller. At first, the roller itself will absorb a lot of paint, but don’t try to go too fast. Don’t load the roller up with too much paint or you’ll get drips. Be patient, use a “W” shaped painting motion and don’t move the roller too fast or you’ll get splatter. Make sure that you overlap every square inch a few times. When you finish, if you don’t plan on putting another coat on, then go back to where you first started (where the paint will be driest) and look very closely for places where the old color isn’t completely covered. Hit those places with the roller again, and go over the entire room very slowly. Then, repeat the process until you’re certain. If you’re confident you’ve perfected painting a room, throw the roller away.

9 – Do the trim. Dry that brush as best as you can with some paper towels. If you don’t trust yourself and feel that you need to tape, then wait for the walls to dry completely (overnight), then tape the wall just above the trim and around the windows and doors. If you’re painting the trim white over a darker color, you’ll probably need two coats. Try to get both coats on right after each other so you can pull the masking tape off while the trim paint is still wet. If you let it dry, you’ll need to run a razor blade along the trim to get the tape off without pulling some of the paint off with it. Once again, clean the brush completely immediately after you’re done.

10 – If you’re doing the ceiling last, same as before: if you don’t trust yourself then tape the wall just below the ceiling, and then use the brush to paint where the ceiling meets the wall. Use a fresh roller with the extension pole for the rest. Use the ladder or stool to get as high as you can. The blood will run out of your arms even with the pole, so go slow and be patient. Be very careful to avoid splatter when close to the walls. Some people like to paint the ceiling first, but I find that if I’m careful I never get any paint on the walls and it’s easier to tape the wall than it is to tape upside down on the ceiling. Either way, doing the ceiling is annoying, but usually pretty quick because there are no windows, doors, outlets, or light switches to paint around.

11 – An optional step, for real perfectionists in painting a room, is to use a tiny brush from a hobby shop to smooth out any uneven lines or eliminate any little spots where one color bled under the tape. The line where the ceiling meets the wall is particularly tough because it’s not hidden by furniture and in plain sight all the time. Even a little mistake up there can drive you crazy.

12 – After completing painting a room you will of course need to clean up thoroughly. Watch out for wet drips of paint that you might step on, because you’ll track it all over the house and ruin carpet. It’s best to take your shoes off and put them on a piece of newspaper or plastic. Throw everything out, except a little paint for touchups, the brush, the roller pan (if you used liners), the roller handle (which probably needs to be cleaned), the extension pole, and of course the ladder. If you have a large amount of paint left, check to see if your county has a specific place for disposing it.

13 – Put the room back together. Put the outlet covers, switch plates, drapes, and furniture back, and get ready for the next room!

Thank you for reading this article about painting a room! If you have any further questions about this topic please contact us.

Dragging Technique of Painting: Projects for Beginners

Beginners Painting Technique

This Article will Discuss s Beginners Painting Technique Called Dragging

A thrifty alternative to pricey wall treatments and professional paint jobs, the dragging of painting is used in order to create a textured appearance similar to that of fine cloths and fabrics such as silk. While the process can be somewhat time consuming and requires patience and moderate painting skills, when this technique is properly applied the results are extremely impressive.

If you have considered updating and improving the appearance of your home by applying wall treatments, or if you simply enjoy experimenting with new and exciting painting techniques, check out these ideas that are great choices for individuals that are new to the dragging technique of painting:

Tables

Small end tables, especially those of a somewhat rustic and antique style or quality, are an excellent choice for a first timer attempting the art of the dragging technique of painting. The finished product of a successfully painted table is generally enough for the painter to make decisions about using the dragging technique of painting for future home improvement and painting projects.

Doors

One or both surfaces of nearly any type of door can be successfully transformed using the dragging technique of painting. This project is especially attractive when applied to the front service of the front or main door to the home.

Wooden Furniture

Wooden furniture such as chairs, chair arms, and couch arms are often greatly improved by applying the dragging technique of painting. Surfaces of nearly any size can successfully be painted by using this technique, such as large areas of exposed wood on couches.

Bookshelves

Medium to small bookshelves of nearly any shape or style are the perfect project for individuals using the dragging technique of painting for the very first time. Painting only the sides or exposed surfaces rather than the entire bookshelf also typically produces nice results.

Outdoor Furniture

Surprising to even experienced painters, the dragging techniques of painting can be used on outdoor furniture such as porch swings, patio chairs, and tables. Great for a beginner, the only difference in using the dragging technique of painting for outdoor furniture is that weather-resistant paints must be used.

Miscellaneous Household Items

Common household items such as wooden garbage or storage bins, lamp stands, and coat racks can easily be painted by using the dragging technique of painting. Small household items with few large surfaces are great for beginners because these types of projects are often quickly and easily performed.

Source:
Experience

Thank you for reading this article about this Beginners Painting Technique! If you have any further questions about this topic please contact us.

Painting Adventures: Things to Consider when Choosing Paint

choosing paint

So, you want to repaint an area of your home. It might even be the outside of your home. There are several factors to consider before even heading to the paint department and choosing paint.

The very first thing you want to consider when choosing paint it, do you want it to match a color of an item you have laying around? If this is the case, you might want to go to a specialized paint store versus your local lumber yard. Your local lumber yard more than likely doesn’t have a paint matching machine and their technique is based soley off of their own two eyes. For them, matching colors is as simple as taking the item you have and comparing it to their dedicated paint samples. This doesn’t work if you want the exact color you are holding in your hand. They can get close but it won’t be the same color.

Another thing to consider when choosing paint is, where will you be painting? Is it inside or outside? There’s not one kind of paint for both. There’s exterior and interior. There’s also the consideration of which finish you want. You have the choices of, flat, eggshell, satin, and semi-gloss. Some paint finishes don’t do well for the inside and then there’s the matter of personal preference.

Flat paint is used mostly for outdoor painting. It has no gloss to it and holds everything on it. It can not be cleaned. It can make the color you picked look very dull. This paint is also the cheapest of all the different finishes. Eggshell paint is a step up from flat and can appear flat at first, but if you look closely there is a sheen appearance to it. It is one of the paints that are used outside, but I’ve seen it used for indoor application. A lot of people prefer eggshell above flat for the simple fact it can be wiped clean of fingerprints and such. Satin holds a little bit of gloss to it and is recommended to those who do want gloss, just not a lot. Satin is used for indoor application and can also be wiped clean. Semi-gloss is the type of paint that will make any color really stand out. It does not leave the color of paint dull. I have never had anyone use semi-gloss on the outside of a house.

If you don’t need to match a color, shopping at the local lumber yard will do just fine. The people behind the counter will have the knowledge you need to find the right paint. They can direct you based on what your preferences are. I would suggest not leaving the decision entirely up to another person who isn’t going to be in your home 24/7. If you have an idea of what you want they can help you find it, but in the end, the decision should be left to you.

Let’s say you found the color you want and you know what finish and whether it’s exterior or interior, now it’s time to mix. But, you don’t want to jump ahead of yourself because there’s one more piece of advice to consider before finalizing that decision. It is always best to go outside with the paint samples you’ve chosen and place them against the sun. The lighting in the store can affect the way the paint looks and can make you grow to hate the color once it’s mixed and put on your wall. While some companies will return a paint they’ve mixed for you, some will not. Take this into consideration when you have them mix the paint for you.

Picking out a paint seems pretty easy, but it’s something you must look at in a cautious manner to avoid dissatisfaction and a do over.

Consider what you want to put in the room. What colors will be connected to the paint? Will you grow tired of the color? What kind of mood do you want to set for that room? Would you prefer a light color or maybe a darker one?

The next step when painting is to gather all the needed supplies. Majority of us know what they are. If you don’t, here’s a list: painting tape (usually blue in color to tape off corners and light fixtures), clear plastic sheeting (to protect your carpet or tile), a paint tray, brushes, rollers, covers for the rollers, and of course a way to open your paint (which is typically provided at no charge with the paint you buy). Not all of this is required but is advised.

Before beginning to paint you want to tape off the areas that might get accidental drops on them. You can cover them with the blue tape you’ve bought. For the floors, it’s better to tape the plastic to something rather than just lay it. Find an area you want to start painting and tape off the plastic to the very bottom of the wall. This will ensure some of the drops from the roller or brush don’t fall and get dried into the carpet. Everytime you move to another area you want to do the same.

When painting you can use either a paintbrush or a roller. My recommendation is a roller, unless you want to spend a pretty penny on a professional paintbrush. Cheap paintbrushes can leave brush strokes, which makes the task of painting pointless. For trim and around light fixtures or window sills, I would suggest using a foam brush. The application is much neater and doesn’t leave you with unsightly brush strokes that you’d rather do without.

The last piece of advice I have when painting? Make sure you can fit all the items into your budget. Painting is not an inexpensive job unless you want to do a shortcut, which I don’t think anyone would recommend. The paint itself can cost anywhere from $15-$30 a gallon. You don’t need to hire anyone to paint a room for you. All you need is patience, the supplies, and the time. A painter is likely going to charge you for the supplies and their time.

Thank you for reading this article about choosing paint! If you have any further questions about this topic please contact us.

Do it Yourself Kitchen Cabinet Painting

DIY Kitchen Cabinet Painting

DIY Kitchen Cabinet Painting can safe you money and be fun!

Our kitchen is where all the cooking action takes place. Every once in a while when we entertain visitors we would want them to see us cooking and preparing food for them. We would want our kitchen to look good so to awe our visitors. Our kitchen cabinets are very important because this will serve as the storages for kitchen utensils like pots and pans. The paint on your kitchen cabinets can easily wear out especially with the hot cooking oil, the sauces that spill on them when we cook. The solution to this problem is to restore the paints on the cabinet. However, it may be too costly to have a professional to do this for you.

If you want hassle-free job, you can just simply have your cabinets replaced. This is only ideal for those who would want to do a total renovation of their kitchen. But for those who would want to save money, changing your cabinet paint will do the trick. You can do the paint job on your own or you can ask your kids to help you out with this. This will be a fun activity that you can do together as a family. Here are some tips you will need to consider before applying new paint on your kitchen cabinets:

1. Choose the appropriate type of paint for the type of wood you used to build your cabinet. You can opt for glossy type if you want the appearance to be shiny.

2. Choose a color scheme you would want to work on.

3. Sand your cabinets to remove old paint and to smoothen out the surface.

4. Invest on nice paints. Do not buy cheap ones that will just fade its color in a year or so.

5. Buy the necessary painting materials like paint rollers and different sizes of paint brushes.

Following these tips will ensure that you will not need to worry on what to do next when you are about to paint your cabinets. Enjoy painting your kitchen cabinets. It will be rewarding for your part. You get to save a lot of money from hiring professionals to do the paint job for you at the same time you get to enjoy the fruits of your labor. You can also be creative and stencil designs on to your cabinets. You can add a touch of art to your kitchen and it will enhance the total look of the area.

Thank you for reading this article. We hope it helps you master your DIY Kitchen Cabinet Painting! If you have any further questions about this topic please contact us.

How To Drybrush RPG Miniatures: Tutorial: Using Drybrush Techniques to Enhance Role Playing Figures

Drybrushing

Drybrushing Techniques

It is simple to paint a figure with a single coat of colour on each feature and detail. It takes some practice, but done with care even such a basic approach can yield decent results. With one simple technique, judiciously applied, those decent results can be refined into something very special.

Drybrushing is the most effective method of making a figure’s various features appear more realistic. It takes a great deal of practice and over time each artist will find ways to refine the technique for various situations. The best miniature features to practice the drybrushing technique upon are capes and armour.

Capes

Choose a figure that is wearing a cape that has as many folds and ripples as possible. Once the cape is primed and a colour chosen, there are four basic steps.

  1. Mix the basic colour with a bit of black (or brown if the basic colour is red or orange) to make a dark version. Paint the entire cape this colour and allow it to dry.
  2. Next, take the basic colour on a shading sized brush, but brush off most of the pigment on some scrap paper until the brush strokes leave only a light shading on the paper. Use the “dry” brush to gently paint the cape, stroking across the folds of the cape, not pressing too hard. This will take some practice. The best approach is “less is more”. Several very light coats can be applied until the desired effect has been created.
  3. Once the main colour has been applied, the cape will look like it has deep shadows. Now lighten the main colour with a dab of white and repeat the drybrush technique, only with lighter strokes and an even drier brush. Again, this will take a good deal of practice, but the effects that can be achieved are worth it.
  4. At this point, the cape should appear to have deep shadows and the lighter highlights should look like natural light shining off the material.
  5. The final step is optional: take a tiny amount of pure white and apply it to the shading brush. Using the same technique as before, wipe off all but the last hint of pigment from the brush. With feather light touch, drag the brush across the very edges of the cape and the bottom edge. Done correctly this white touch will appear as a subtle wearing on the fabric.

Armour

Whether chainmail, plate armour, or another metal feature, the basic technique to create an appealing finish is the same.

  1. Once the figure is primed and dry, the first step is to paint all the parts that are meant to appear as metal with flat black paint. Be certain to get the black paint into every fold, every divot, every crevice. Allow the figure to dry thoroughly.
  2. Use steel paint, not silver, for armour and metal. Drybrush the steel across chainmail and over the folds in armour. In some cases, it may work best to brush in only a single direction, since this will have the effect of deepening the shadows in the metal. In other cases, swiping the brush back and forth might achieve a more interesting effect.
  3. For a final touch, a very light coat of silver can be drybrushed to give the metal a gleam at the highest parts of the feature. This isn’t a necessary step, and some figures may look better without it.

Drybrushing requires a lot of practice and a lot of mistakes before an artist can use it to create an effective finish, but once the technique is mastered it has infinite applications and variations.

Thank you for reading this article! If you have any further questions about this topic please contact us.

You Can Paint Landscapes like on TV, so Now What?

painting composition

This article assumes you’ve done a few paintings in your spare time, maybe watched a PBS series on the activity, think you have some potential but can’t quite manage to make anything your friends would buy just yet. Here are some things to do to learn to paint some works you’re really proud of and improve your knowledge of a good painting composition.

I’ve been an acrylic painter for ten years. I’ve been taught by some of the best artists in my part of the world, and I have shown my work in galleries many times over the last decade. It sounds so obvious that it couldn’t be true, but I have to say, the best thing I ever did for my art was go to art school. I went through a very informal cirriculum with instructors who mainly gave advice here and there, observed and made suggestions when necessary, and subjected their students to rigorous peer review on a weekly basis. I didn’t sit through many lectures or follow many guidelines, but one thing I was encouraged to do was independent reading and research. Here I will try to provide the beginnings of what has led to my experience and try to throw out some knowledge I haven’t been able to find on the internet. Yes, believe it or not, there are books in libraries that can’t be replaced by a simple Google search. I won’t point to any specific resources right here, but I will make some suggestions later on as to where to find good reading material and how to judge a book by its cover, along with simple life experience that can only be passed on from one person to another.

I started painting in highschool the way many people these days begin. I learned from watching painting shows on educational television. This is free and actually very helpful for a beginner. You learn about tools, you learn the common colors used, and you learn a few simple shortcuts to work in detail. What they don’t teach on TV is much about content and composition, originality, or any of the in-depth, nitty-gritty details of the craft. Consider this to be a primer on these concepts of advanced painting.

Without further ado, here are some pointers to get you started.

Knowing how to make a good painting means knowing what a bad painting looks like. As many bad paintings don’t get reproduced or widely published, I would suggest going out to local galleries or paying a visit to an art school to view student work. Note your gut reaction to what you see. A big portion of quality in art is what you can’t really describe in words. Does the piece invoke an emotional response in you? Does the artist have any clear objectives to meet or a statement to make? Have these objectives been made, and is the statement made clearly and effectively? Most importantly, do you like the piece? If not, why not? These questions will make a viewer more aware of decisions he or she makes in his or her own work and help to build an individual style.

On to more concrete subjects, all beginning artists need a crash course in composition. Composition is the geometrical relationship between the forms depicted on the surface and the shape and edges of the surface itself. The tension between the subjects of the work and the edges of the support creates the most subtle, initial, and effective response in the viewer. For example, an object in the dead center of the canvas, or evenly dividing the canvas in half creates a feeling of static, unmoving space. The space around the object seems wasted and unnecessary. Centering the subject is one of the most common pitfalls of a beginning artist, and should be avoided unless done for a very specific reason. A prime example of the influence this positioning has on a painting composition is a work done by a non-objective artist in which a bold circle was placed slightly off center in one quadrant of an otherwise blank field. The piece could be rotated and displayed in four different ways, each giving a different feeling to the overall painting composition. This holds true for the entire spectrum, from abstract to representational, and even for paintings of several objects. Points of focus should be carefully arranged to guide the eye of the viewer in the desired manner. This is a form of passive manipulation of the viewer. For example, in a horror-genre painting, the eye could be guided away from the most sinister portion of the composition, tucked neatly away in a remote corner, only to be viewed as a surprise at the end of the viewer’s visual scan. One must always be aware that the eye really only takes in a limited amount of information over time, and thusly, a composition can have a temporal “plot”, much like a moving picture, such as a video or performance piece.

Color also plays an important part in composition. It should be an obvious conclusion to draw that positive and negative space should be in stark contrast to one another. But what if the values gradate in opposite directions? What if, for instance, your sky in the back ground begins a deep Prussian blue at the top of the composition, fading to a desaturated white at the bottom, and objects in the foreground begin at the bottom of the composition as dark shadows and gradually lighten to highlights at their tops? Somewhere in the middle, there may be points where the values of the foreground and background are nearly–or even completely–the same. These points are called passages, and actually play a very important part in making a composition dynamic. Passages can be deliberately placed around a composition in the same way as whole objects to guide the eye of the viewer. Passages can be merely singularities in value or can even be points where the foreground and background object are the exact same hue, tone, and value. When observing groups of objects in real life, try to become aware of the passages between them, and how they influence your visual scan. Good places to look are crossing branches of a tree, a display at a grocery store, or a group of people walking in the street.

These are a few of the visual elements of a painting composition, but how should they be arranged? This all depends on the intended effect on the viewer. Classical forms of painting composition include circular, linear, and triangular. How these look when laid out on a surface should be obvious. A circular composition gives the viewer a feeling of dynamicism in a composition, but also of stability, as the eye is never led off the edge of the piece. A triangular composition is itself composed of diagonals. Diagonal lines are a very powerful gesture in a composition, giving the feeling of unstable movement. The whole triangular aspect of the composition gives it a grounded feeling, however, as opposing diagonals are balanced on a fixed point. Linear composition could mean objects are arranged in a straight line, be it horizontal, vertical, or diagonal, or objects could be placed in a winding or curved fashion along the composition. A horizontal line generally gives the piece a relaxed feel, like a person reclining in a hammock or a pastoral scene with a straight and level horizon. A vertical line gives the feeling of strength and rigidity, like a standing statue or a soldier at attention. A winding painting composition conveys a feeling of crowdedness, clutter, or chaos, such as in a large group of people standing in disarray, or a spiraling mountain road. These are just a few of the possibilities, granted the most commonly used. Hopefully they will provide enough options to avoid the pitfall of a centered object in dead space.

One more important note on painting composition: the proximity of an object to an edge of the piece is also very important. An object can be so far away from an edge as to be seemingly unrelated, could actually go off the edge, or could come very close to an edge without running off. This latter case is very special and much like perfectly centering an object, should be avoided until one understands the implications and particular tensions this placement brings with it, but can eventually be an important tool to the artist. Running an object off the edge of a piece tends to expand the understood space of the surface beyond its physical boundries, giving the piece more of a feeling of one being able to walk into it. This is especially true of a lifesized or larger composition. A prime example of this would be a woodland scene in the order of seven or eight feet tall, with a human figure walking onto one edge and trees extending off the top and bottom edges.

And finally, where to find more information. Of course, the most valuable sources are images themselves. Visiting exhibitions and museums is definitely very helpful. Another good source is a local university art library. There you will be able to find thousands of books full of images. Find a few artists or a movement you like and study as many of their works as possible. There are also plenty of texts on theory and practice. If a book such as this feels heavy in your hands, it probably has some information you never would have thought of by yourself. I would suggest books such as this on any particular subject should at least deserve a scan through their tables of contents, and maybe even a deep reading of a chapter or two. All this book work can seem dense and boring, but think of it as a quest for information no one else could find, and you’ll quickly become the teacher.

Thank you for reading this article! If you have any further questions about this topic please contact us.

Whimsical Accessories: Art and Paintings by Children

children's artwork and paintings

Children’s artwork and paintings often times can make even the most jaded of adults feel a sense of whimsy. Throughout my career I have crossed paths with many artists who have demonstrated this fact again and again.

A colleague and fellow artist disclosed how a simple project to decorate the children’s waiting area at a local hospital helped to reinstate his sense of fun and wonder. As he searched for inspiration for the project he happened upon two children’s artwork and paintings depicting scenes from one of his favorite childhood books. The paintings seemed to ignite wonderful childhood memories thus inspiring his long lost sense of fun.
A friend who worked at a rehab center as an administrator once confided that the simple addition of children’s paintings to the physical therapy lounge seemed to lift the spirits of their patients – Adults and children alike.

Another sample of the joy that can be had with the simple addition of children’s artwork and paintings is found in the story told by a decorator friend of mine. She tells how a childless couple asked for her help in selecting a few wall hangings. Their style seemed to be minimalist at best, however as they perused her portfolio they were particularly taken with a few Lollipop Art prints. Bottom line is they decided to add a few Lollipop Art prints to the main hallway of their house and not only did it add warmth to the entire house it seemed to add a warmth and sense of joy to the couple as well.

Whimsical accessories can also spark change in one’s life as told by another decorator friend. She tells how a family was inspired to incorporate family days into their normal routine as a result of having some fun filled children’s paintings placed in their daughters room. The paintings depicted such joyful family togetherness that they have now incorporated family days into their own lives.

Whimsical children’s paintings can also inspire artistic expression. A fellow artist describes how a dance studio owner raved that the mural the artist was asked to paint on the walls at the dance studio so inspired the young students that enrollment almost doubled. The children so admired the ballerinas in the mural that they wanted to be just like them.

A sense of fun and whimsy can be inspired by simply adding the most appropriate children’s painting to your life. As we can see, both young and old can be inspired by whimsical children’s paintings.

The right piece can be a great conversation starter or make people laugh when they see it.

Charlotte is well known for her designs that appear regularly in several publications including McCalls and Arts and Leisure Magazine. She has also appeared on the cover of New South Magazine and has done design conversion for Disney and Warner Bros. Check out Charlotte’s paintings and see how they can add life and laughter to your home by visiting Cathartic Desgins.

Thank you for reading this article! If you have any further questions about this topic please contact us.


Painting Your Problem Areas Successfully

painting problem areas

Painting problem areas in your home simply means there are certain surfaces that need to be treated differently before being able to paint them successfully.

What you may not readily realize is not all surfaces come ready to paint immediately. Like it or not there is often quite a bit of prep work that must be done in order to ensure that the paint sticks like you need it to. Without properly preparing the surface you are looking at a painted area that will chip, crack and look poor once you are finished. If you are planning on painting on a problem area, you need to ensure that you devote the time to properly caring for the surface to ensure that paint will bond properly.

For example, on a metal surface paint will almost always never stick directly. You will have to use a primer, as well as sand the area down a bit. Sanding the area down allows you to reduce the shine which will give the paint a suitable surface to bind to. It is also very important to select the appropriate type of primer, for a metal surface, it is best to use a corrosion-resistant primer, as this will help to greatly reduce the problems with rust and other similar complications. Once you have treated the surface by sanding the area and priming with a suitable corrosion-resistant primer you can use almost any type of paint to paint the area and have wonderful results.

For surfaces that are peeling, it is important to remove all pieces of paint that are peeling. Once you have done this, you need to then take a sander and carefully sand the area down so that it is smooth so that the paint can properly adhere to the surface. If you leave the cracked and peeling paint rather than removing it you will cause the paint job to look poor, as well as increase the chances of the paint peeling rather than sticking appropriately. You may also discover that once you have sanded the area down you may discover that you also need to use a primer to help ensure that the paint adheres properly.

Using the proper precautions will help you avoid many of the hassles that people come across while trying to paint unusual surfaces. Almost anything can be painted, however it is important to take the time to carefully ensure that you have prepared the surface. With a properly prepared surface, you should be able to discover that your entire painting experience is very positive. However, if you are unable to properly prepare the surface yourself you may need to as for assistance from a professional in helping you ensure that you have properly prepared the surface.

If you are unable to find the proper primer at a traditional paint store, you may need to find a specialty paint store that can provide you with exactly what you need. Never omit primer and properly preparing the surface because you are having difficulty tracking down the supplies that you need. By skipping these crucial steps, you are simply making more work for yourself and making it much harder to paint the complicated surfaces.


Thank you for reading this article about painting problem areas! If you have any further questions about this topic please contact us.