Early Renaissance Painters: Robert Campin, Simone Martini and the Subjects of their Paintings

what

Q. What is Louis IX in Simone Martini’s “St. Louis of Toulouse” (1317) doing?

A. Crowning Robert of Anjou. Little is known of the life of artist Simone Martini (c. 1284 – c. 1344), but he is famed as a major figure in the development of early Italian painting. He is believed to have been a student of Duccio, one of the most influential artists of his day and the creator of the stunning Maesta altarpiece in the Museo dell’Opera del Duomo in Siena. Today the painting “St. Louis of Toulouse” can be visited in the Museo di Capodimonte, Naples.

Q. What is Joseph in the right wing of Robert Campin’s “Merode Altarpiece” (c. 1428) doing?

A. Making mouse-traps. Robert Campin (1375-1444) was the first great master of Early Netherlandish painting. The altarpiece can be seen at the Metropolitan Museum of Art, New York.

Q. What is the baby Jesus Christ in Jan van Eyck’s “Madonna with Canon van der Paele” (1436) doing?

A. Pinioning the wings of a green parakeet (which is a symbol of sin). Today this sumptuously detailed painting can be seen at the Groeningemuseum in Bruges, Belgium

Q. What is the archangel Michael in Rogier van der Weyden’s “Last Judgment” (1450) doing?

A. Weighing in his scales the souls of the Saved and the Damned. Today viewers can see this painting by Dutch Renaissance master van der Weyden at the Musee de l’Hotel Dieu, Beaune in France.

Q. What is Niccolo da Tolentino in Paolo Uccello’s “Rout of San Romano” (c. 1456) doing?

A. Directing the attack of Florentine forces against the Sienese on June 1, 1432. Niccolo da Tolentino (1350-1435) was an Italian condottiere, or mercenary. He was hired by many Italian lords and is famous for the many battles he won on their behalf; “Rout of San Romano” serves as a memory of his heroism. Today the riotous and colorful painting, in which Niccolo can be seen in the center in charge of the Florentine army, can be visited at the National Gallery, London.

Q. What are the angels in Andrea Mantegna’s “Agony in the Garden” (c. 1460) doing?

A. Holding the instruments of Christ’s Passion. The Passion represents the suffering of Jesus Christ in the hours surrounding his death by crucifixion. In Mantegna’s depiction, angels in the sky are bringing the Instruments of the Passion to Christ while he’s at prayer and while the disciples sleep. The instruments include the cross upon which Jesus is hung, the column where Jesus is whipped, the vessel with the vinegar offered to the Lord, the sponge soaked with vinegar offered to him, and the spear used to pierce his side. In the background Judas is coming with soldiers to arrest Christ. Today the painting can be seen at the National Gallery, London.

Q. What is Flora in Botticelli’s “Primavera” (1482) doing?

A. Strewing flowers from her gathered skirts. This lovely work shouldn’t be missed at the Uffizi in Florence.

Thank you for reading this article! If you have any further questions about this topic please contact us.


Create Digital Paintings on Your IPad with the Pen & Ink App

creating digital paintings

Creating Digital Paintings Made Easy with the Pen & Ink App

Creating Digital Paintings is easy with the “Pen & Ink” application, by Stepping Stone Software, LLC, is a terrific low-cost approach to digital art creation with a focus on watercolor stylings. I use it on my iPad with a plain Bamboo stylus, and find it very easy to use to create digital paintings. The limited version of the app is available for free in the iTunes store, and to upgrade to the full version, the developer charges a reasonable fee of $2.99.

The app allows you to recreate the look of a watercolor painting with a great degree of realism in its brush strokes and textures. There are several tools it offers: two types of erasers, a pen, a pencil, and three types of paintbrushes. Each brush, when selected, allows you to choose the style of stroke/painting effect, the size of the brush, and the opacity of the color being applied.

From the options you can select, there are practically infinite variations of brush strokes and styles you can use to create a doodle or a masterpiece. You can draw with your finger, but I find that using a stylus (even a plain, inexpensive one like mine) helps in control and fine detail. You can also zoom in quite a bit, so creating finer details in your art is easy to do.

The app’s interface is simple and attractive, and though it doesn’t offer much in terms of options, you can learn to use it very quickly. Through trial and error, you can determine how best to create your art–and if you make a mistake, there’s always the “undo” button, which comes in handy when making a digital painting!

Though you can start with a blank canvas (the app also gives a handful of textured, realistic canvas backgrounds), you can also import a picture to work from in the background. You can’t change the transparency of the background image, though, and there are no layers to work with. The app does have its limitations, but overall, I find it to be not only fun to use but very satisfying in making vivid and realistic digital paintings.

Thank you for reading this article! If you have any further questions about this topic please contact us.


Professional Painting Contractors in New Castle, Delaware

professional painting contractors
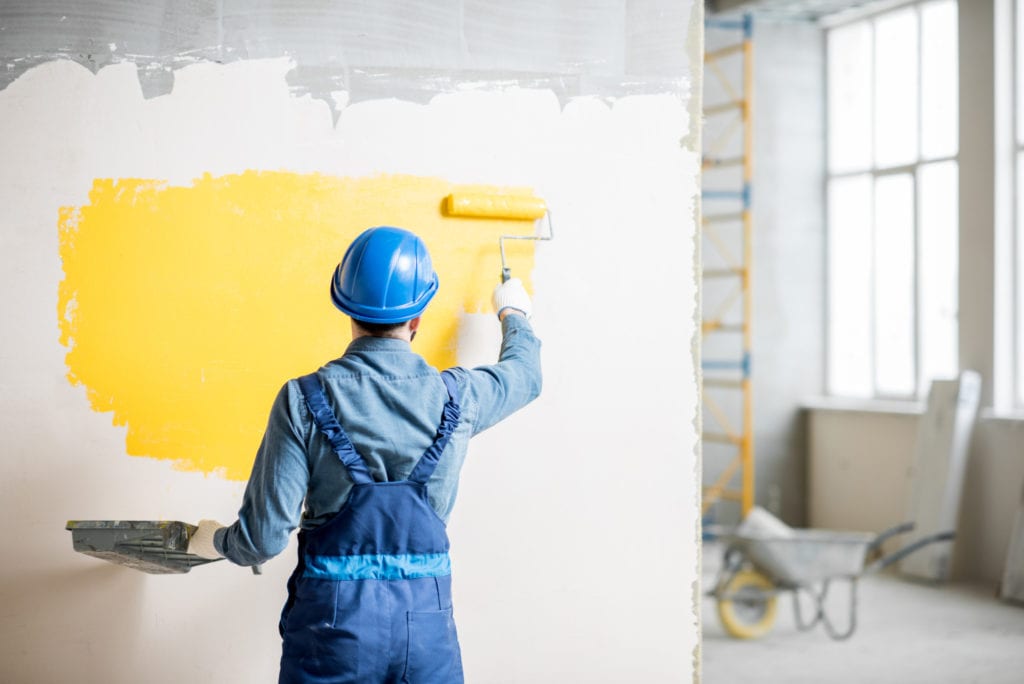
Workman in uniform painting wall with yellow paint at the construction site indoors

I have had my houses painted twice since I have been a homeowner by professional painting contractors . One was my primary residence and then I also had a rental home painted. When I was looking for a contractor to do it I checked out several. Here are a couple of the better ones that I have found and two that I have used. All use pretty good business models and have decent prices.

The first company of professional painting contractors I will profile is Paint Doctor. This company actually did the painting in my primary residence. The company has been in business for fifteen years and their owner Rich actually goes to each job at some point to supervise. This was one reason that I chose them for the job. They offer free estimates including phone estimates if you have measurements. They serve New Castle and Kent counties in Delaware, Cecil County in Maryland, In addition to painting; they also do carpeting, siding as well as doors and. windows. You can reach them at (302) 454-6400. And are open Monday through Friday until 6pm in the office, but work six days a week.

My house is part siding on the top level and stone on the bottom level. I had them paint the inside of the house and the siding part of the outside. They arrived on time and were very professional. The quality of the work was great and they offer a three year guarantee on their work, which I did not find many places doing. I was overall very happy with the job and would use them again.

Two Guys Construction is the next company that I would like to profile. I had them paint the inside of my rental property, which is a two unit ranch style house. They have been in business for eleven years, but their owner has extensive experience in painting and other construction projects. Their services include drywall, painting, roofing, siding, flooring, cabinet installation, and additions. They serve all of the state of Delaware and Southern New Jersey. I do not recall the exact amount I paid for the job, but I do recall that their prices were quite fair. The contractors conducted themselves very professionally and arrived on time and kept the house very neat. They can be reached at 302 674-1615. I was most impressed by the professionalism and quality of work they did for being a rather small company. I would recommend and use them again if needed. They will probably be doing a flooring project for me soon.

Pro Touch Painting has been used by a very good friend of mine for several rental properties that he has. They have been in business for twenty five years and do a pretty good business. They primarily do painting and drywall but also offer some other services like deck finishing. They offer a very good guarantee as far as the satisfaction of the customer goes and do not take payment until you are happy. I do believe they still would want to be paid, but that is what they advertise. They have always been very punctual and get jobs done on time. They offer free estimates and I have never heard of one being off by more than a few dollars and their prices are quite reasonable. I actually am thinking of possibly using them the next time they have a good deal going on some other rental properties that I acquire a rental property. From everything I have seen and heard they are a very good professional company. They have offices in both North Wilmington and Claymont Delaware. Pro Touch Painting can be reached at 302-792-9795 and 302-478-9362.

I have provided websites to the three companies that I profiled below.

http://www.paintdoctorde.com/

http://twoguysconstructioninc.com

http://www.protouch.biz

Thank you for reading this article! If you have any further questions about this topic please contact us.

Quick and Easy Crafts: Painting a Rainy Day T-Shirt

quick and easy crafts

Quick and easy crafts for rainy days that are a great time to do crafts with the kids. When my son was just about 6 years old, he was extra bored one day, and I just happened to be extra tired. He really wanted something to do, but I really wanted to something quick and easy and to keep him busy. His little face really wanted something interesting to do, and I wanted to make him happy. We decided on designing him a new shirt, one that he would paint himself.

This shirt was going to be his masterpiece. He planned it and was very excited to begin. Here are the supplies we used:

1 white t-shirt
Acrylic paints, assorted colors
Fabric medium
Stiff paintbrushes
Cardboard
Paper towels
Water cup
Paper plate
Newspapers

This is a super easy craft for any experience level and age, as long as properly supervised.

Since it was raining outside, and my kitchen table was already full of quick and easy crafts, we decided on using my newly mopped kitchen floor. My young son was ecstatic that he got to paint my kitchen floor! I reminded him to keep the paint on the shirt not my floor.

To prepare, he spread two layers of newspapers on the floor. While he did that, I placed a large piece of cardboard inside his white shirt. The shirt needed to be stretched, but not overly stretched to cause the cardboard to bend.

After that, I took out my vast collection of acrylic paints and let him pick five colors. He was very happy and picked some metallic colors and even a bright pumpkin orange. I taught him how to gently squirt the paint onto the paper plate and made sure he had the basics of dab-dab-dab after he rinsed his brush in the water cup. I followed the directions on the fabric medium and properly mixed it with each color on the paper plate. After putting on his painting smock, he was ready to paint.

I walked a safe distance away and let him plan his own design. It was fun to watch. He designed a very nice train and insisted that certain areas be the metallic colors. He used the gold paint to make the smoke/steam coming out of the stack. He wrote “ENGINE” below his masterpiece so everyone would know what it was. He was very proud.

I still have this shirt, even though he outgrew it years ago. At the time, he slept in his homemade shirt and proudly showed it off to everyone he could. This was a great way to introduce simple crafting to my young son and, to this day, he asks me if he can make another one. He is nine, almost ten, and now wants to teach his little sister how to make her own shirt.

Thank you for reading this article! If you have any further questions about this topic please contact us.

How to Encourage Reluctant Art Students to Paint: Helping Learners Find Confidence and Self Expression With Painting

painting

Painting with Confidence

The initial assessment does not always pick up on every learner’s needs until the practical exercises ensue. As is the case with painting, the teacher might find herself concerned over a student who freezes at the thought of depositing paint to paper. When this happens, identifying the cause will help find a solution.

Overcome the Fear of Painting

There are many causes of reluctance to painting. These might be:

  • Beginner’s nerves, if this if the first time
  • Fear of making mistakes
  • Inability to tap into the inner child that enjoys exploration
  • Low self-esteem

How to Encourage the Inner Artist

Sensitivity must be applied. In certain situations, the student might be willing to discuss the issues that might be causing this mental block. An overbearing inner critic or anxiety over domestic or financial issues might be hampering freedom of expression. Singling out the student in any way must be avoided. However, assuring the student that this affliction is common might put him at ease. In order to develop as a visual artist, the student must be encouraged to apply lenience whilst exploring an unfamiliar medium such as oils or acrylics. Happy accidents are part of learning and is the only way to move forward.

Completing a Painting in Lesson

The following teaching strategies might be applied when encouraging a reluctant art student to complete a painting.

  • Agree on an individual learning plan with the learner that sets out clear and precise goals
  • Ensure the goals are small and manageable
  • Ensure the goals provide opportunities for the learner to experience success
  • Use cheap materials during the experimentation

Art Resources for the Special Needs Learner

  • Set of acrylic paints
  • Bristle brushes
  • Sponges and rags
  • Thick paper
  • A china plate for a palette
  • Stencils of simple shapes such as circles and stars

Examples of small goals might be:

  1. To paint exploratory marks over the page via different types of brushes and implements
  2. To draw around the stencils at random places on the painting surface and then to fill in the stencil shape with a solid colour
  3. To apply a contrasting solid colour into a neighbouring stencil shape

Further goals might be:

  1. To lighten a colour by adding small increments of white
  2. To darken a colour by adding small increments of a complimentary colour
  3. Mixing colour combinations to see how they behave

Opportunities for praise and achievement are essential for learning according to G. Gibbs in Learning by Doing [FEU, 1988]. The application of paint onto the painting surface is what defines art and is a great first step for the bashful student. The next step might be to emulate the great Expressionists or Abstract artists, such as Picasso, Miro or Klee in order to further explore paint.

Encouraging the Hesitant Art Student

Completing a painting can be a daunting prospect for some learners. The teacher must treat this problem sensitively. Appropriate use of encouragement and praise will help overcome this mental block, but agreeing an individual learning plan that sets out specific, achievable and clear goals is likely to encourage the student to take their first steps into exploring paint. Ensuring that learners experience success is likely to build their confidence in the future.

Thank you for reading this article! If you have any further questions about this topic please contact us.


Five Safety Tips for Using Paint Thinner

paint safety tips

It’s important to use safety tips when using paint thinner. As the do it yourself season is always ongoing there are many people who will be touching up their homes; both inside and out. of particular interest over the summer months is getting that big paint job done. Maybe you’re hoping to sell your home in the fall and you want to put a new coat of paint on your exterior; maybe your family’s expecting and you want to touch up the baby’s room in shades of blue or pink. Even if it’s none of those if you’re using paint, chances are you’re using paint thinner. Consider these five simple safety tips put together with assistance from doityourself.com when delving into paint thinner.

Safety Tips: Ventilation: Perhaps one of the most important things for paint thinner users to remember is to keep the space you’re using paints and thinners in well ventilated. That is more than just blowing cold air in via air conditioning; you need to have windows and doors open and it would help to have an industrial sized fan blowing out a window or door to keep the fresh air in and the stale air out.

Safety Tips: Protective Gear: Make sure you’re wearing the right type of protective gear for paint thinner use. That is, goggles to cover your eyes, a mask to cover your face, and don’t wear your party dress in to paint; make sure the clothes you’re wearing is expendable.

Safety Tips: Acidic Combustion: It is possible for paint thinner to react with acids or acidic materials in a very hazardous way. For that reason it’s important to keep acids and thinner away from each other at all times.

Safety Tips: Safety First: When you’re not using your paint thinner, make sure to keep all lids tightly closed. It is a noxious chemical and should also never be inhaled or ingested so also wash your hands when you’ve been using paint thinner and never eat while using paint thinner. Thinner also ‘hangs out’ so don’t use paint thinner as a substitute cleaner to clean floors or tables; that’s a big no-no. Lastly, don’t smoke around paint thinner.

Safety Tips: First Aid: Make sure that if you do ingest or become otherwise ill from paint thinner, that you don’t delay in getting assistance. You’d hate to be light headed one minute and pass out the next.

Do it yourself projects are some one of the most rewarding experiences. However working with paints and paint thinners is no laughing matter. Follow these simple steps and you’ll be safe and productive in your uses of paints and paint thinner.

Thank you for reading this article! If you have any further questions about this topic please contact us.

How to Paint on Feathers

Feather Painting

My feather-collecting daughter was enchanted when we discovered the beautiful painted feathers by Northwest wildlife artist Julie Thompson. Since then, I’ve kept my eye out for feather painting tips and tutorials. Here’s what I have found.

What You’ll Need

  1. Feathers (thick and wide)
  2. Fixative spray (to hold feather together)
  3. Waxy paint marker (for outlining)
  4. Blue painter’s tape or artist tape (to hold the feather down)
  5. Acrylic paint (and water to dilute if necessary)
  6. Paintbrushes
  7. Spray-on gloss (for finishing and preserving the painting)

Recommended feathers: Turkey, peacock, pheasant, and quail. All are thick and wide.

A little inspiration: On Julie Thompson’s Featherlady Studio website, you can watch a slideshow of her famous painted feathers.

A History

Vanya the Faerie Lady of Sacred Earth Sacred Art presents “Arteplumaria” – Feather Painting Through the Ages,” an article about the art and practice of feather embellishment around the world.

Tutorials and Resources

  • Novawuff’s Tutorial on Deviant Art is a little rough-around-the-edges, but it gives some helpful tips such as prepping the feathers with fixative spray, painting with water-diluted acrylic paint, and finishing with a spray-on gloss.
  • Caroline Travisano created a series of eHow video tutorials beginning with Choosing Feathers for Acrylic Painting. Further videos demonstrate laying out the painting, choosing brushes, and finishing the painted feather. View the whole series: How to Paint Feathers with Acrylics.
  • In her How to Paint Feathers tutorial, eHow author Michelle Bell says feather painting is not as complex as it looks. She breaks the process down into seven simple steps.
  • Folk artist Kelley Patterson describes her feather painting process using Gesso, a paint binder with chalk, as an undercoat and oil paints on feathers.
  • Instructables.com author poofrabbit is planning to create an Instructable: Feather Painting as a project to share with children. The author answers questions about the project on this page.
  • Wildlife artist and feather painter, B. Curtiss, sells a downloadable ebook Painted Feathers, divulging the secrets of feather painting from start to finish.

Thank you for reading this article! If you have any further questions about this topic please contact us.

Simple Paint Thinner Safety Tips

paint thinner safety

Paint thinner is an oil-based paint and is often used to clean paint from tools and surfaces but it is a toxic chemical. Toxic chemicals like paint thinner are harmful to animals and people and serious medical illness can set in if you inhale or ingest it. A lot of people use paint thinner to clean off their hand or leg if paint gets on it and do not think of the safety concerns this poses. Paint thinners need to be used in a proper manner and also need to be disposed of properly to ensure your safety as well as the safety of other people. If you are going to be using paint thinner then you might want to follow some easy tips to keep you safe while using this toxic chemical.

The first thing you want to do if you are using paint thinner is to wear safety equipment while handling this product. Safety glasses and solvent-resistant gloves and shoes need to be put on before you open the container of paint thinner. You want to make sure your eyes are protects as well as your skin from the possible splashes of paint thinner. You should also be wearing long-sleeved shirts and pants while working with paint thinner to protect your skin from the paint thinner if it splashes on you while you are working with it. The safety glasses will help with unintended splashes that might occur and will also protect your eyes from the fumes of the paint thinner.

Working in good ventilated areas is something else you need to do if you are using paint thinner. Since paint thinner gives off fumes the best thing you can do is prevent those fumes from making you sick by using them in well ventilated areas. The paint thinner can make you feel nauseous as well as dizzy and can give you a headache or respiratory problems. Windows and doors should be open and you should also use fans to circulate the air during the time you are using the paint thinner. If it is at all possible, only use paint thinner outdoors so that you do not have to open windows and doors in your house for circulation.

You should also keep paint thinner away from acidic materials because it can cause a huge chemical reaction. Never mix the paint thinner with anything other than paint because explosive reactions can occur. Paint thinner is designed to be used only with paint and if you are using other chemicals with paint thinner then you are putting yourself and everyone around you in danger.

Paint thinner is also combustible so it should not be anywhere near explosive or other combustible materials. Liquids and heaters could spark a deadly chemical explosion if it comes into contact with paint thinner so make sure you place the paint thinner in a separate area. Smoking should also be avoided while you are using paint thinner due to the possibility of an explosion which could kill you. If the end of your cigarette falls off near the paint thinner then this could cause a serious deadly reaction and it would start a fire with flames that you could not control.

It goes without saying but you should also never eat near the area where paint thinner is located and never eat while you are using the paint thinner. Paint thinner could be splashed onto your food items without you knowing it and just a little bit in your food could make you really sick. Ingesting paint thinner is a very bad idea and if you do not know you ingested it then it could cause serious internal problems.

Since paint thinner is a hazardous chemical, you should always dispose of this chemical in a safe manner. There are rules in regulations in place that say you should not dispose of paint thinner down a drain or in the trash can because of the hazard it causes. Paint thinner needs to be disposed of properly and you can find that information on the side of the paint thinner.

When you are using paint thinner you should also keep the container closed tightly and stored in a proper location. If you do not put the lid on the paint thinner properly, then you could be potentially leaking fluids and this could cause a safety hazard. Store the paint thinner up high on a shelf where children and small pets can not get to it.

Thank you for reading this article! If you have any further questions about this topic please contact us.

Helpful Tips to Consider Before Your Next Household Painting Project

household painting project

Excited to begin your next big Household Painting Project?

Nothing can make a room feel more brand new then a fresh coat of paint. But, before you go crazy and reach for the paint brush, there are some things to consider before you slap on the first coat of paint.

Paint alone will not cover all of the blemishes that can appear on your walls, so in order to make sure that you get the end result you’re looking for, it’s necessary to do a little prep work before you ever pick up that brush. It’s a good idea to plan on spending as much time doing wall repair as you will actually spend painting, but the time spent is well worth the effort and your friends will insist that you paid a professional to do the work.

The first step in preparing your walls for a new coat of paint is to wash them down with a phosphate-free wall cleaning agent and then rinse the wall with a sponge until the water runs clear. Once you’ve finished cleaning the walls, it’s time to inspect them for any damage like nail holes, cracks, or gouges. Pay special attention to seams in the wall and the area around windows and doors.

Repair all of the damage that you’ve located. There are several ways that you can repair damaged walls; here are a few different options.

Caulk

Use caulk to fill small cracks, transitions from wall to molding, and down the corners of the room. Smooth the caulk with a wet finger so you have a nice transition from one surface to the next, and then allow to dry completely.

Surfacing Compound

Surfacing compound is a different composition from joint compound, which is used in drywall construction. Use surfacing compound to patch damaged areas in your wall such as gouges or cracks.

Glazier’s Compound

Glazier’s compound is the putty that holds windows in place and it’s designed to stick in place and dry quickly. This makes it an excellent product to use for filling nail holes or other small defects in your walls.

Once you’ve completed the repair work that’s necessary on your walls it’s time to prime them. Applying a primer sealer to your walls before you paint them will keep the old paint from bleeding through, as well as allow the new paint to form a solid bond to the wall. This is especially important when painting over dark colors or satin finishes.

Once your walls are primed it’s time to apply the first coat of paint. It’s a good idea to not cheap out when it comes to buying paint. Cheaper paints tend to become powdery after a few years and often don’t provide the coverage that a more expensive paint can provide. It’s also smart to not skimp on your brushes or rollers. Cheap brushes or rollers can leave lint or bristles behind on your walls which can make any paint job look sub-standard.

Make sure to paint during the day with strong light coming into the room. It’s much easier to not miss bare spots, drips, splatters, or a random insect if you can see what you’re doing!

Before you begin, be sure to remember to cover any surface in the room that you would rather not get splattered with your new color, like the carpet, trim and woodwork. If possible, remove large pieces of furniture from the room to provide more mobility while painting.

After you’ve finished your first coat of paint, it’s a good idea to sand the walls before applying a second coat. Wipe the walls down with a piece of 120 grit sandpaper and then brush away any dust with a rag or old paintbrush. This extra step in the painting process doesn’t take long, and will ensure that your finished paint job feels as smooth as velvet.

By following these helpful tips throughout your household painting project, and remembering to do your prep work before you begin painting, your next paint job is sure to be a success and your home will quickly be transformed from drab – to dramatic!

Thank you for reading this article! We hope it makes your next household painting project a roaring success! If you have any further questions about this topic please contact us.

Painting Contractors in and Near Jefferson County, Tennessee

Painting Contractors in Tennessee
Workman in uniform painting wall with yellow paint at the construction site indoors

Need Painting Contractors in Tennessee?

In today’s economy everyone is looking for contractors who are reasonable in price and professional in service. Here are three painting contractors in and around Jefferson County, Tennessee who do good, quality work at reasonable prices.

The first one is an independent contractor. Affordable Painting is father and son owned and operated and located in Jefferson City, Tennessee. They have 40 years combined experience and specialize in interior repaints. However, they also do new work. Affordable Painting prides themselves on being extremely neat and professional in their work. They do interior and exterior painting as well as pressure washing, sheet rock/dry wall repair, patch work on walls, and caulking. They pride themselves on being extremely neat and professional in their work as well as being punctual to a job and completing the job in a reasonable amount of time. They have some of the most affordable rates around this area. They do back up their work and offer a quality guarantee. They offer free estimates as well as free advice of the best paint or stain to get for your home, office, etc. Their number is 865-475-5829 or 865-622-0972 or e mail them at painting0052@gmail.com.

The next contractor is Craig’s Painting Service. They are licensed and insured. They have been painting and doing remodeling since 1989. This painting service not only offers painting but also wallpaper, faux finishes, custom woodwork, and other remodeling services. One thing this painting service also offers is NHIS certified home inspections. They are located in Newport, Tennessee and they can be reached at 423-623-5755, PO Box 694 Newport Tennessee 37822, or e mail them at candzn@dishmail.net.

Then there is Obregon Painting. This painting contractor is located in Knoxville, Tennessee. Their services include residential and commercial work. Interior and exterior, painting and staining, wallpaper removal, water proofing, and preventative maintenance and repairs. They offer free estimates and can be contacted at 865-679-7973 or fax them at 865-933-9471. You can visit their website at www.obregonpainting.com and request an estimate page or e mail them at obregonpainting@gmail.com. Obregon Painting has been in business for over ten years and is also family owned and operated. Obregon Painting offers a year quality guarantee. If you are not satisfied you just give them a call.

Thus, there are several painting contractors located in and around Jefferson County, Tennessee. The above are three who have the best prices along with the best services. Just give them a call for an estimate.

Thank you for reading this article! If you have any further questions about this topic please contact us.