NYLO Hotel in Texas: March’s Destination for Artists

NYLO Hotel in Texas

This month’s Destination for Artists is a mix of sensibilities that most artists can appreciate. Visitors to the NYLO Hotel in Plano, Texas are immediately struck with the fantastic artwork combined with ecological hotel design.

First Impressions

In the lobby, behind the check-in desk, is a photographic collage created by local photographer Jason Janik. From far away the piece looks like an abstract. As you get closer you realize that the collage is made of small photos that Janik took of the local area. Not wanting to take pictures of just the glamorous side of Plano (a suburb of Dallas), Janik incorporated closely cropped shots of things that most people would over look to include in their art, such as a Wal-Mart sign.

As you move towards the elevators you notice the glass antler chandeliers and then your eye is drawn to the fantastic, larger than life artwork on the hallway wall. These three pieces become almost abstract as you approach them, the opposite of the art first piece of art in the lobby. Simple black strokes on white draw you in and almost makes you forget to get on the elevator.

The New-York style rooms carry on the style and artistry that was found in the lobby, though the feel of the art becomes more local feeling, with Texas sunsets and black and white photos of bull riders.

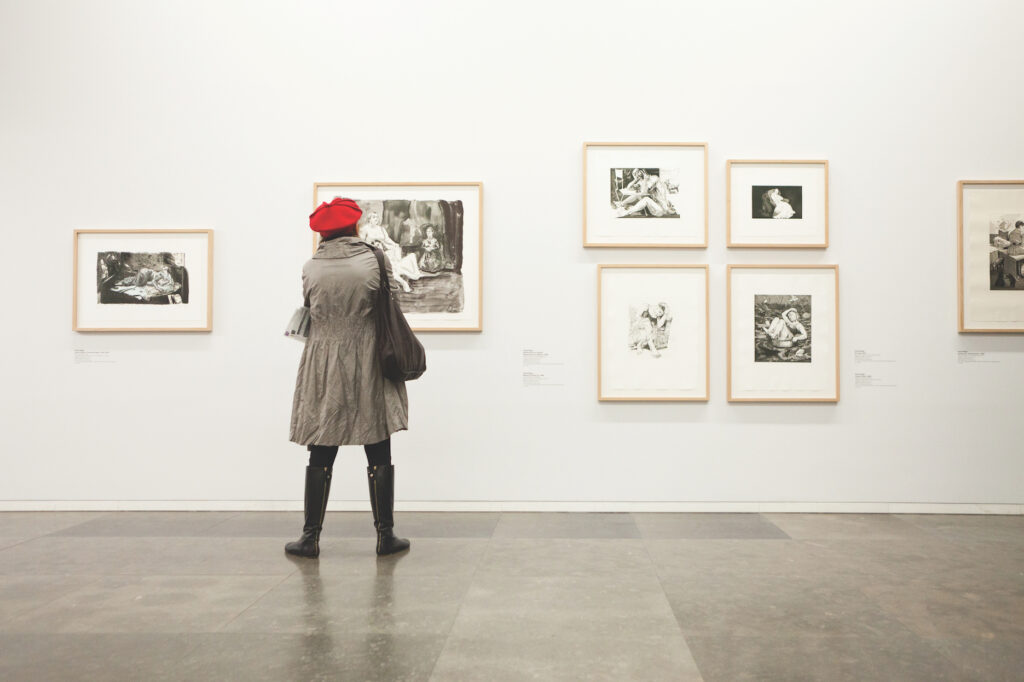
The art for the NYLO was chosen through a local art contest created by the hotel. Over 500 participants entered. “(Art) is the core of our brand,” says Patrick O’Neil, the general manager of NYLO Plano and director of the art contest. O’Neil says that it was hard to organize the art that they received and make it into a cohesive collection for the hotel, because it was luck of the draw. But he says that, “It came together organically.” Some of the NYLO contest winners were Jason Janik, Darrell Moseley, Lorraine Haan-Stewart, LRPS, Greg Piazza, Caryl Gordon, and Amanda Smith. (See picture, below.)

On Deeper Inspection

Contrasting and blending with the art is the ecological awareness of the hotel. The walls are bare, raw concrete, which CEO John Russell says is easier to heat and cool, saving electricity. Guests are encouraged to reuse towels to save on electricity, 50% of which is from wind power. The trendy packages for personal items are biodegradable. “It’s a big push to save our planet,” says CEO John Russell, “and to conserve resources.”

Together, the art, design, and ecological consciousness comes together in a place that savvy artists will appreciate and enjoy.

Thank you for reading this article about the NYLO Hotel in Texas! If you have any further questions about this topic please contact us.

How to Paint a Landscape

paint a landscape

Painting in general isn’t exactly everybody’s ballpark. Some people do it professionally, some as a hobby, some not at all. However, painting has been proven to provide beneficial stress-relief affects for anyone, regardless of their full-time profession, their skill, or their intent for painting in the first place. Actually, if painting is practiced without the pressure involved in a professional art career, it is of much more benefit as there is nothing involved but the sheer enjoyment of the experience of say, to paint a landscape just outside your own front door. The best part about painting and art in general is that you’re the boss of your own creation, there are no rules (or no rigid rules) except that the more you experiment the more fun you’ll have and the better the result will be.

How to Paint a Landscape with Watercolors or Acrylic Paints:

Step 1 (Optional):

– Map out your composition or design and/or decide on a general color theme.

Step 2:

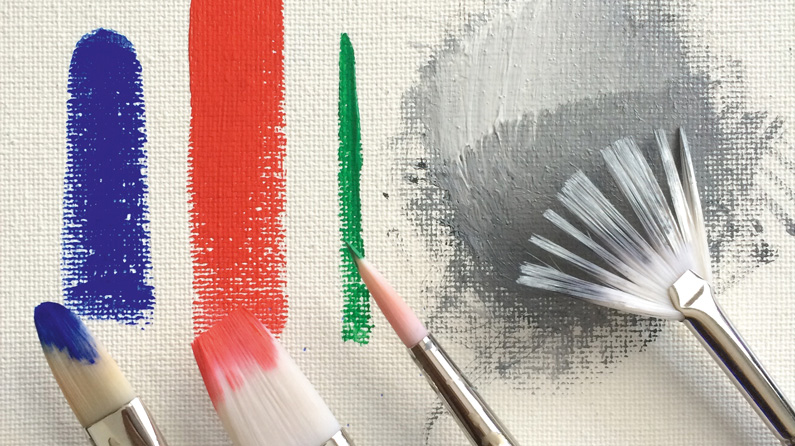
– Choose a large size brush, any kind or make, then choose any color you like and water it down with a little bit of water. Strain your brush.

– With large free brush strokes, start applying the watered paint across your paint surface, paper or canvas; start filling in the largest areas first, most importantly, the background.

Step 3:

– Choose another color, one in contrast with your first color would be best. Then start filling in the foreground or the area on the bottom of your paint surface.

Step 4:

– Observe which painted areas appear too thin or transparent, if you like it that way then move on to the next step. If you feel it needs more work, then start applying more layers, either of the same color mixed with other colors, or just that one color without so much water.

Step 5:

– Fill in any areas which you don’t want to leave empty, then consider adding texture through applying dots with your brush, or use a tissue, or your fingers. Apply several layers of colors with different affects to get the final mood you’re striving for.

Step 6:

– Step away from the painting. Think about what else it needs. If you feel like adding splotches of green, blue, yellow, etc. then just go ahead. Do what you feel till the image appears relaxing to your own eye.

Step 7:

– Congratulate yourself on your first attempt to paint a landscape!

Tips:

Mixing colors can be a bit tricky, here’s a quick guide;

Red + Blue = Purple

Red + Yellow = Orange

Yellow + Blue = Green

Any color (eg. Green) + white = a lighter color (eg. Light green)

Mix all the colors together, you’ll get a brown-black

The secret is to play around with it and simply enjoy the process. Art is about experimentation and expressing whatever you feel through colors and brushstrokes. The landscape is YOUR landscape, it can be any color you wish, and can have any horizon you desire. If you’re observing a landscape, try to capture the contrast in colors, whichever colors you choose, it doesn’t matter, as long as you try to get the feeling of what you see.

Thank you for reading this article! If you have any further questions about this topic please contact us.

Tips for Perfect Painting Techniques

painting techniques

Learning how to paint is not rocket science, and with the right painting techniques it is something that is possible for anyone to learn. All it takes is a bit of practice and some patience and you are sure to be painting like a professional in no time. However, before you just jump right in, these tips can help you ensure that you are off to the right foot and stand a chance of having a better success than tragedy with a paintbrush.

Your first step in learning different painting techniques, should always be gathering all of your supplies before you start. Even the most skilled painters are going to lose their train of thought if they much run around searching for all of their supplies while they are attempting to paint. Putting the supplies in the middle of the room you are going to paint is usually a good idea, this keeps them close enough to easily access, while keeping them out of your way in the wall area.

If you are trying to use a roller, you want to make sure you use the appropriate roller. For smooth surfaces choose a short nap and for rough surfaces choose a longer nap. Once you have this settled out it is time to start rolling your roller into the paint. Starting with a slightly damp roller will allow you to evenly coat the roller and provide the best results possible. Once you start applying the roller onto the wall, it is important to roll in a diagonal direction. This will provide the best coverage possible, once the entire wall is covered you can then take the roller and run in vertical lines to smooth out the coverage.

To paint with a brush and cut in the trim work you need to put a bit more time into the process. A good-sized brush to use for those cut in jobs is approximately 3″, this gives you plenty of room to seamlessly blend in the two sides with the corner to ensure that the paint is even and seamless. Using a smaller brush will mean many more brush strokes and much more opportunity to create a line in the paint. This can cause a normally beautiful paint job to have a few flaws.

You will also need to ensure that you stop every so often and clean your brush. This will need to be done once the brush starts to dry because then you are creating skips in the paint because the bristles are hard and not working properly. Stop and clean your brush thoroughly and let it dry before going back to painting. If you have two brushes, the same size you can work with one brush while the other is drying to speed the process along. In order to do the best job possible in cutting in, use a good quality brush. When selecting a paintbrush this is not the time to start thinking about a tiny budget, good quality supplies will ensure a good quality paint job every time.

Thank you for reading this article! If you have any further questions about this topic please contact us.
French Wash Painting Instructions

french wash painting

How to master the french wash painting technique by following these simple steps.

Antique old furniture, shelves, plaques and other wood items using the French Wash Technique. This particular technique is one I use to refurbish wooden items I have found at local thrift stores, garage sales and auctions.

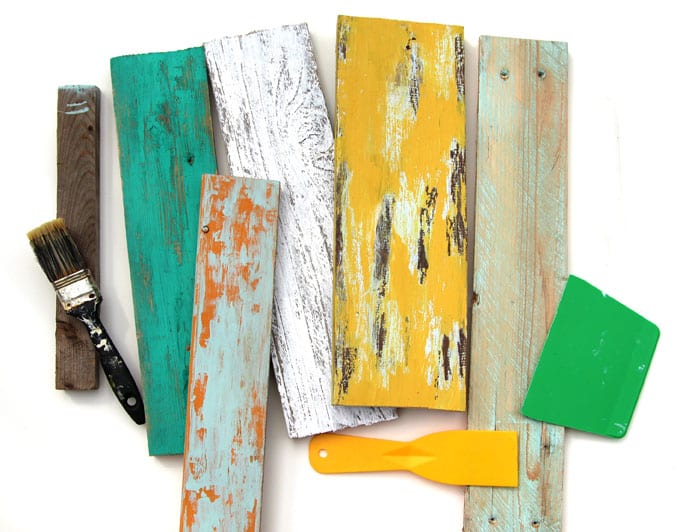
The French Wash Painting Technique uses three colors of paint, sandpaper and sealer. I prefer spray paint due to the ease of application. Choose three colors for the project. I suggest using a dark, medium and light color such as brown, light rust and ivory.

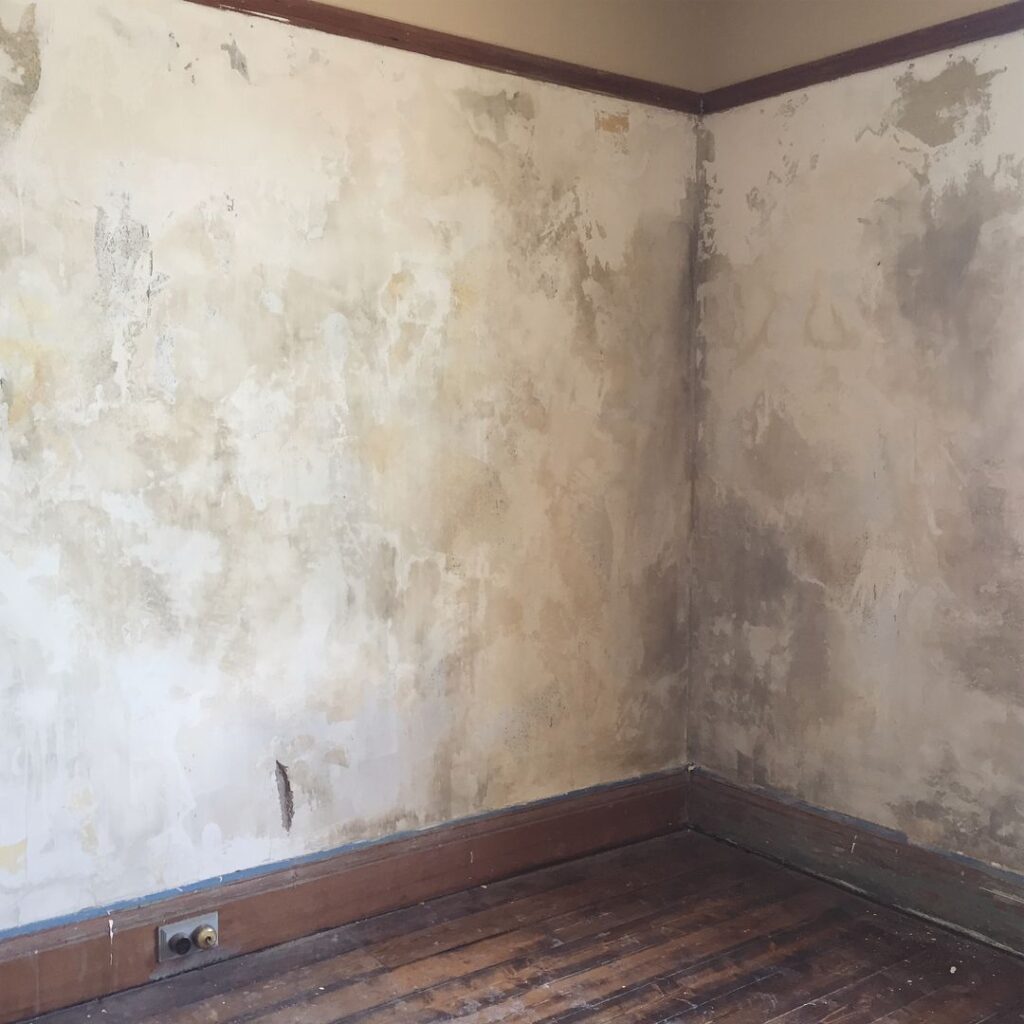
Old wood items normally have a stain and sealer or a painted surface. Prepare the surface by sanding the entire piece with 120-grit sandpaper. The sandpaper creates small grooves in the finish to hold the application of the new paint. If the painted surface is not a color you desire, remove the paint with a paint stripper. A step within the French Wash Technique sands through the layers of paint.

Wipe the sanded wood item down with a damp cloth or with a tack cloth to remove sanding dust. My preference is a tack cloth. A tack cloth is a special cloth that is sticky on both sides. It is available in the paint or woodworking department at home improvement centers. Allow the wood to dry completely if a damp cloth is used to remove the sanding dust.

Apply the darkest color of spray paint to the sanded surface. Hold the can approximately 12-inches from the surface. Apply the paint using a side-to-side motion. Allow the paint to dry 15 minutes. Apply the medium colored spray paint next. Allow the paint to dry 15 minutes. Apply the lightest color last. Allow the spray paint to dry two to three hours before continuing. The longer length of time is needed to allow the spray paint to cure.

Sand the edges and raised decorative adornments on the surface of the wood item to reveal the darkest paint. Sand the flat surfaces of the item following the grain of the wood to scratch the top coat of paint to reveal the medium color. Stop the sanding process when the project looks good to you. There is no right or wrong amount of paint to remove. When the object becomes visually appealing to you, stop sanding.

Wipe the entire project down with a tack cloth to remove the sanding dust. Apply three to four layers of spray acrylic sealer to protect the painted surface.

Thank you for reading this article! If you have any further questions about this topic please contact us.

How to Get Oil Paintings into Art Galleries

getting your art into galleries

Are you an artist who has ever struggled getting your art into galleries? Well read on…

The most important thing to an artist is finding a public place to display and show off their work. There are tons of galleries out there and it is important to find a place who likes the work. The best ways to find the right gallery is by building a website, researching online, practicing ‘artist code’, and more.

Artists find it difficult to establish their names. Finding a way to display and sell work is important. The best method is by building a website. It is important to build a site that is optimized. This will guarantee traffic to the site with people who are interested in what the artist has to offer. It might be a good idea to hire a consultant who can build your site effectively and help with a good marketing campaign. Getting your name and your work out there is the best method because you can reach thousands of people quickly. The smart artists hire professionals because they know the importance of a good website.

Galleries do not like to be bothered by artists who are trying to sell their oil paintings. The most well known methods of ruining a chance with a gallery is when an artist knocks on the door in a ‘cold call’. They don’t like people knocking on their doors. An artist should never show up at a gallery without an invitation. All artists know they should never practice ‘cold calling’. This also includes calling galleries on the phone. Don’t waste their time. They immediately think it is rude and will make a point not work with the artist.

It is the artist’s responsibility to do their homework on art galleries. The best way to find galleries is through the use of the World Wide Web. Almost all galleries have websites. Searching through these sites gives an artist the type of work the gallery favors to display. They will also be specific if they are interested in oil paintings from new artists or seeing any new work. Most established galleries have favored artists and it is impossible to get into them. The site will say if they are interested or not.

New art galleries are usually open to talking to a new artist and showing their oil paintings. It is important to remember that most galleries don’t make it. A gallery can open and close the doors within as little as a year. If you do secure a gallery that is interested in displaying your work, be sure to get a check right then and there. It is important to have a written contract too. If the company shuts down you won’t be able to get your paintings back or any money.

When an artist wants to have their work displayed or showing in an art gallery there are many things they must consider. An online site to display your work and tell about who you are is the most important thing. The galleries will come to you if your site is developed properly. Also, remember not to harass the galleries. This will build a reputation that you are rude and people won’t ever consider you.

Thank you for reading this article about getting your art into galleries! If you have any further questions about this topic please contact us.


Teaching Lesson Plan for Art Using Sgraffito With Paint

Sgraffito Art Technique

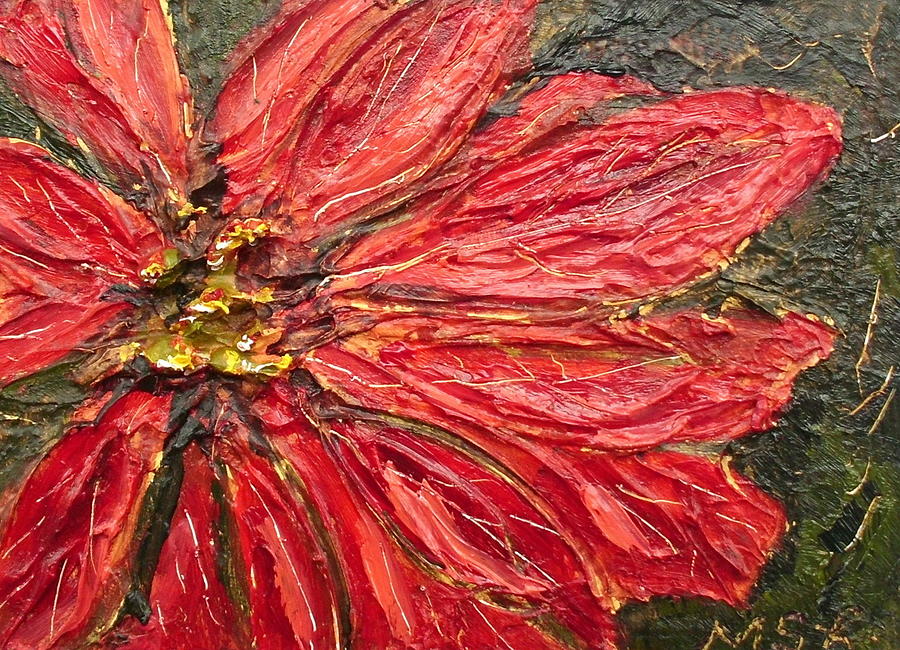
The Sgraffito technique is a great idea for an art lesson, for it is a novel way of enjoying paint. Not only does Sgraffito exploit the texture of the paint, it can also be used for decorative purposes, expressing patterns, movement and injecting energy into the painting. Traditionally, the Sgraffito technique was used to decorate pottery and ceramics, but it is also a great technique for painting.

Lesson Plan on Sgraffito

The art teacher may firstly explain to the class that Sgraffito is simply a painting method whereby the upper layer of paint is scratched off to reveal a different colour or texture beneath. Any scratching tool can be used for Sgraffito, including old toothbrushes, combs, toothpicks, palette knives or the other end of the brush.

Add Texture to Paint

Sgraffito can be used for several painting effects. The art teacher may show exemplars of different Sgraffito paintings and if necessary, conduct a painting demonstration in front of the class on how to use Sgraffito. The lesson will show that Sgraffito can be used to express:

  • Texture
  • Colour
  • Energy
  • Patterns

Demonstration Using Sgraffito

The texture of the Sgraffito can be enhanced when painting in impasto. Impasto means thick paint, the opposite of applying paint in thin washes. If using oil paint, impasto medium can be added to thicken the body of the paint. Alternatively, partially-dried acrylic paint can be used. Peaks and troughs can be etched into the paint in order to add texture and energy to the painting. If side-lit by a lamp, the texture of the painting will show up in sharp relief.

Experimental Art Activities for Adults

Sgraffito can also be used in a more decorative way by etching patterns such as swirls or crosshatches onto the upper layer of the paint in to reveal a different colour beneath. To use Sgraffito in this way, the painting surface must be prepared beforehand. This often means applying a contrasting colour onto the painting surface first.

If the painting is to be predominantly green, as in a landscape painting for example, a conflicting colour such as red or orange can be applied underneath. When the green paint is scratched off in strategic places, this contrasting colour will be revealed, adding energy and vibrancy to the painting. This under-layer of paint must be thoroughly dry before painting on top, or it may dirty the colour mixture of the final painting.

Art Materials Required for Sgraffito

In order to complete a painting in Sgraffito, the following resources are needed along with the usual painting materials:

  • Any scratching tool, such as combs, stiff brushes, palette knives or plastic cutlery
  • Acrylic paint
  • Impasto medium is useful for emphasising texture
  • Reference material such as an artistic influence, photographs or still life can be used. The composition must be kept simple.

Experimental Art Technique and Lesson on Painting with Sgraffito for Students

Students may find out for themselves how mark making will affect the painting. Using scratch marks to echo the outlines of the objects depicted, will add tension to the painting, as shown by the Expressionists. Munch’s The Scream is a good example. The French Fauves, such as Matisse’s paintings shows how mark-making to reveal a contrasting colour beneath can be used to add vibrancy to painting.

Art students may try out experimental art techniques in order to find inspiration for painting. Sgraffito is a great art activity for this purpose. Not only is it simple to do, but Sgraffito provides interesting painting effects. The only requirements are scratching tools, a paint thickener if texture is desired, and contrasting colours, if vibrancy is required. Experimenting with different techniques such as Sgraffito will inspire art students to explore other art techniques.

Thank you for reading this article! If you have any further questions about this topic please contact us.
Free Websites for Colouring, Painting, Modeling, Sculpting, Making Birthday Cards and Birthday Ideas for Your Kid

making ideas for kids

This article I have devoted towards free websites that offer making ideas for kids – for colouring, painting, modeling and for other creative kids activities. It is every parent’s predicament in summer vacation how to keep their children active in a creative way. I am no different, my daughter who is eight years old is full of energy and she needs constant engagement from the time she wakes up till she sleeps in night. So this summer myself and my daughter have sat in front of our lap top and started probing internet for free websites for colouring, modeling and other creative activities which a child likes.

Free websites for colouring, painting # 1
This website myself and my daughter both found to be a great free website meant for colouring and painting. This free website has been created for age group up to ten years. In this free website which every kid will enjoy, therefore it is my daughter recommendations to all her young friends.

http://www.uptoten.com/kids/coloringpage-mainindex.html

Free websites for colouring, painting # 2
Kidzpage.com is excellent free website for kids to put their creative young mind to work simultaneously kids enjoy the fun filled games, this free website my daughter has high esteem and she recommends it too. Please visit along with your kids to this free website for colouring & painting.

http://www.thekidzpage.com/colouring_menus/index.htm

Free websites for kids to learn sculpture #3
My daughter is good in sketching and painting in two dimension, but her joy and her creative young mind had no bonds , when she discovered she can also create three dimension models, by clay or playdough by joing this free website, she said dad communicate all my young friends about this free website.

http://www.artistshelpingchildren.org/paintingchildrenpaintsartscraftstideasprojects.html

Free websites for kids to learn about birthday cards and ideas # 4
This is another good free website for kids to play games, learn decoration ideas, n birthday theme party tips, and 100 cool birthday cake ideas with photographs and step by step instructions as well as videos. Your kid can learn in this free website about pirate party and spooky and scary Halloween ideas.

http://www.groovy-kids-parties.com/

This free website also promises to provide tools for Parents to Create Lifelong Happy Memories in their kid’s heart.

Therefore I recommend all the parents to see the above mentioned free websites for creative development of their kids, as well as to bring smile and laughter in your child face. Let your child learn while having fun in participating in free websites for colouring, painting and other creative behavior.

Thank you for reading this article! If you have any further questions about this topic please contact us.

Distressed Painting Technique – 10 Tips For You

We at Paintings studio more than happy to provide you 10 distressed painting technique tips. We hope you will enjoy!

Distressed Painting Technique

Creating a distressed or aged look is a great way to add character or elegance to tired doors or furniture. You could just wait. You furniture will be distressed eventually, but if you don’t have 30 years or more there are a quite a few ways to go about creating a distressed look for your furniture. You could hire someone. There are painters who specialize in creating faux finishes. Hiring a professional to age your furniture can get expensive, so you might as well just do it yourself. Here are a few distressed painting technique tips to make creating a faux distressed look simple:

  1. Make sure you sand the piece of furniture. Just because you’re applying a faux finish doesn’t mean you can skip steps. You will probably be able to skip applying primer, but you must be sure to sand the piece well.
  2. There are a lot of different ways to create a faux distressed look. You can use a glaze, painter’s wax, a crackle glaze, and many other techniques. Decide exactly what kind of look you’re going for.
  3. Before you paint, hit your local Sherwin Williams store. They have paints that create the faux finish you’re looking for without a lot of hassle. Some stores have videos you can borrow that will walk you through the process. Almost every Sherwin Williams store has books you can look at and associates that can demonstrate various techniques for you. They’re a great help when painting just about anything.
  4. If you’re using a glaze to create a distressed look, use paint with a satin finish as your base coat. This will help the glaze go on smoothly. A flat paint will create a blotchy look.
  5. The simplest way to create a faux aged look is to use sandpaper. Naturally, the areas of a piece of furniture exposed to sun will have a lighter shade. You can create this look by sanding the paint a bit. You can also paint a different color underneath the top coat and sand the top coat to let the contrasting color underneath show through.
  6. Before you try your faux painting technique to your entire piece, try it on a small section first. This way you can see it before you waste the time and money to do the entire piece and make changes if you need to.
  7. Using wallpaper paste, latex paint, gum Arabic, acrylic paint, a toothbrush and a hair dryer you can create a beautiful antique door. After you sand the door, apply a base coat of light colored water based paint. Let that dry over night. Apply a good coat of wallpaper paste and gum Arabic, letting this dry too. Once that coat is dry, apply a coat of off white latex paint, drying this coat with a hair dryer turned to high. It will crack. Next, apply an acrylic paint in some lighter shade of brown, depending on the look you want. Use an old toothbrush to lightly splatter a slightly darker color if you want.
  8. If you’re going to use a sanding technique, make sure you sand the areas that are usually thinned naturally. Sand the high points and corners more than other areas and you will create a naturally aged look.
  9. Add a darker antiquing glaze to a mixture of clear oil glaze and mineral spirits to create a simple, natural look. Apply more to the recessed sections. Wipe some of the glaze off the high points. This will darken the paint already on the piece, simulating the look of dirt and age.
  10. Apply alternating layers of different 3 different colors of paint and tinted painter’s wax. Start with a layer of paint, then wax, another color of paint, wax, and a last color of paint. Once the last color of paint has dried, apply crackle paint. Once the crackle paint has dried you should sand areas to create an aged look. Once you’re done sanding, apply a last coat of painter’s wax to seal the piece.

    We hope that you enjoyed our article about Distressed Painting Technique Tips. If you have further questions, feel free to contact us.

Early Renaissance Painters: Robert Campin, Simone Martini and the Subjects of their Paintings

what

Q. What is Louis IX in Simone Martini’s “St. Louis of Toulouse” (1317) doing?

A. Crowning Robert of Anjou. Little is known of the life of artist Simone Martini (c. 1284 – c. 1344), but he is famed as a major figure in the development of early Italian painting. He is believed to have been a student of Duccio, one of the most influential artists of his day and the creator of the stunning Maesta altarpiece in the Museo dell’Opera del Duomo in Siena. Today the painting “St. Louis of Toulouse” can be visited in the Museo di Capodimonte, Naples.

Q. What is Joseph in the right wing of Robert Campin’s “Merode Altarpiece” (c. 1428) doing?

A. Making mouse-traps. Robert Campin (1375-1444) was the first great master of Early Netherlandish painting. The altarpiece can be seen at the Metropolitan Museum of Art, New York.

Q. What is the baby Jesus Christ in Jan van Eyck’s “Madonna with Canon van der Paele” (1436) doing?

A. Pinioning the wings of a green parakeet (which is a symbol of sin). Today this sumptuously detailed painting can be seen at the Groeningemuseum in Bruges, Belgium

Q. What is the archangel Michael in Rogier van der Weyden’s “Last Judgment” (1450) doing?

A. Weighing in his scales the souls of the Saved and the Damned. Today viewers can see this painting by Dutch Renaissance master van der Weyden at the Musee de l’Hotel Dieu, Beaune in France.

Q. What is Niccolo da Tolentino in Paolo Uccello’s “Rout of San Romano” (c. 1456) doing?

A. Directing the attack of Florentine forces against the Sienese on June 1, 1432. Niccolo da Tolentino (1350-1435) was an Italian condottiere, or mercenary. He was hired by many Italian lords and is famous for the many battles he won on their behalf; “Rout of San Romano” serves as a memory of his heroism. Today the riotous and colorful painting, in which Niccolo can be seen in the center in charge of the Florentine army, can be visited at the National Gallery, London.

Q. What are the angels in Andrea Mantegna’s “Agony in the Garden” (c. 1460) doing?

A. Holding the instruments of Christ’s Passion. The Passion represents the suffering of Jesus Christ in the hours surrounding his death by crucifixion. In Mantegna’s depiction, angels in the sky are bringing the Instruments of the Passion to Christ while he’s at prayer and while the disciples sleep. The instruments include the cross upon which Jesus is hung, the column where Jesus is whipped, the vessel with the vinegar offered to the Lord, the sponge soaked with vinegar offered to him, and the spear used to pierce his side. In the background Judas is coming with soldiers to arrest Christ. Today the painting can be seen at the National Gallery, London.

Q. What is Flora in Botticelli’s “Primavera” (1482) doing?

A. Strewing flowers from her gathered skirts. This lovely work shouldn’t be missed at the Uffizi in Florence.

Thank you for reading this article! If you have any further questions about this topic please contact us.

Create Digital Paintings on Your IPad with the Pen & Ink App

creating digital paintings

Creating Digital Paintings Made Easy with the Pen & Ink App

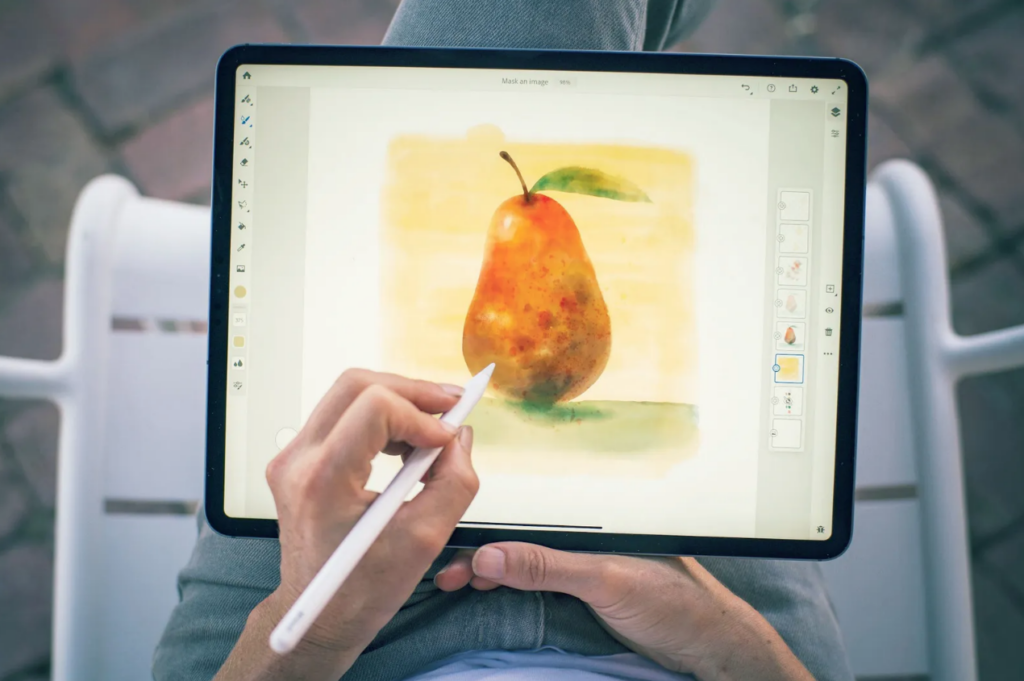
Creating Digital Paintings is easy with the “Pen & Ink” application, by Stepping Stone Software, LLC, is a terrific low-cost approach to digital art creation with a focus on watercolor stylings. I use it on my iPad with a plain Bamboo stylus, and find it very easy to use to create digital paintings. The limited version of the app is available for free in the iTunes store, and to upgrade to the full version, the developer charges a reasonable fee of $2.99.

The app allows you to recreate the look of a watercolor painting with a great degree of realism in its brush strokes and textures. There are several tools it offers: two types of erasers, a pen, a pencil, and three types of paintbrushes. Each brush, when selected, allows you to choose the style of stroke/painting effect, the size of the brush, and the opacity of the color being applied.

From the options you can select, there are practically infinite variations of brush strokes and styles you can use to create a doodle or a masterpiece. You can draw with your finger, but I find that using a stylus (even a plain, inexpensive one like mine) helps in control and fine detail. You can also zoom in quite a bit, so creating finer details in your art is easy to do.

The app’s interface is simple and attractive, and though it doesn’t offer much in terms of options, you can learn to use it very quickly. Through trial and error, you can determine how best to create your art–and if you make a mistake, there’s always the “undo” button, which comes in handy when making a digital painting!

Though you can start with a blank canvas (the app also gives a handful of textured, realistic canvas backgrounds), you can also import a picture to work from in the background. You can’t change the transparency of the background image, though, and there are no layers to work with. The app does have its limitations, but overall, I find it to be not only fun to use but very satisfying in making vivid and realistic digital paintings.

Thank you for reading this article! If you have any further questions about this topic please contact us.