Professional Home Painting Tool Selction Made Easy

home painting tools

Professional Home Painting Tools Selection Made Easy. This article is going to cover the basics of selecting home painting tools including brush and roller types used in professional painting. To start with lets cover the equipment, a professional specializing in home painting really needs several brushes and one roller with several roller covers to produce high quality work. While there are several quality brands of paint brushes available for your use, the most commonly used by professionals for its long durability is “Purdy” brand. You will need one brush for latex paints, and one for oil based paints. I do not recommend that an amateur use oil based paints until they are able to do a good clean job with latex, as latex is easier to clean up after.

The brushes should be angle cut in order to make drawing a line with them easier. They will be labeled as to the type of hairs they have and what type of paint that is good for. Once purchased I recommend marking them with a permanent marker on the tip end of their handle as to what type of paint you use them in and then store them in their covers to protect the hairs from getting bent out of place.

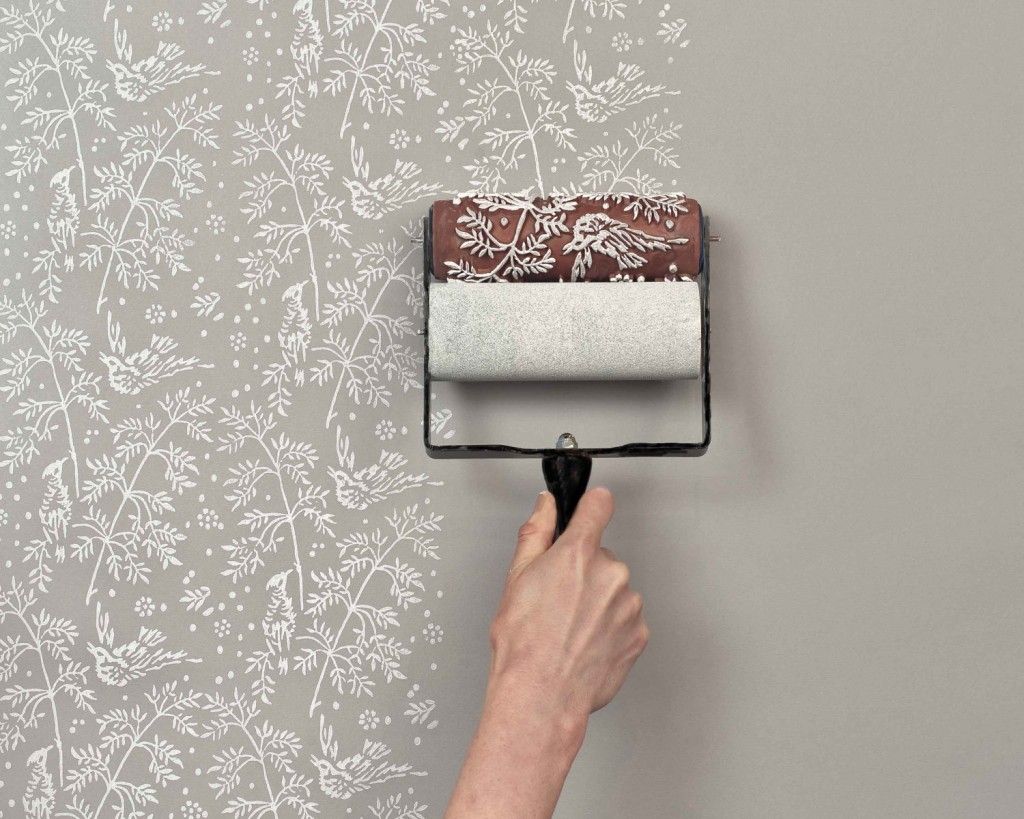
A good brush will probably cost you $20.00 USD and should be 2-1/2 to 3 inches wide depending on personal preference. A smaller brush is easier to get into tight spaces with, while a wider one needs to be reloaded with paint less often. You may also need a small 1/2 inch or maybe even an artist brush for some of those small spaces or if you want any type of graphics on your walls.

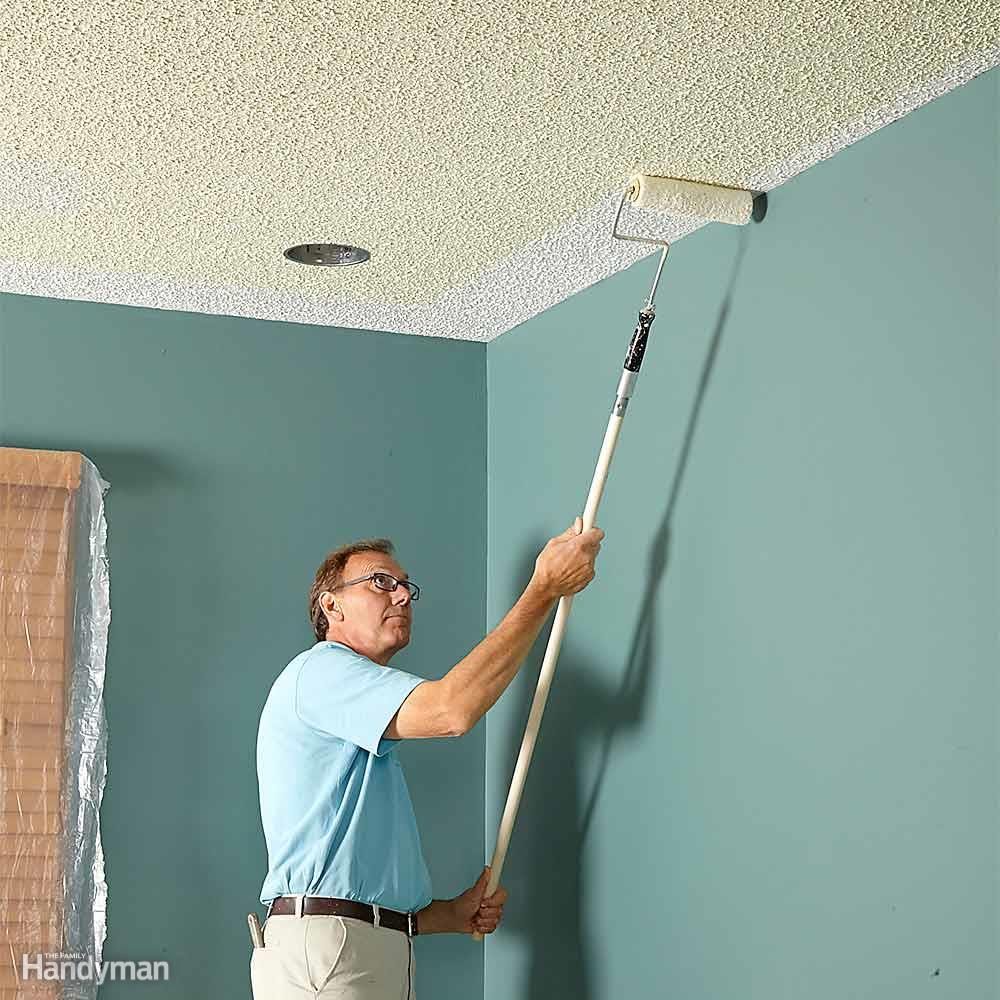
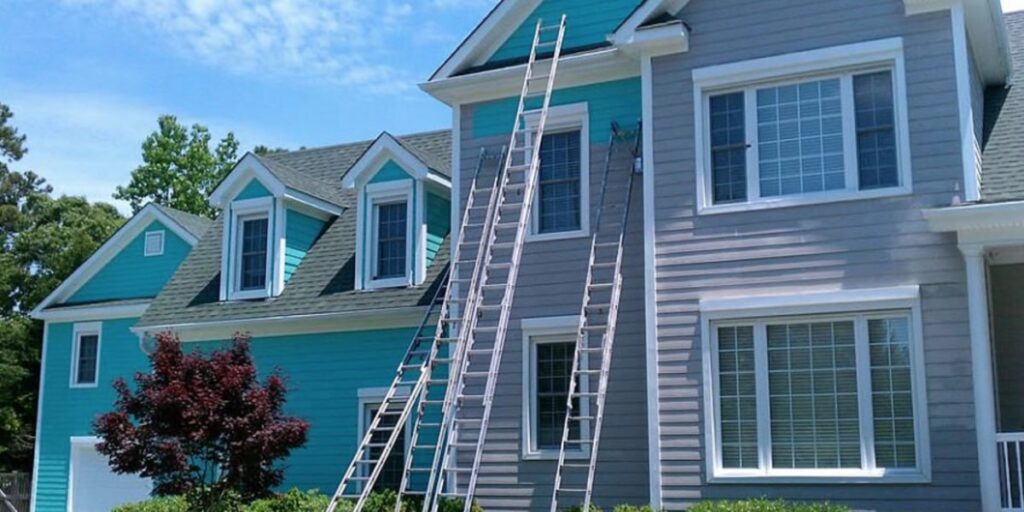
The standard roller is 9 inches wide and is used in wide open spaces. The type of roller cover you use will depend on the texture of the wall your using it on. A fine 1/8 inch or less nap cover is used on smooth walls while a 1/4 inch works good for knockdown texture and you may need a 1/2 or 3/4 inch nap for really rough surfaces. For oil painting I recommend a cheap cardboard core to the roller cover as you will want to throw it away on a daily basis. For latex painting I would look for a plastic core as it will wash out without falling apart and thus should last several weeks or even a month before you have to throw it away. Smaller 3 inch wide rollers are commonly used for painting some trim and large signs they are not recommended for cutting lines like in corners or against roofing or on signs, this is what a brush is for. Although on a rare occasion under right circumstances a professional can draw a fine line with a roller it is very tricky and not recommended for the amateur. There are special rollers made with an edge guard just for drawing lines that makes it easier for the amateur to do it. That guard requires more frequent cleaning to keep it working good, and once you get used to a brush for lining it will be the easiest way to do it unless you only have a little to do then the extra clean up of an extra piece of equipment might be more hassle than it is worth. Sprayers are only good for fences and large walls with little or no brick and very few windows, as everything around where you are spraying needs to be masked off and covered up and the extra masking and covering is often more work than if you just took the extra time to brush and roll it and with spraying you still have to brush your lines in. While sprayers have come down in price dramatically in the last twenty years they still cost enough that it is not worth while for the home owner who if he does the job right is only going to be painting once every twenty to thirty years. I personally have exterior and interior paint jobs that are twenty years old and with the advancements that have been made in the last twenty years it wouldn’t surprise me if ones I am doing today would last thirty years. The key to getting long durability out of a paint job, is to seal it up tight and do a good job of troubleshooting problems that may cause water to get behind the paint or be held on the paint. Examples of problems would be, plants that are planted too close to a house will touch and hold rain water against the paint for extended periods of time while leaky gutters or roofs allow water behind the paint, any of these will cause the paint to peal. If you have pealing paint you know you have another problem as paint won’t peal otherwise, it would just fade away.

Thank you for reading this article! If you have any further questions regarding home painting tools or anything else about this topic please contact us.

How to Paint a Portrait

paint a portrait

You can paint a portrait. It is quite simple. You do not need any special skills. Although it would be easiest to paint with at least one hand, it is not necessary. There are painters who use a foot or a mouth. What you will need is desire and inspiration. The rest is a three-step process, so let’s get started!

1) Select your medium

As with any type of painting, you will need paint. There are many types of paint to choose from: oil. Acrylic, watercolor, tempera, aerosol spray, and finger are some examples. If you have no paint, that is okay. Colored liquids in various viscosities can be found all over your home or office: toothpaste, transmission fluid, pudding, gravy, fingernail polish. Be creative! You can combine ingredients to get the colors you want.

After you’ve acquired your paint, now you need something to paint on. Canvas is great, but it is rather expensive. Poster board, slate shingles, and plaster board are all very good to paint on. If you are painting wit toothpaste, you might as well paint right on the bathroom mirror. Just remember one thing: if you are going to paint on community property, ask permission.

2) Select your tools

There are many types of brushes available to artists: filberts, fans, rounds, flats. They come in many shapes and sizes. The bristles are either made of synthetic materials or animal hair. Some animals that have generously donated their precious hair to the noble cause of art include mink, camel, horse, and badger. Some artists in Java use the hair of the nearly-extinct wooly rhinoceros for brushes. These artists greatly cherish these exotic brushes and protect them ferociously. You should love your brushes, too. Take care of them and keep them clean. Animal hair brushes are expensive. You may want to try to make your own. If you have a dog, cat, or pet ferret, you can make very good brushes. Just snip one to three inches of fur, glue it to any old stick, and use a cut-up pot pie tin for a ferrule. It is that simple!

You don’t need brushes to paint. You can use rollers, feathers, turkey basters, and most power or hand tools from the garage. You can use your fingers. Some artists paint by poking their fingertips with a lance and paint with their own blood. This is not suggested, because your palette would be extremely limited.

3) Choose your subject

Sometimes the hardest thing for an artist is not how to paint, but what to paint. You should paint someone you like. It can be a friend, relative, or acquaintance. You can have your subject pose in person, or you can paint from a photograph. Maybe you could paint the portrait of a famous person: rock star, actress, athlete, war hero, living or dead, man or woman. It is up to you, so choose wisely.

You can paint your subjects realistically or abstractly. You can flatter them with portraits or you can dignify them. If your subject is posing in person, allow time for breaks.

Now that you know how to paint a portrait, go get started. It’s fun, easy, and relaxing. Painting portraits is good art. All you need is Inspiration!

Thank you for reading this article! If you have any further questions about this topic please contact us.


How to Paint a Doll’s Face: Faceup Tips for Pullip, Blythe, and Super Dollfie

Doll Painting

For doll enthusiasts, whether their obsession is a Pullip, a Blythe, or a Dollfie, there is no greater joy than customizing their doll. There’s also no greater pain than ruining a beautiful doll with stains or chemicals after the wrong care. For all that can go wrong with a faceup, however, so much can go right. Here are some tips for painting a beautiful customized doll.

Know The Medium

Each type of doll will require different care. The main types of doll that can be painted and customized are plastic dolls similar to Blythe and Pullip, vinyl dolls like Tyler Wentworth and Barbie, and resin dolls like the Volks Super Dollfie. Of all of these, Resin is the easiest to change, and vinyl is the easiest to paint, but stains easily. Aspiring doll faceup artists may want to practice on a few cheap ceramic dolls before tackling Tonner fashion dolls, or resin ball jointed dolls (BJDs).

The first step in painting a doll face is to remove the old face paint. In nearly any medium, this can be done with three items: an abrasive sponge, some acetone (resin only!), or some rubbing alcohol. When using any caustic material such as acetone, it may be a good idea to dilute it with water to avoid damaging the doll’s face. Dip a sponge into the alcohol or acetone and water solution, and use it to gently wipe away any current paint. Clean the doll head thoroughly after removing paint, as leaving chemicals on any material might damage it.

Painting the Doll

The next step in painting a doll is to seal the doll’s face. There are many substances to do this. Among doll hobbyists, Testor’s Dull Cote and the Japanese import Mister Super Clear are the most popular. These sealants not only protect the original material, but provide a texture that will hold paints and powders. Testor’s may not be suitable for Blythe or Pullip dolls, so always test a spare head first. Always seal a doll outdoors, in a well ventilated area. Hold the can at least a few feet away from the doll head, and lightly mist the head a few times until the area is coated with a transparent layer of sealant.

Many doll faceup artists begin with blushing. Blushing a doll adds a lifelike quality. There are several suitable methods of blushing. For those talented with an airbrush, airbrushed blushing is very natural in appearance. For beginners, however, chalk pastels, or oil free makeup will work. Makeup brushes, or natural fiber art brushes are best for blushing. Create the desired color by applying the brush to the chalk, or by shaving the pastels and mixing colors. Lightly dust the powder on the doll’s cheeks and nose.

Painting Doll Eyes and Lips

After the doll is blushed, another layer of sealant will protect the work so far. Generally, any mistakes with the paint can be removed with alcohol if applied quickly enough. The eyes and the lips are the next step. The level of detail here will depend on the artist’s personal preferences.

To paint a doll’s lips, first mix the preferred color of paint using acrylic paints. For a glossy look, mix paint with a thinner for some transparency. For a matte color, apply paint directly to the lips. Painting the eyes is done in the same way. First, apply a dark liner, and then allow it to dry. Eyeshadow can be done in either chalks or paints.

Eyelashes and eyebrows are often the hardest part of a doll’s face to paint. It’s always a good idea to have a piece of glass or plastic to practice the stroke and consistency of the paint before applying it to a doll. A liner brush with a long, fine tip is often the best tool for painting doll lashes and eyebrows. Paint the lower lashes first, with light strokes that taper at the ends.

The eyebrows can be difficult, partly because they should be symmetrical. This can be accomplished easily by designing the shape of one brow, and then using a stencil to paint it. Detail can be added as desired.

At this point, seal the doll’s face again with the sealant, and allow it to dry fully. Some artists use a clear acrylic gloss to add some sheen to the lips or eyelids. Do not seal after using a gloss, as this will dull the shine.

Thank you for reading this article! If you have any further questions about this topic please contact us.

Botanical Art and British Drawing Master Walter Fitch

botanical art

With botany developing into a science the services of a drawing master of botanical art were required for the realistic and accurate portrayal of plants. At the same time, demand grew for pictures of flowers. From the 17th to the 19th century, the finest flower paintings were produced in France, Germany, Austria, Holland and England with Ehert, Bauer and Redoute being among the greatest drawing masters.

Walter Hood Fitch (1817-1892) was one of the most important British botanical artists of the 19th century. Introduced to botany by William Jackson Hooker, editor of Curtis’s Botanical Magazine and director of Kew Gardens, Fitch illustrated for Kew and other publications for 40 years producing some 9,000 drawings. Most famously he worked with Joseph Dalton Hooker, the most prominent botanist of the 19th century.

Before photography, the media used to draw plants and in flower paintings were

  • Watercolour, first on vellum and later on hot-pressed paper
  • Oil painting
  • Wood cutting, etching and metal engraving
  • Aquatint, mezzotint, stipple
  • Lithography

How to Draw Plants according to Walter Fitch

Endersby’s Imperial Nature provides many insights on what Fitch and his partner, the famous botanist Joseph Dalton Hooker, thought about the techniques and practices an artist should employ to draw plants or flowers. These were:

  • Constant observation: According to drawing master of botanical art, Walter Hood Fitch, while colouring can be easily mastered, the only way for a botanical artist to acquire a correct eye for drawing is by constant observation.
  • Knowledge of plant anatomy: Fitch stressed that to draw plants and flowers and get the perspective right, the artist should have an understanding of plant geometry, a solid knowledge of plant anatomy and structure. Fitch himself was a master of plant dissection.
  • Accuracy and bold outline: Accuracy was certainly important for flower paintings or botanical drawings. Hooker advised a field sketcher to make sure that he makes an accurate free bold outline: “Do not hold the pencil too tight nor press too heavy or hard, but learn to make free strokes”. Fitch was famous for his bold outline and free flowing strokes.
  • Use other people’s sketches and dried specimens: Often Fitch never saw the plants he drew but worked instead from sketches provided to him by field artists or from dried plant specimens. A great drawing master of botanical art, Fitch was able to create flower paintings that looked lifelike from a series of flattened herbarium specimens. This he accomplished due to his deep knowledge of plant anatomy.

Finally as Endersby points out, before learning how to draw plants the Victorian student should have first learnt plant anatomy and classification: “drawing was only a learning process for those who already knew what to look for”. For flower paintings or for botanical drawings one needed a good, undamaged specimen; “the act of drawing was one point in a cycle of observation, mimesis, inscription and memorization”.

Thanks for reading this article! Please contact us if you have any further questions.


Host a Paint Your Own Pottery Party

party
Pottery wheel

Pottery painting provides a fun activity for party-goers. Great for fund-raisers, showers, luncheons and kids parties, painting pottery allows guests to be creative and make their own keepsakes for the event. Luckily, anyone can host a pottery painting party in his or her own home with the help of some innovative products.

Preparing for a Pottery Party

Hosting a pottery painting party in your home requires the use of pre-glazed ceramics and pottery. Look at thrift and dollar stores for inexpensive pieces of pottery. Make sure that the pieces are all white or a light neutral tone. This will allow party-goers to easily add their design to the pottery. Purchase a variety of shapes and sizes of pottery so that guests will have a wide array to choose from.

Also head to a local craft store and purchase “Porcelaine 150” Paint and Pens. These innovative products adhere permanently to ceramics when baked in an oven. They are dishwasher and microwave safe and non-toxic. Also purchase some paint brushes, paper plates and small paper cups .

The pottery must be completely clean before painting to make sure to wash all of the thrift-store pottery. Fully dry the pottery and set it out on a table so that guests will be able to browse and pick the pieces they want to paint.

Before the party, set up tables so that guests will have plenty of space to work. Place paint brushes, paper plates, towels and small cups full of water at each seat. Place the paint products in the center of the table. If necessary, cover the tables with vinyl table cloths to prevent damage.

Painting Your Own Pottery

When guests are painting their pottery, they can use a wet rag to wipe off any imperfections. The paint will not be permanently set until it is baked in the oven. Tell guests to write their initials on the bottom of any pottery piece they paint. This will make it easier to give the pottery back to the guests at the end of the party.

Have guests paint pottery at the beginning of the party. After they have finished, bake the pieces in a 300 degree farenheit oven for 30 minutes. Serve food or play party games while guests wait for their finished pieces.

After the ceramics have been removed from the oven, allow some time for them to cool. Once cool, guests can collect their pottery and take it home.

Create a Unique Party Experience

Party guests will love creating their own custom pottery pieces. This fun activity will create a memorable event for all who attend. Your party will definitely stand apart from the rest with such an enjoyable and unique activity.

Thank you for reading this article! If you have any further questions about this topic please contact us.

How to Paint a Night Setting

painting night scenes

Painting night scenes is not the norm. There are many artists that paint during the early morning and throughout the day. Why not paint at night? The answer is obvious, but some of the best moments to seize are those at sunset. Take your paint set out tonight and test your skills. You may find that you like doing this.

To learn painting night scenes or something similar to the photo above, you will need black, green, blue, white, brown and yellow paints. Use some gesso to put on the canvas first, and do not give it time to dry. You will need a two inch brush to start with. Other brushes needed are a fan style, 1/4″ flat, thin long bristle around a size 3 or 4, #2, #1, and a #00 or #0 size brushes. I prefer using one of those cheap plastic palettes for acrylic paint mixing. Some artists prefer ceramic palettes.

If you want a watercolor style painting use water to dillute the paint. This will still help you in painting night scenes but merely alter the styleTo keep it strictly acrylic use paint thinner used for acrylic paints. The kind you use in painting your house is too strong and will damage your brushes. You may find having duplicate brushes makes the painting go quicker if you are soaking a brush to be cleaned. Have a drying cloth nearby to dry out your brushes. When everything is nearby it will save you plenty of time from running back and forth in cleaning your brushes.

Start by blending a little blue with white, and just a touch of black to get the color of the evening sky. When I say a touch of black, I mean, just a touch. Too much will have you starting all over again. Take your time to get the right color. If clouds are there or you want clouds, hint at them with a tad more white and darken them at the top to show the sun is setting. Too many clouds may take the focus of what you will be painting later on.

Determine your horizon line. How much sky do you want in this painting? Do not go straight down the middle because it will make it seem childish in thought. Either bring the horizon line down or raise it up. Quickly gray in the horizon line with a #2 or #1 paint brush. From there, clean off your two inch brush, and paint in a dark green mixture starting from the bottom. Work your way up towards the underside of the horizon. As you get closer to the horizon, lighten up the dark green a little bit. If what you are viewing is ilghter then paint it as such.

A sure sign you are getting better at painting is understanding that colors are not so distict the further away they are unless they are a light.

To paint the tree in, start with a dark brown mix. Remember, the sun has not completely set, so some colors are still somewhat visible with the refracting light. Catch glipses of brown on the side of the tree facing the sun. Paint these in with a #0 paint brush to let the viewer know that it does have color. Use your #1 brush to paint in the finer branhes, while using the long bristle brush for the larger limbs. You can use the flat brush for the leaves using a dark green in combination with black to show some leaves don’t have color.

Bushes are sometimes best put in with a fan brush. Lightly dab the color you mixed onto the canvas. The #1 or #0 brushes are best for painting in their stalks and limbs. Use these same brushes to add hints of grass here and there, and to dab in slightly gray trees in the background.

Finish up with various size yellow spots here and there. Be careful not to make them too big. The larger dots can have a dab of brown or black at one side to show there is a body to the lightning bug. Do not get too carried away as this will also ruin the wonderful work you started.

The final step in your painting is to sign and date it. You do not have to date it, but if you plan on selling it that will be a plus. Now you have your night time painting. You can paint it however you want. What I have explained is rather simple, and is a start for someone new at painting.

Thank you for reading this article! If you have any further questions about this topic please contact us.

Painting Ceilings — Hire a Pro and Save Your Sanity

painting ceilings

I can barely recall the last time I attempted painting ceilings, but I know it was more than 20 years ago, for sure! Any time we’ve needed ceilings painted since, we have hired the ‘experts’, who truly make the job of painting ceilings seem like a whole lot less bother than I remember from the few times I attempted it myself…and the ceilings come out uniform and crisply fresh!

Painting ceilings is definitely on my list of “Things I really DO NOT like to do”.

These professionals come in with their tools and equipment, immediately start taping and hanging their poly sheets on the walls and in doorways or archways between rooms. They lay down their drop cloths to cover the floor and any furniture or other items left in the space, then they set up their rolling staging or step ladders, and begin mixing, stirring and pouring the paint into their spraying equipment. Then they simply begin painting the ceilings!

Depending on the sizes of the ceilings involved, it won’t be too long before the job is done and all cleaned up. We once had all of our ceilings (about 1800 s.f.) painted in less than one day! And, all we had to do was get out of the way, (and, of course, pay the bill). Surely, hiring the professionals cost more than doing it myself, but in my opinion it was well worth it!

So…for me, the best way to paint ceilings is pretty much to “leave it to the professionals”! Otherwise, you may end up ‘marred for life’ (like me!) about painting ceilings yourself!

You see, whenever I tried painting ceilings myself (perhaps as many as 5 or 6 times actually, and with BRUSHES & ROLLERS, not spray equipment), it was always the same thing…I would always end up virtually covered with speckles of paint…my face, arms, legs, and any other part of me not adequately covered for the job at hand.

Ideally, I’m sure it is smarter to wear long sleeves, long pants, gloves, hat or bandana, safety glasses, and of course….at least a ‘dust mask’ (for some respiratory protection), but I was never one to follow instructions anyway, so I’d end up soaking in the bathtub when the job was finally done. Oh well…that’s not such a bad thing, but the whole job made for a trying day, to say the least.

If you DO attempt painting ceilings yourself, I suggest you visit a few other websites for more in-depth advice and instructions. I have posted a few links for your convenience to learn more about painting ceilings!

Good luck, and happy ceiling painting!

Thank you for reading this article! If you have any further questions about this topic please contact us.

How To Draw and Paint Dolphins in Compositions: A Dolphin Is An Ideal Subject When Planning Sea Themed Art Displays

dolphins

Dolphins are a wonderful subject matter because they are such graceful creatures that they can be used as a motif in all kinds of artistic statements. Featured in artworks from bronze casting to simple cartoons, the character and playful nature of the sea creature has inspired artists through the ages. Dolphins are elegantly shaped and they are easy to draw.

How To Draw Dolphins

Ask students to search the site How Stuff Works.com until they locate the step by step instructions called “How To Draw A Dolphin. ” These instructions are for young artists. This basic drawing process will explain the elements of capturing the shape and character of the dolphin.

Stepping Through To Lyrical Composition

  1. Students master drawing the mammal, so that they can comfortably capture proportion, perspective and structure. Give them support and time to become comfortable with drawing by using a site such as How Stuff Works.com. After experimentation, ask them to decide whether they wish to draw realistically, abstractly or in a cartooning style
  2. The teacher can begin working towards the exhibition or classroom display by teaching the students about composition. Talk to them about placing the creature in relation to the background and environment within which it swims. Help them to find ways to place dolphins within the pictorial space in relation to each other, or to trainers and other fish or animals in the picture plane
  3. Artists can create beautiful compositions using the motif of the dolphin because of the circular feel to the body. They swim rhythmically, and when they swim, jump and play they create movement through the water. This fluidity adds to the dynamics of composition. Splashing also adds lighthearted elements to the pictorial plane.

Research the Design

How uniquely original and resonant the range of student artwork will be, is sure to rest on how much focused research each artist does before settling to design the final composition.

Set a web search task so that students locate sites where they can find images from which to draw dolphins in various poses. Ask them to experiment with light and tone until they have developed the ability to capture various diffusions of light and how it plays on the dolphins as they swim about. Insist they take their time so that they sink into the flow of the experience.

The Harmless Lion Gallery

Here is a dolphin image by Tursi that allows you to see what the light would look as it dapples across the velvet skin of the dolphin while it is swimming under the sea. Ask the students to browse the entire Harmless Lion Gallery and study the Tursi Dolphins by cruising on from that image link. The students will be able to examine a variety of images that capture dolphins at play.

Imaginative Display

By now the students should have

  • mastered the drawing side of the project
  • become able to capture the contextual aspects of mood and atmosphere
  • captured movement through gestural drawing and design

Now is the time to ask them to become more imaginative. They may search out images of dolphins swimming in circles, or they may cut themselves a simple dolphin stencil and start playing with placing the dolphins in a variety of places, spaces and poses. Encourage creative freedom as they play with colour, line and media to create an abstract composition

Give them permission to experiment boldly, but set a time limit on the final stages of experimentation. Make sure the students know when their work is to be submitted ready for display.

Once these sea themed compositions have been carded up, framed or otherwise mounted, display them in your classroom, the library or foyer of the school. They will create an atmosphere of lighthearted good fun.

Thank you for reading this article! If you have any further questions about this topic please contact us.


Creative Ideas on Painting a Kid’s Bedroom

painting a kids bedroom

Painting a kid’s bedroom can be the most fun room in the house to decorate. You get to be off the wall, colorful, and there are no rules. You can be as wild as you want and it actually ads to the room. Painting a kids room is no exception to this rule. I love painting kids rooms because you can do practically anything you want and be more artistic than in any other room in your home.

You will want to paint the room to go with the room’s theme. If the room is done in a baseball theme, you can paint the top half of the wall a sky blue and the bottom of the wall a dirt brown. If the room is done in a duck theme, consider painting the wall a soft yellow. The paint color of the room can really pull the room together and do more for the theme than any other part.

You may want to consider actually painting designs on the walls. I love to do this! This is where you can have the most fun and add the most to your kid’s room. There is no limit to the excitement you can add to the room by painting designs and pictures on the walls!

Space themed kid’s rooms are a lot of fun to paint! You can paint the planets on the walls, paint the background of the walls black or dark blue, and paint stars on the ceiling with glow in the dark paints. To paint the planets on the walls you will want a book with clear pictures of each planet. You need to draw each planet onto the walls with a pencil first, this way you don’t run the risk of doing a very sloppy paint job where the planets don’t even look like planets. By using a pencil you will be able to erase all of your mistakes until you have them drawn perfect, and then paint them onto the walls.

Fish aquarium themed kid’s rooms are fun to paint also. You can paint the walls blue, then use a pencil and draw on all of the fish. Don’t forget to draw on the other sea life, such as coral. You can even include a shark or some dolphins; after all, this is a pretty big aquarium!

You can have fun painting the themes onto the walls no matter what the room theme is. Whether it’s trains, planes, boats, teddy bears, Barbie, or sports; you can paint it on the wall!

Thank you for reading this article! We hope you got a lot of inspiration for painting your kid’s bedroom. If you have any further questions about this topic please contact us.


Tips for Unique Home Exterior Painting

home exterior painting

Home Exterior Painting that Showcases Your Creativity and Unique Personality

When you have a close look at your neighbourhoods you will realize that majority of those homes are painted in the same design, colour, and layout. It is advisable when you want to repaint the home to be original and avoid uniformity at all cost and you will end up having a smart home different from the neighbourhoods. The colour you choose shows gives you a chance to show case your creativity and also brings out your personality.

In some neighbourhoods, you will find out that it has a homeowner’s association and some rules, In this case it is good to adhere to the rules and regulations before repainting your house. This is your home and therefore you have a right to choose colour you want irrespective of what the surrounding neighbours like or dislike about your favourite colours. So be adventurous and do your home exterior painting, without much consultation from your neighbours. For any consultations, it is always wise to get experts or professional opinions. The experts are able to support your choice and help them improve on it other than criticise it.

It is always wise to select a house-painting colour that has a meaning since most people will tend to ask you why you chose the colour. It can be fun when you select the colours of your favourite animals, for example, the zebra. In such a situation, probably the house will be painted black and white. You can also decide to paint from other symbols. For instance, you can also choose the colour of your flag. In some situations, you can get confused and is not sure of the end result of a certain colour. It is good to apply a little of the colour of choice and maybe have the trim painted that bold colour as an accent to the overall colour and see how you like that. In such situations, it is equally good to consult your contracted painters since their options can be nearly limitless. They will always advise you on colour ideas and colour combinations and go ahead to show them their previous projects. This makes you more creative in your choices for the home exterior paintings. In case you have questions concerning the layout and the colours to use, the contracted painter can be of great help.

Lastly, there are some words of caution to take heed of. If for instance your neighborhood has a homeowner’s association that follows rules concerning your house paintings, it is always good to adhere to them. In this case, have adventure and fun in your home exterior paintings and be very unique for better results.

Thank you for reading this article about home exterior painting! We hope it was very helpful. If you have any further questions about this topic please contact us.