Helpful Tips to Consider Before Your Next Household Painting Project

household painting project

Excited to begin your next big Household Painting Project?

Nothing can make a room feel more brand new then a fresh coat of paint. But, before you go crazy and reach for the paint brush, there are some things to consider before you slap on the first coat of paint.

Paint alone will not cover all of the blemishes that can appear on your walls, so in order to make sure that you get the end result you’re looking for, it’s necessary to do a little prep work before you ever pick up that brush. It’s a good idea to plan on spending as much time doing wall repair as you will actually spend painting, but the time spent is well worth the effort and your friends will insist that you paid a professional to do the work.

The first step in preparing your walls for a new coat of paint is to wash them down with a phosphate-free wall cleaning agent and then rinse the wall with a sponge until the water runs clear. Once you’ve finished cleaning the walls, it’s time to inspect them for any damage like nail holes, cracks, or gouges. Pay special attention to seams in the wall and the area around windows and doors.

Repair all of the damage that you’ve located. There are several ways that you can repair damaged walls; here are a few different options.

Caulk

Use caulk to fill small cracks, transitions from wall to molding, and down the corners of the room. Smooth the caulk with a wet finger so you have a nice transition from one surface to the next, and then allow to dry completely.

Surfacing Compound

Surfacing compound is a different composition from joint compound, which is used in drywall construction. Use surfacing compound to patch damaged areas in your wall such as gouges or cracks.

Glazier’s Compound

Glazier’s compound is the putty that holds windows in place and it’s designed to stick in place and dry quickly. This makes it an excellent product to use for filling nail holes or other small defects in your walls.

Once you’ve completed the repair work that’s necessary on your walls it’s time to prime them. Applying a primer sealer to your walls before you paint them will keep the old paint from bleeding through, as well as allow the new paint to form a solid bond to the wall. This is especially important when painting over dark colors or satin finishes.

Once your walls are primed it’s time to apply the first coat of paint. It’s a good idea to not cheap out when it comes to buying paint. Cheaper paints tend to become powdery after a few years and often don’t provide the coverage that a more expensive paint can provide. It’s also smart to not skimp on your brushes or rollers. Cheap brushes or rollers can leave lint or bristles behind on your walls which can make any paint job look sub-standard.

Make sure to paint during the day with strong light coming into the room. It’s much easier to not miss bare spots, drips, splatters, or a random insect if you can see what you’re doing!

Before you begin, be sure to remember to cover any surface in the room that you would rather not get splattered with your new color, like the carpet, trim and woodwork. If possible, remove large pieces of furniture from the room to provide more mobility while painting.

After you’ve finished your first coat of paint, it’s a good idea to sand the walls before applying a second coat. Wipe the walls down with a piece of 120 grit sandpaper and then brush away any dust with a rag or old paintbrush. This extra step in the painting process doesn’t take long, and will ensure that your finished paint job feels as smooth as velvet.

By following these helpful tips throughout your household painting project, and remembering to do your prep work before you begin painting, your next paint job is sure to be a success and your home will quickly be transformed from drab – to dramatic!

Thank you for reading this article! We hope it makes your next household painting project a roaring success! If you have any further questions about this topic please contact us.

Painting Contractors in and Near Jefferson County, Tennessee

Painting Contractors in Tennessee
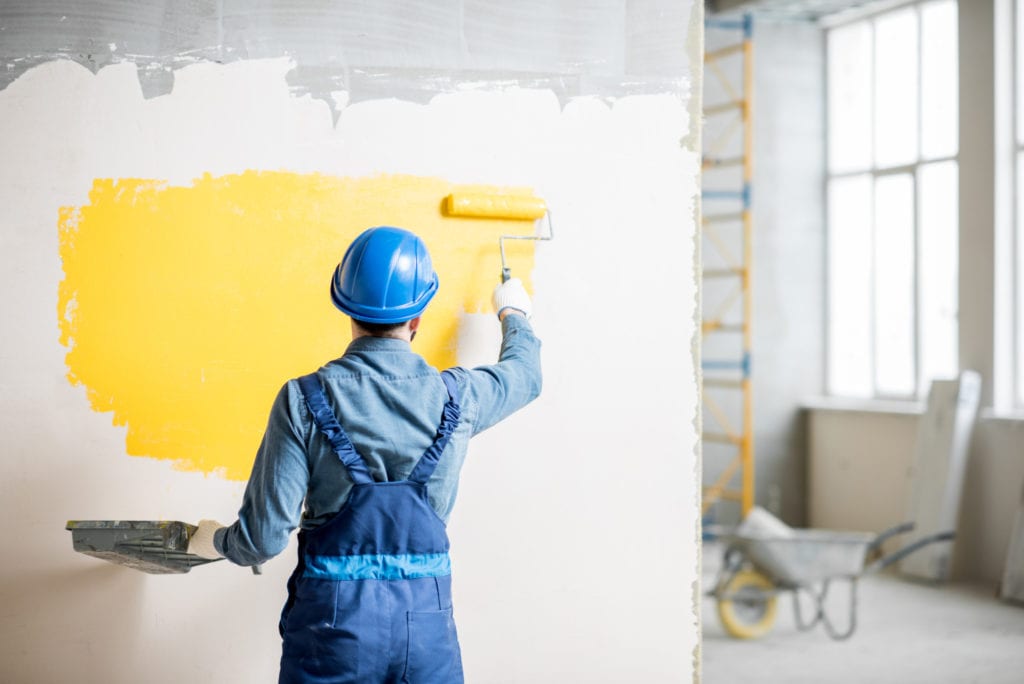
Workman in uniform painting wall with yellow paint at the construction site indoors

Need Painting Contractors in Tennessee?

In today’s economy everyone is looking for contractors who are reasonable in price and professional in service. Here are three painting contractors in and around Jefferson County, Tennessee who do good, quality work at reasonable prices.

The first one is an independent contractor. Affordable Painting is father and son owned and operated and located in Jefferson City, Tennessee. They have 40 years combined experience and specialize in interior repaints. However, they also do new work. Affordable Painting prides themselves on being extremely neat and professional in their work. They do interior and exterior painting as well as pressure washing, sheet rock/dry wall repair, patch work on walls, and caulking. They pride themselves on being extremely neat and professional in their work as well as being punctual to a job and completing the job in a reasonable amount of time. They have some of the most affordable rates around this area. They do back up their work and offer a quality guarantee. They offer free estimates as well as free advice of the best paint or stain to get for your home, office, etc. Their number is 865-475-5829 or 865-622-0972 or e mail them at painting0052@gmail.com.

The next contractor is Craig’s Painting Service. They are licensed and insured. They have been painting and doing remodeling since 1989. This painting service not only offers painting but also wallpaper, faux finishes, custom woodwork, and other remodeling services. One thing this painting service also offers is NHIS certified home inspections. They are located in Newport, Tennessee and they can be reached at 423-623-5755, PO Box 694 Newport Tennessee 37822, or e mail them at candzn@dishmail.net.

Then there is Obregon Painting. This painting contractor is located in Knoxville, Tennessee. Their services include residential and commercial work. Interior and exterior, painting and staining, wallpaper removal, water proofing, and preventative maintenance and repairs. They offer free estimates and can be contacted at 865-679-7973 or fax them at 865-933-9471. You can visit their website at www.obregonpainting.com and request an estimate page or e mail them at obregonpainting@gmail.com. Obregon Painting has been in business for over ten years and is also family owned and operated. Obregon Painting offers a year quality guarantee. If you are not satisfied you just give them a call.

Thus, there are several painting contractors located in and around Jefferson County, Tennessee. The above are three who have the best prices along with the best services. Just give them a call for an estimate.

Thank you for reading this article! If you have any further questions about this topic please contact us.


Brianna Martray Original Paintings Brighten Any Home or Office

Brianna Martray

If you find yourself seeking a cultural experience in the Denver, Colorado area, you will want to visit the Brianna Martray Gallery. Brianna Martray is a magnificent young artist in downtown Denver whose style is a welcome change from the norm. She is a member of Denver’s Art District on Santa Fe and has been showing around the city since 2004. Her contemporary abstract style is bright and unique, and is sure to liven up any home or office.

Brianna graduated with honors from Columbine High School in 1997, one year before the shootings that made the school a household name. She comes from a long line of travelers and has traveled extensively, first in the United States, then around the globe. Her stops included Mexico, Europe, Chile, Jamaica, Asia, and a summer in Prague. She held several jobs, including two stints as a pizza delivery girl, and a counselor at a women’s shelter. During these years, she was composing and painting; literally, at times, a starving artist.

The Brianna Martray Gallery in downtown Denver is a treasure-trove of unique abstract oil paintings. Through past life experiences, Brianna has learned to put her energies and emotions on canvas, and the results are beautiful journeys that parallel those of the viewer’s soul; each piece seems to speak in a haunting whisper, but at the same time, is exuding optimism. Brianna’s work is to visual art what comfort food is the the soul. Her deeply spiritual nature is revealed in her paintings as she allows the viewer to “see the unseen”, to touch what she feels. She uses no brush or other artists’ tools like the ordinary artist, but intimately creates each canvas with her hands. Words that seem to float from the paintings are written by her fingers and nails, and therefore, lend a touch of the painter’s personality to her work.

Brianna’s works are a process, and with each one, she not only learns and grows as a painter, but also spiritually. Only the colors and the canvas size are chosen in the beginning. Her experiences and travels come together with the oils as she wraps herself in her passion. Each piece is born, not from an image across the room, but in the mind of this amazing young woman.

You owe it to yourself, and to your space, to visit the studio. One could most certainly add zest to a barren, color-hungry room in your home or office with an original work of art by this fascinating artist. The paintings range in size from 16″ x 20″ to 52″ x 52″ x 4″, and are priced between $290 to $5,000. The Brianna Martray Gallery is located at 900 Santa Fe Drive, Studio G in Denver, Colorado.

Thank you for reading this article! If you have any further questions about this topic please contact us.
Faux Painting Tips: Using Pearlized Paint

faux painting tips

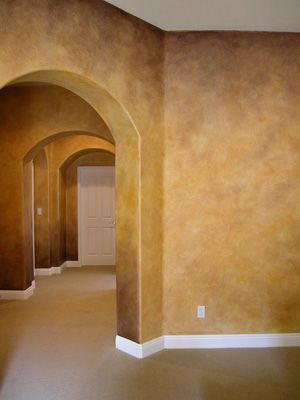
Faux Painting Tips can be really helpful in transforming rooms, to furniture or old items you’d love to recycle!

Painting your walls or other painting projects with pearlized paint is an great way to add an interesting, dramatic look to your finished project. Pearlized paint is easy to work with, but can present a few unique challenges!

As when working with any other paint, be sure to cover any areas you don’t want painted with tape and drop cloths. Mask off any edges and protect your flooring!

Pearlized paint has a glossy finish. A glossy finish will emphasize any imperfections in your walls, so this type of paint is best used on walls that you know are perfectly even. If your walls have any cracks, bumps, or other uneven places, you will want to sand or spackle as appropriate before proceeding.

One way to tell if your wall has any of these imperfections is to inspect it closely with a light held very close to the wall at an angle. Even the tiniest imperfection will cast a shadow on the wall, making areas that need prep work easy to identify.

Once your wall is smooth and ready to paint, you will first want to put down a base coat in a solid color. The pearlized paint is fairly transparent, so your color will show through. If you are working over existing paint, you may want to touch up any areas that are stained, chipped, or otherwise in need or attention.

Let your base coat dry completely before moving on to your pearlized topcoat. Be aware that you should use at least 2 coats of your base color to ensure even application, and some colors may require additional coats as well.

Apply the pearlized paint over your base coat just as you would any other paint. Use a soft-bristled brush for applying paint to edges and corners. Applying the paint to the remaining wall with a roller is preferable to a brush, as a brush may leave visible strokes in the paint.

Optionally, you can drag the handle of a paintbrush or a wooden skewer through your paint in a pattern to create an interesting effect.

Pearlized paint is available in different colors, so be sure to pick one that compliments your base color. You can even paint different colors of pearlized paint over each other for an interesting effect.

For a more subtle look, you can dilute your pearlized paint with either water or a clear acrylic paint. (Using the paint rather than water will also give your finished project additional shine!)

You may find it helpful to do a sample board first before applying paint to your walls. Use a scrap piece of wood or drywall and apply layers of base coat followed by your pearlized paint, just as you would if you were painting your walls. A sample board will give you an opportunity to experiment with different color combinations and application techniques before moving on to your actual walls.

Thank you for reading this article about Faux Painting Tips! If you have any further questions about this topic please contact us.

Modern Art

modern art

There are many schools and styles of modern art, all of them exciting. If we define modern art as encompassing all of the twentieth century, we start with the Fauves and Matisse, the master of color. Indeed, one of the major movements of modern art has been toward color as the primary tool of the artist.

But it’s Picasso who really brought art into the new century with the birth of Cubism, which led directly to Futurism and abstraction. By breaking up the planes of the figure, Picasso opened the way for artists to leave representation behind entirely, and focus instead on the inherent emotion of color and abstract form. This chain of influence leads to the pure color theory of the minimalists and color-field artists.

Modern Art also Includes Representation

Another branch of modern art veered away from pure abstraction toward representation of a new kind. Rene Magritte painted perfectly recognizable men in bowler hats, but in the strangest of circumstances, such as the horde of them raining down on a town in The Fall. Dali, too, began with recognizable images, but distorted them into images of pure imagination. Botero, Lucian Freud and Balthus also used the human form as subject, each seeing it in his own unique vision.

We might consider Pop Art and Op Art to be the two extremes of representation and abstraction. Both movements look very dated today. There’s no telling what direction modern art may take as we enter the 21st century. All we can say for sure is that it will be different from what has gone before, and it will most certainly be interesting.

Thank you for reading this article! If you have any further questions about this topic please contact us.


Martin Benka: Slovak Painter and Illustrator: The Father of Slovak Modernist Art

Martin Benka

Martin Benka is noted for introducing the aesthetics of folk culture into the formal language of Slovak Modernism at the beginning of the 20th century. Through his impressionist beginnings he progressed to inventing his own pictorial style of monumental expressiveness. His inclination to nature was in a strong contrast to the contemporary purist movements such as the German Bauhaus and Soviet constructivism whose stylistic priorities lay in functionalism.

Martin Benka was born into poverty in a village of Kiripolec (present day Kostoliste) in Western Slovakia. He began to draw at a very young age. As a young man he trained In Vienna as a painter-decorator. His spare time was spent visiting galleries and practicing his own art. Despite his meagre earnings he was still able to buy pigments, brushes, canvases and paper.

Prague Student

As there was only so much he could learn by himself, he started applying for an apprenticeship with accomplished painters who had their own studio and held classes. Accepted by the renowned Czech landscape painter Kalvoda, he moved to Prague in 1910. His first paintings were inspired by impressionism. His work concentrates on studies of natural motifs in various lighting conditions. Kalvoda praised his excellence in depicting forest scenery.

Homeland

A significant stage of Benka’s career as an artist began in 1913 when he journeyed to his native Slovakia. Travelling across the countryside, he visited remote mountain regions and the local rural communities, making spontaneous sketches outdoors.

Martin Benka lived in Prague for thirty years but regularly travelled to his homeland. Around 1915 this fusion of influences resulted in landscapes in the decorative art nouveau style which later evolved into abstracted landscape motifs with decorative compositional arrangement and ornamental line.

Man and Landscape

In the early 1920s Benka journeyed to several European countries where he familiarized himself with the works of great masters. Seeing this variety of different styles encouraged him to dramatize his own mode of expression. At this period his typical monumental style begins to take shape. Benka’s goal was to amplify the substance through the reduction of expressive means and simplification of forms. He now includes a human element in his mountain landscape and focuses on the dramatic interaction between nature and man. The landscape is the background to the struggle between the two.

Unlikely Heroes

From 1925 Benka exhibited internationally and this period is also a landmark in his artistic development as his interest gradually shifted from landscapes with figures to figurative painting. His monumentalized paintings concentrating on the human are characterized by their epic symbolism. The figures as well as the landscapes they inhabit are generalized and stylized. Man and nature form an organic entity. Through the flatness of surface, bold delineation of forms and warm earthy colours Benka translates his own emotions experienced in nature into his works.

Folk Art

Benka’s work was inspired by Slovakian traditions and folk culture, including ballads and songs. The main protagonists of his paintings are people living in communion with nature. Colours and shapes derived from colour schemes and figurative motifs of folk art.

Benka’s brush transforms the trivial into monumental: a common man becomes a hero, an ordinary woman turns into a heroine, a mundane task is a noble deed. But Benka’s hero is void of political associations. The heroism he presents has a timeless quality: the ability to remain true to oneself and to one’s roots.

Thank you for reading this article! If you have any further questions about this topic please contact us.


Guide for Painting Animals in Watercolour

painting watercolour animals

Have you ever dreamed of learning how to master the art of painting watercolour animals? Well this article has been written with YOU in mind.

Everyday we see some beautiful creations of nature that we want to capture for ourselves be it a bird or a tree or a flower or a butterfly. A painter needs to be a good observant so that his paintings reflect the beauty of nature as it is. You can always drag your parents or friends to a zoo or nature park to see the amazing creatures which we call animals.

If you are an amateur painter you can start with drawing animals or birds by taking a reference picture. With practice once you are a pro in painting you can always rely on your imagination.

Now let’s be more technical. Selecting good quality paper, brush & water colors is very important. You can always take help of the salesperson in the shop. Quality of your painting depends a lot on these. Use both flat & round tipped brushes of different size from size zero to at least twelve. Select a good palette on which you can create various colors of your own by mixing various colors.

Let us now move to actual painting the animal. Select an animal which you want to draw. No depending on the animal you selected decide on the background of your drawing. It can be a backdrop of zoo, or a farm or a forest background. Always remember that your background should compliment you animal. It shouldn’t overshadow your animal. Most of the times select a transparent background if your animal is of opaque colors. For example, horse with farm as the background. Vice versa select an opaque background for an animal of light soft colors like for the cheetah or lion, have a dark green forest scene as a background.

Proportion is also another aspect that should be kept in mind. If the body of the animal is out of proportion then a horse may end up looking like donkey. Use a pencil or draw blocks if you are finding it difficult to draw in proportion. Don’t worry with practice you will be perfect.

Always to be on safer side outline the animal with soft pencil lines. As even you don’t get the right shape the first time you always have an eraser. You can run an eraser on the pencil sketch to lighten the pencil lines.
Paint the animal keeping in mind the direction of light source. Also painting shadow of the animal will give an edge to your painting. Do not outline the whole body of the animal with a dark color as black as it will give an artificial look to your drawing.

If you approach painting watercolour animals while remembering all these aspects then you can never go wrong. Paint some animals & frame them in you room & lo you can create your own virtual zoo at your own home!

Thank you for reading this article! If you have any further questions about this topic please contact us.


A Guide to Repainting Those Old Kitchen Cabinets

Repainting Kitchen Cabinets

Repainting kitchen cabinets can be an easy, fairly inexpensive and quick way to update your kitchen. This is a project that will transform the look of your kitchen in one weekend.

The first thing you will need to do in repainting kitchen cabinets is to choose the paint color. There is virtually an endless spectrum of colors to choose from. White is a classic choice for kitchen cabinets and will give your kitchen a clean, fresh look. Or you may want to choose one of your favorite colors, be it a spicy red, cool blue or serene green. You can choose from many colors to reflect your personal style and the style of your home. Keep in mind the size of your kitchen and the amount of natural light that the room gets. Too dark a color in a small space can be overwhelming. A good option for a small kitchen in to paint the cabinets a light or neutral color and paint the walls a bolder color.

After you have decided on color, the next step is preparing the cabinets for painting. Remove the doors, drawers and the hardware. It’s a good idea to label the cabinets and drawers with a number that corresponds to a map you make so that you can match doors and drawers to their location when you are finished. You will then need to clean the cabinets with warm, soapy water, making sure to remove all greasy residue and dirt. Then sand them lightly using 150 grit sandpaper. After sanding, make sure to wipe the cabinets with a damp rag to remove any dust.

Next you need to apply two coats of primer, letting the first coat dry completely before applying the second coat. Choose an acrylic primer if you are painting over a surface such as previously painted or varnished cabinets. Look for a primer that says it is intended to cover high gloss surfaces.

Now you are ready to add the color! Two coats of semi gloss or satin paint should be applied with ample drying time between coats. Semi gloss or satin finish paint will hide imperfections in the wood.

The next step is applying one or two coats of clear acrylic sealer. This will protect the paint finish as well as ensuring easy clean up. You may also want to replace the cabinet door knobs and drawer pulls to give them a more modern look. There are hundreds of styles and finishes to choose from at your local home improvement store.

Enjoy your freshly transformed kitchen! You may be inspired to paint the walls or add a new backsplash, sink or faucet. Any of these easy projects will give your kitchen an updated look for not a lot of money.

Thank you for reading this article about repainting kitchen cabinets! If you have any further questions about this topic please contact us.

How to Use the Paint Brushes in Real Draw Pro

Real Draw Pro

In this guide I will show you how to use the different paint brushes in Real Draw Pro. This program has many different brushes that you can use to apply things to your photos, to create wallpapers, to create buttons, and more. Open your Real Draw Pro program and we will get started.

We will start off by using an image. Open an image or import an image to Real Draw Pro. Then click on your paint brush tool in your toolbar on the left. If your paint brush is not clickable then click on your image. Your image must be selected before your paint brush will be clickable.

When you click on your paint brush tool a brushes box will pop up on your screen. Click the top icon in the box which is the black paint brush. You will see the Set drop down box in this box. Drop that box down and select Nozzle 1. That will show two rows of graphics. Click on one of the graphics to select it. Then click on your photo to apply that graphic. You can add flames to a photo, smoke to a photo, and more.

You can drop the set box down again and select Nozzle 2 to see more graphics to add to your photo. If you click the second brush which is the Stamp it will leave an imprint of the graphic in the photo. The third and fourth brush will make a cut out of the graphic.

Next, we will create a wallpaper using the paint brush. Create a new document. Then select your square tool from your toolbar. Draw a square to cover the entire document. Then click on your paint brush again. Drop the Set box down and select what you want to use for the wallpaper. You can create a flower wallpaper, a card wallpaper, or whatever. Once you have selected what you want to use keep clicking your mouse on the document to create your wallpaper.

You can also create wallpapers using textures with the paint brushes. Create a new document. Draw a square over the entire document. Then click on the paint brush tool. Drop the Set box down and select Live Painters 1. Then select the first graphic in the window. Now you will need to select your texture that you want to use. Go to the right side of your window and you will see your Color box. Drop the Texture box down and select the texture that you want to use. Then paint on your entire square to create your wallpaper.

You can do many different things with your paint brushes. You can add many different effects to your photos with the brushes too. If you have any problems with this guide please feel free to leave me a comment at the bottom of this page.

Thank you for reading this article! If you have any further questions about this topic please contact us.


Ten Tips to Learn how to Paint Laminate Furniture

painting laminate furniture

Do you have any ugly piece of laminate furniture around your home that just doesn’t match? Learning to paint laminate furniture can freshen up any piece of laminate furniture with a simple color change! Most people think painting over laminate is impossible, but it’s really quite simple. Here are ten tips to make painting laminate furniture a breeze:

1. Make sure you sand your furniture before you prime it. Sand just until the laminate loses its shine. Sanding you laminate will keep the primer form sliding off.

2. If you don’t have a palm sander grab a chunk of wood and your staple gun. Wrap sandpaper around the wood and staple it in place. This will make it easier to grip and will help keep your hand from cramping up.

3. It helps to take your furniture apart before you paint it. This allows you to get into every nook and cranny. It’s also a lot easier to move your furniture when it’s in pieces and it’s a lot easier to handle while you’re painting it.

4. Choosing a latex paint with a slight sheen is best. Latex paints are easier to clean and go on well. You can even choose antimicrobial paints, which are great for kid’s bedrooms.

5. Read the instructions on your primer before you paint. Some primers need to cure for upwards of a week. Your primer may feel dry to the touch after a day, or even a few hours, but it hasn’t completely hardened. Allowing your primer to cure for the specified amount of time helps prevent damage to your furniture.

6. If you scratch the paint when you’re reassembling your furniture you can just give it a quick touch up, but make sure you go through the same steps. You want every part of your furniture to look nice, even the parts you have to retouch.

7. Make sure you do more than one coat when you paint, using slow, even brush strokes. Don’t load your roller or brush down with paint. That causes drips and runs. You want to take your time and do it right the first time rather than trying to rush through the paint job.

8. If you do end up with drips or runs, use a razor blade to shave them off. Sand the area and repaint it. You don’t need to scrap the whole piece or repaint everything. Just do the area you messed up.

9. Make sure you let each coat of paint dry over night before you move on to the next coat. Always apply at least two coats of paint. Don’t apply more than three coats of paint because it will look thick and sloppy. If you’ve applied a good primer, you won’t need any more than two coats of paint.

10. Apply a coat of polyurethane once your paint is completely dry. Some brands can be applied with a sponge and are extremely easy to work with. Check with your local home improvement store. Applying polyurethane prevents damage to the furniture and is a necessity if you have children!

Thank you for reading this article on how to paint laminate furniture! If you have any further questions about this topic please contact us.