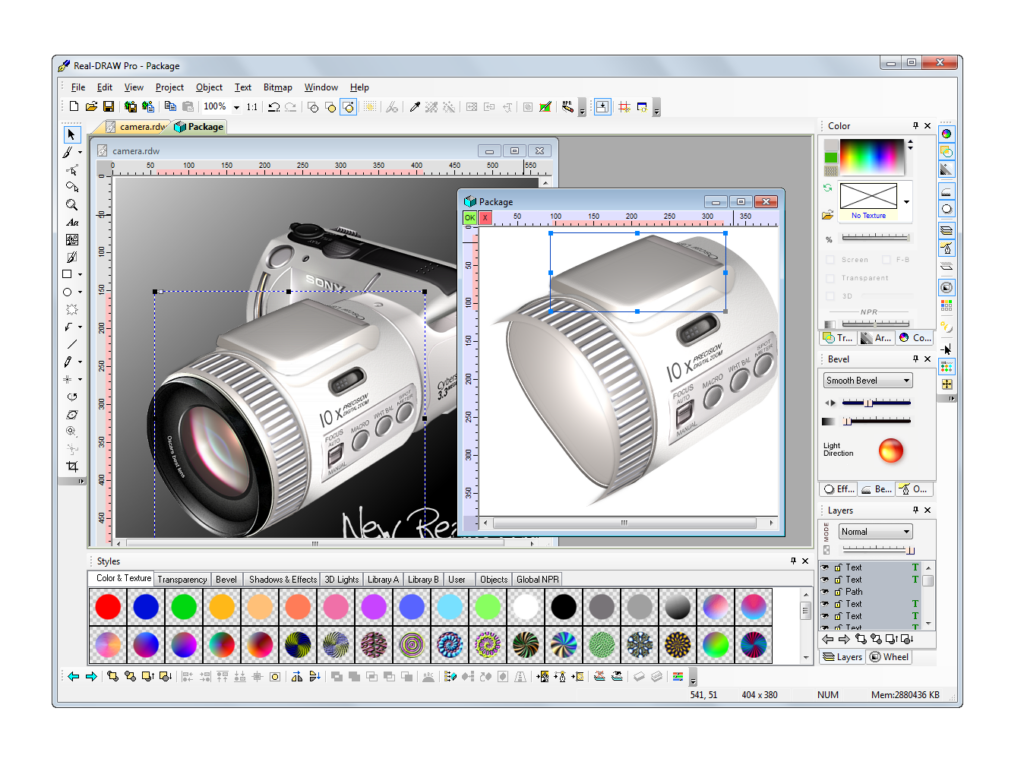
In this guide I will show you how to use the different paint brushes in Real Draw Pro. This program has many different brushes that you can use to apply things to your photos, to create wallpapers, to create buttons, and more. Open your Real Draw Pro program and we will get started.
We will start off by using an image. Open an image or import an image to Real Draw Pro. Then click on your paint brush tool in your toolbar on the left. If your paint brush is not clickable then click on your image. Your image must be selected before your paint brush will be clickable.
When you click on your paint brush tool a brushes box will pop up on your screen. Click the top icon in the box which is the black paint brush. You will see the Set drop down box in this box. Drop that box down and select Nozzle 1. That will show two rows of graphics. Click on one of the graphics to select it. Then click on your photo to apply that graphic. You can add flames to a photo, smoke to a photo, and more.
You can drop the set box down again and select Nozzle 2 to see more graphics to add to your photo. If you click the second brush which is the Stamp it will leave an imprint of the graphic in the photo. The third and fourth brush will make a cut out of the graphic.
Next, we will create a wallpaper using the paint brush. Create a new document. Then select your square tool from your toolbar. Draw a square to cover the entire document. Then click on your paint brush again. Drop the Set box down and select what you want to use for the wallpaper. You can create a flower wallpaper, a card wallpaper, or whatever. Once you have selected what you want to use keep clicking your mouse on the document to create your wallpaper.
You can also create wallpapers using textures with the paint brushes. Create a new document. Draw a square over the entire document. Then click on the paint brush tool. Drop the Set box down and select Live Painters 1. Then select the first graphic in the window. Now you will need to select your texture that you want to use. Go to the right side of your window and you will see your Color box. Drop the Texture box down and select the texture that you want to use. Then paint on your entire square to create your wallpaper.
You can do many different things with your paint brushes. You can add many different effects to your photos with the brushes too. If you have any problems with this guide please feel free to leave me a comment at the bottom of this page.
Thank you for reading this article! If you have any further questions about this topic please contact us.