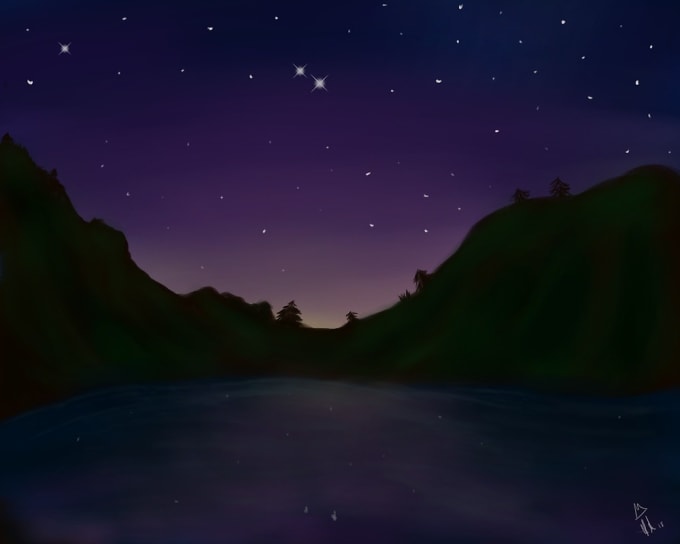
Painting night scenes is not the norm. There are many artists that paint during the early morning and throughout the day. Why not paint at night? The answer is obvious, but some of the best moments to seize are those at sunset. Take your paint set out tonight and test your skills. You may find that you like doing this.
To learn painting night scenes or something similar to the photo above, you will need black, green, blue, white, brown and yellow paints. Use some gesso to put on the canvas first, and do not give it time to dry. You will need a two inch brush to start with. Other brushes needed are a fan style, 1/4″ flat, thin long bristle around a size 3 or 4, #2, #1, and a #00 or #0 size brushes. I prefer using one of those cheap plastic palettes for acrylic paint mixing. Some artists prefer ceramic palettes.
If you want a watercolor style painting use water to dillute the paint. This will still help you in painting night scenes but merely alter the styleTo keep it strictly acrylic use paint thinner used for acrylic paints. The kind you use in painting your house is too strong and will damage your brushes. You may find having duplicate brushes makes the painting go quicker if you are soaking a brush to be cleaned. Have a drying cloth nearby to dry out your brushes. When everything is nearby it will save you plenty of time from running back and forth in cleaning your brushes.
Start by blending a little blue with white, and just a touch of black to get the color of the evening sky. When I say a touch of black, I mean, just a touch. Too much will have you starting all over again. Take your time to get the right color. If clouds are there or you want clouds, hint at them with a tad more white and darken them at the top to show the sun is setting. Too many clouds may take the focus of what you will be painting later on.
Determine your horizon line. How much sky do you want in this painting? Do not go straight down the middle because it will make it seem childish in thought. Either bring the horizon line down or raise it up. Quickly gray in the horizon line with a #2 or #1 paint brush. From there, clean off your two inch brush, and paint in a dark green mixture starting from the bottom. Work your way up towards the underside of the horizon. As you get closer to the horizon, lighten up the dark green a little bit. If what you are viewing is ilghter then paint it as such.
A sure sign you are getting better at painting is understanding that colors are not so distict the further away they are unless they are a light.
To paint the tree in, start with a dark brown mix. Remember, the sun has not completely set, so some colors are still somewhat visible with the refracting light. Catch glipses of brown on the side of the tree facing the sun. Paint these in with a #0 paint brush to let the viewer know that it does have color. Use your #1 brush to paint in the finer branhes, while using the long bristle brush for the larger limbs. You can use the flat brush for the leaves using a dark green in combination with black to show some leaves don’t have color.
Bushes are sometimes best put in with a fan brush. Lightly dab the color you mixed onto the canvas. The #1 or #0 brushes are best for painting in their stalks and limbs. Use these same brushes to add hints of grass here and there, and to dab in slightly gray trees in the background.
Finish up with various size yellow spots here and there. Be careful not to make them too big. The larger dots can have a dab of brown or black at one side to show there is a body to the lightning bug. Do not get too carried away as this will also ruin the wonderful work you started.
The final step in your painting is to sign and date it. You do not have to date it, but if you plan on selling it that will be a plus. Now you have your night time painting. You can paint it however you want. What I have explained is rather simple, and is a start for someone new at painting.
Thank you for reading this article! If you have any further questions about this topic please contact us.
