
This article will break down the process of home painting made easy so you can revamp your home all on your own!
Turn on the lights, open the blinds and take a good look at those walls. It’s time to paint.
After choosing a color, or colors, the best place to start on a paint job is with supplies. Get everything you need for the whole job and lay them out – pencil, screwdriver, wall cleaner, spackle, spackle knife, latex caulk, wall patch, joint compound, interior paint primer, drop cloth, paint rollers, painter’s tape, paint brushes, paint and gloves.
Like an artist, you’ll need to start with a clean canvas – or wall. Painting over dirty walls causes the paint to chip away so it’s best to use a degreaser or prepaint cleaner to remove dirt and grease. Using a clean cloth, make circular motions and start at the bottom of the wall and work up. Be sure to wear gloves.
As you make your way across the wall, take note of the flaws – circle them. Each pock hole, indent or crack can, and should, be fixed before painting. For small holes or nicks use wall spackle and a spackle knife bigger than the area you are patching. Put the spackle on the knife, rather than squirting it directly on the wall. Press the spackle and knife hard against the wall and make one smooth stroke. Give it two coats.
Next, move on to the repair of the hairline cracks that sometimes happen in the wall joints. Any kind of latex caulk will work. The trick is getting the caulk directly on the crack and making sure that it is not too thick. Use your finger to spread and smooth the caulk evenly.
Fixing a bigger gash or hole in the wall will require a wall patch and setting compound. Fill the hole with the compound and smooth it over with the spackle knife. Apply the wall patch and use compound to smooth an area just beyond the patch. Make even strokes and blend the compound so the patch is smooth with the wall.
The patches you just made will absorb the paint and make the paint job look uneven or blotchy. To avoid that, apply one coat of primer before painting. Apply the primer with a roller for a smooth finish.
Now you are ready to paint. If your room has trim, paint that first using a small brush, this way if you get paint on the walls, no worries, you’ll be painting over it. Let the trim dry for at least 24 hours. Now, use painter’s tape and mask the trim.
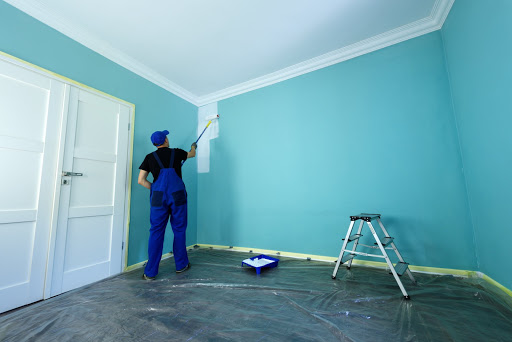
Drop your cotton cloth (plastic is slippery) on the floor and prepare to paint. Use a roller to get a nice even finish. Roll the full length of the wall, and keep the open side of the roller frame toward the part of the wall already painted. If you overlap each stroke just slightly over the previous stroke, you will avoid streaks. Paint the entire wall at once, never letting the last stroke or the roller dry.
Thank you for reading this article on home painting made easy. If you have any further questions about this topic please contact us.