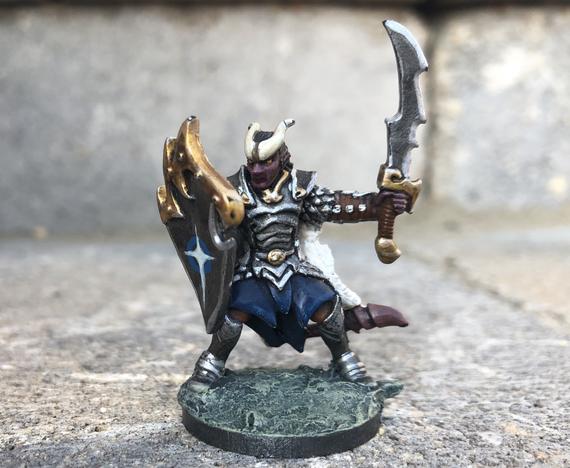
Once an RPG miniature figure is painted and detailed, it is ready to be displayed. However, much as the drybrushing technique can be applied to improve a figure from decent to special, there are three final details that can take a special figure to the level of professionally finished.
It All Comes Out In The Wash
Washing an RPG miniature figure isn’t a way to clean it, but to dirty it. By applying a final coat of diluted pigment the folds and creases of a figure are deepened and enhanced and by contrast, the raised areas are highlighted.
There are two methods of washing miniatures:
- Ink washes employ a diluted (usually a 1:1 or even more diluted) solution of ink to the figure. Each section should be washed separately and the artist needs to take gravity into account since the dilute solution will tend to wind up most intense at the lowest point. For example, when washing a cape, lay the figure face down and wash the entire cape so that the wash pools in the depths of the various folds of the cape. Use an ink colour that is slightly darker than the the colour being washed. If done correctly, the ink will slide off the high points and adhere in the shadowed low areas.
- Paint washes are applied in the same way. Darken the main colour that was used on a feature with a dab of black paint and water the paint down to a consistency just a little thicker than water. The application process is identical to the process used for inks.
Washing takes a great deal of practice and not all painters use the technique. It can produce amazing results if done correctly. It should be noted that the paint wash is basically a reverse version of the three step drybrushing process detailed in Part 4 of this series. Beginners might be more comfortable using the simpler, less messy drybrush technique.
Covering All The Bases
The base of an RPG miniature figure is often left out of consideration. It should not be treated as an afterthought.
Incorporating the base in the early planning stages of painting the figure will save time puzzling out what to do with it once the figure is done. There are two basic ways to approach finishing the base.
- Painting the base is the simplest way to finish it. In the early days of figure casting, all figures had metal bases that could easily be painted, just like the rest of the figure. If the figure in question has a metal base, or better still a metal base that has some detail to enhance the figure, a simple paint approach can give the figure a perfect finish.
- Flocking is the technique that railway modelers use to create the grass, sand and gravel effects that surround railroad dioramas. Flocking is available in bags at most hobby stores. Simply pick a colour of flock, paint some glue (two part, five minute epoxy works well for this) on the base, taking care not to get any glue on any part of the figure that is attached or close to the base. Cover the wet glue in flock and let dry. Sand can be used in place of flock. It helps the finish to paint the base a similar colour to the chosen flocking colour first. The flocking technique works best with the modern “slot base” figures, but it works fine on metal bases too.
Seal the Deal
Finally, a sealant should be sprayed on the entire RPG miniature figure to finish it. A good sealant will help protect it from fading, chipping and repel dirt and oil from hands. Any art supply or hobby shop should carry several different matt finish sealants that will do the job.
Metal miniatures may be small, but with patience, practice and perseverance, painting and displaying them can a hobby worth the time.
Thank you for reading this article! If you have any further questions about this topic please contact us.
